Solar-Powered Balcony Hydroponics: How to Design a Reliable Off-Grid System for Small Urban Spaces
Common Mistakes: Why Balcony Solar + Hydroponics Keeps Failing Quietly
“Just add a panel and a battery and you’re off-grid.” That idea is exactly why so many balcony hydroponic systems run perfectly for two weeks, then silently starve plants when a cloudy week hits.
Most small urban builds copy RV or garden-off-grid logic without accounting for three brutal constraints on a balcony:
- Shaded, sub‑optimal panel angles.
- Very limited panel area and battery weight.
- Hydro hardware designed for wall power, not micro solar.
The result: pumps that cut out overnight, lights that dim or shut off early, and whole systems that slowly underperform until roots suffocate or stretch for light. The good news: once you design from the power budget outward, a small, reliable solar-powered balcony hydroponic system is absolutely achievable.
Recent balcony builds, including the compact rail-and-tote system in this Instagram project, plus the small-space ideas in this Grozine guide, show what’s possible in a few square feet. What’s missing is a clear, numbers-first way to match micro solar kits with real-world hydro loads. That’s what we’ll do here.
Why These Mistakes Happen: Power Reality vs Balcony Fantasy
1. Treating balcony solar like a rooftop array
Most wattage claims on panel boxes assume full sun, perfect tilt, and no shading. Balconies rarely have that. Overhangs, side walls, and railings cut your real “peak sun hours” down hard.
On a decent mid-latitude balcony you might get 3–4 effective sun hours on the panel, not the 5–6 a roof sees. Once you include wiring, charge controller, and battery losses, only about 70–75% of panel output becomes usable energy.
Rule-of-thumb for balconies:
- Assume 3–4 peak sun hours unless you’ve measured better.
- Multiply panel wattage by sun hours, then by 0.7–0.75 to estimate usable Wh/day.
2. Oversizing lights and pumps, undersizing battery
Hydro growers love big lights and “plenty of aeration”. On a balcony micro-solar system, that thinking kills reliability.
Example mismatch:
- One “100 W” blurple LED actually drawing ~95 W for 16 h/day = ~1,520 Wh/day.
- Plus a 10 W air pump and a 10 W water pump 24/7 = ~480 Wh/day.
- Total: ~2,000 Wh/day.
- Realistic 200 W balcony solar (3.5 PSH, 75% efficiency) ≈ 525 Wh/day usable.
You are trying to pull 2 kWh from a ~0.5 kWh solar budget. The battery empties, the inverter shuts down, and your plants “mysteriously” crash after a few cloudy days.
3. Running AC gear through an inefficient inverter
Most apartment growers start with standard 230 V or 120 V AC pumps and lights, then add a cheap modified-sine inverter. That adds 5–15% conversion loss on top of everything else, and cheap inverters often waste power at idle.
In a 400–800 Wh/day budget, throwing away 50–100 Wh on inverter inefficiency is a bad trade. For small balcony systems, DC-first design is almost always better.
4. Ignoring worst-case weather and shade
Panels sized for sunny days fail during the exact week you need system resilience most. A three-day cloudy stretch with no backup plan is when DWC roots suffocate and aeroponic roots dry out.
Most builds never run through a realistic “what happens when we get 2 bad days in a row?” scenario before plants go in.

How To Fix It: Design-First Solar-Powered Balcony Hydroponics
Step 1 – Start from your grow area and method, not the panel box
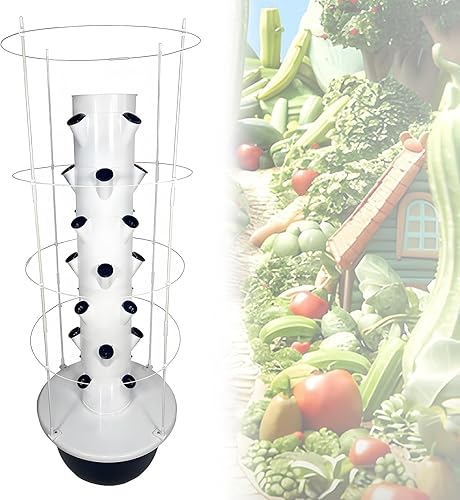
You can grow a surprising amount in a very small footprint, especially if you lean on vertical systems like the compact towers seen in urban small-space builds here. But each style has a power signature.
Kratky (zero-pump baseline)
- Energy demand: 0 W for pumping.
- Best use: lettuce, Asian greens, basil, mint, and most herbs in opaque tubs or jars.
- What solar powers: mainly LEDs, sensors, and maybe a small fan.
This is the easiest way to “buy back” watt-hours on a tiny balcony. The more you can push into Kratky, the more solar budget you free for lighting.
DWC (small, steady draw)
- Energy demand: air pump 3–5 W 24/7 for a small 40–80 L reservoir.
- Best use: heavier feeders (tomatoes, peppers, strawberries) or higher-density greens.
- What solar powers: air pump + LEDs.
Paired with an efficient DC air pump and modest lighting, a small DWC bucket or tote fits well within a 150–200 W solar kit.
Low-pressure aeroponics (spiky but controllable draw)
- Energy demand: DC pump 10–20 W at 5–20% duty cycle via a cycle timer.
- Best use: when you want maximum growth speed in a compact vertical root zone.
- What solar powers: pump bursts, LEDs, and controllers.
This is viable on solar if and only if you oversize your panel/battery relative to the pump and build a fail-soft mode (more on that below).
Step 2 – Calculate your real daily energy budget
Let’s build a small but realistic balcony scenario and walk through the numbers.
Grow goal: 10–16 heads of lettuce and herbs in 2 trays or a short tower. Mostly Kratky plus one small DWC tote, powered from a micro solar kit.
1) LED lighting
- One efficient 60 W LED panel, true draw measured with a watt meter.
- Run time: 8 h/day to supplement natural balcony light.
Daily LED energy: 60 W × 8 h = 480 Wh/day.
2) DWC aeration
- DC air pump: 4 W continuous to drive one or two air stones.
Daily aeration energy: 4 W × 24 h = 96 Wh/day.
3) Controls and misc.
- Cycle timer, small DC fan, controller/monitor: assume 6 W average draw.
Daily control/fan energy: 6 W × 24 h = 144 Wh/day.
Total daily load: 480 + 96 + 144 ≈ 720 Wh/day.
Step 3 – Match solar panel size to that budget
Assume a realistic 3.5 peak sun hours on a balcony and 75% system efficiency.
Usable daily energy ≈ Panel_Watts × 3.5 × 0.75.
- With 200 W of panels: 200 × 3.5 × 0.75 ≈ 525 Wh/day usable.
That is less than your 720 Wh/day load. You either:
- Reduce consumption (shorter photoperiod or dimmer LED, more Kratky, fewer fans), or
- Increase panels (if space allows), or
- Accept a hybrid setup where the grid fills gaps.
A very practical target for true “mostly off-grid” balcony growing:
- Panels: 150–250 W total.
- Daily load: 300–600 Wh/day.
- LED budget: 40–80 W for 6–8 h/day, rest from sunlight.
Step 4 – Size your battery for real autonomy
Decide how many days you want the system to ride through bad sun before you intervene.
For apartment life, 1–2 days is realistic: you can always reduce light hours or temporarily plug in.
Example: 400 Wh/day design target.
- 1 day autonomy at 50% depth-of-discharge (DoD): battery Wh = 400 / 0.5 = 800 Wh.
- At 12 V, 800 Wh / 12 ≈ 67 Ah of usable capacity.
So a 12 V 100 Ah LiFePO₄ battery (about 1,200 Wh nominal) is an excellent balcony sweet spot. For smaller setups, 50 Ah LiFePO₄ is workable if loads are tight.

What To Watch Long-Term: Reliability, Layout & Safety
1. DC-first hardware choices
A balcony system that quietly runs all season usually has one thing in common: it avoids unnecessary AC conversion.
- LEDs: Look for 12 V or 24 V DC grow lights or bar strips that can run directly off your battery or via a DC-DC step-down.
- Pumps: Use brushless DC water pumps (for NFT/aeroponics) and small DC air pumps for DWC.
- Controls: Timers and microcontrollers that accept 12 V DC input.
Use an inverter only when you have no reasonable DC alternative, and then choose a pure-sine unit sized to 2× your maximum AC load.
2. System layout for balconies and windows
Space is tight, so layout matters as much as watt-hours.
- Panels: mount high on walls or railings, tilted toward true south (north in the southern hemisphere). When in doubt, prioritize consistent light over perfect angle; a vertical railing mount that avoids shading can beat a flat mount under an overhang.
- Reservoirs: keep them shaded or insulated to stabilize root temperatures and reduce algae; dark totes or blackout sleeves are your friends.
- Electronics: mount charge controller, fuses, and battery in a splash-protected box above the highest likely water level.
The Instagram build mentioned earlier uses tight vertical stacking and short plumbing runs to keep both power losses and water head low. That kind of compact layout is ideal indoors too.
3. Designing for partial shade and bad-weather days
Instead of pretending shade does not exist, bake it into your operating plan.
- Set priority loads: pumps and basic controls must run first; lights are second priority.
- Use a battery monitor: when state-of-charge drops below a threshold (say 40%), automatically shorten the light cycle or dim LEDs.
- Plan human interventions: on the third day of storms, you either plug into the grid, reduce photoperiod, or temporarily turn off supplemental lights.
For aeroponics, design a passive safety net: a shallow nutrient puddle or wicking layer at the bottom of the root chamber so roots do not dry out instantly if the pump stops.
4. Avoiding silent failures that kill plants
Silent failures are what make off-grid indoor hydro frustrating. You come back to a healthy-looking canopy, but the root zone has been under-aerated or dark for days.
Simple prevention measures:
- Use a cheap watt/energy meter during testing so you know actual draws, not label claims.
- Add status LEDs or a small display that shows when the pump and lights are powered.
- Use fuses and DC breakers so a shorted device does not take the whole system down.
- Test failure modes: unplug panels for 24 hours and see what actually shuts down first.
5. Hydroponic nutrient, EC, and pH stability in small systems
Small reservoirs swing faster. That is true whether they are solar-powered or not, but power constraints often push growers to undersize res volumes.
- Reservoir size: aim for at least 8–10 L per mature leafy plant in DWC, less in Kratky if you are harvesting quickly and topping up regularly.
- Target EC: for balcony lettuce and herbs, 1.0–1.6 EC keeps plants happy without pushing salts too hard in variable light.
- Target pH: keep most systems between 5.6 and 6.2; check every few days.
Use a complete hydroponic nutrient and a decent pH/EC meter. The small-space recommendations in this small-space hydro article pair very well with solar-first design, because compact systems and fewer heavy feeders keep your power budget manageable.
Putting It All Together: A Proven Design Pattern
Example: Solar-assisted balcony DWC + Kratky combo
Let’s turn all of this into a concrete layout you can adapt.
Hydro layout
- Tray A: 3–4 Kratky tubs (opaque 10–15 L containers) with net pots for lettuce and herbs.
- Tray B: 1 × 40–60 L DWC tote with air stone for 4–6 larger plants or higher-density greens.
- Optional: a short low-pressure aeroponic rail for propagating cuttings or fast baby greens.
Electrical layout
- Panels: 200 W total monocrystalline, railing or wall mounted, wired to a 20 A MPPT charge controller.
- Battery: 12 V 80–100 Ah LiFePO₄ with integrated BMS.
- Loads (all DC):
- One 40–60 W LED bar or panel over both trays (dimmable).
- 4 W DC air pump for DWC.
- Small DC fan for air movement over canopy.
- 12 V cycle timer if you run any aeroponic section.
Operating strategy
- Let natural balcony light provide the base; use LEDs 4–8 h/day, biased to early morning and evening to flatten indoor temperatures.
- Run the DWC air pump 24/7 unless battery drops below a set point; DWC is your highest-priority electrical load.
- Use Kratky tubs to add yield without adding pump load.
- In extended cloudy stretches, shorten LED hours and accept slower growth instead of risking a full power cut.
Benchmarks to track
- Daily Wh consumption: log from a DC watt-hour meter once; verify it matches your design.
- Panel harvest: on a good day, verify your panels actually reach their expected Wh output.
- Battery SoC: keep typical depth-of-discharge in the 20–60% band for long battery life.
- Plant performance: aim for 25–35 day lettuce cycles; if growth is slow, troubleshoot light intensity and photoperiod before blaming nutrients.
That pattern scales down nicely: half the panel wattage, half the LED output, fewer plants. Or scale it up across a longer balcony with more Kratky containers if space but not structural load allows.
Key takeaways
- Design from Wh/day upward: know your loads, then size panels and battery.
- Use Kratky and efficient DWC to keep pump loads tiny.
- Choose DC-first gear to avoid wasting power in inverters.
- Plan for shade and bad weather with operating rules, not just hope.
- Keep reservoirs light-tight and volumes reasonable so pH and EC stay stable.
Do that, and your solar-powered balcony hydroponic system stops being a novelty and starts behaving like a reliable, compact food appliance that happens to sit on a railing.
As an Amazon Associate, I earn from qualifying purchases.