Travel-Proof, Budget Hydroponic Towers: How to Design Small, Automated Vertical Systems That Don’t Need Daily Attention
Most new tower growers think reliability is all about buying a “smart” system. In reality, the difference between a tower that cruises for a week and one that crashes in 48 hours comes down to very boring details: pump head height, emitter bore size, reservoir volume, and how you manage pH and EC.
In 2026, you can see this playing out everywhere. Commercial options like the Mr Stacky Smart Farm tower garden are leaning on automation and solar. DIY builders on YouTube are stacking PVC and totes into budget towers. First-time growers on Reddit are posting surprisingly polished, automated setups that still sometimes fail because a tiny clog, power blip, or dry reservoir goes unnoticed.
This guide focuses on those weak points and how to eliminate them, specifically for small, vertical hydroponic towers you can trust while you’re at work, away for the weekend, or even gone for a week or more.
1. Common Mistakes In “Low Maintenance” Tower Builds
Let’s start with what actually goes wrong in real towers. If you nail these, everything else is fine-tuning.
1.1 Undersized reservoirs that swing wildly
The most common failure in “low maintenance” towers is an undersized reservoir. Many budget tower kits and DIY builds run on 20–40 L (5–10 gal) of solution for 20+ plants. That volume can lose a huge percentage of water in a few hot days and will swing EC and pH hard.
For a travel-proof setup, aim for at least 4–8 L of solution per mature leafy plant, and more for heavy feeders. That usually means a 60–100 L base for a small tower, and 150–200 L if you want to leave it for a full week with a heavy canopy.
1.2 Pumps sized for flow, not for head
You’ll see a lot of YouTube builds (for example DIY tower tutorials) where the pump is chosen by “L/h” rating only. That’s a problem. Tower systems are about head height – the vertical distance from the pump in the reservoir to the top outlet.
If your tower is 1.5 m tall and you run tubing with elbows and manifolds, you want a pump that can still deliver your desired flow rate at at least 2–2.5 m of head. Otherwise, you end up with a slow trickle that barely wets the top cells and stalls root development.
1.3 Tiny emitters and complicated manifolds
Another classic mistake is using aquarium drip lines, micro-drippers, or misting heads with tiny orifices. They clog from:
- Fine roots that escape net cups
- Precipitated nutrients from pH swings
- Biofilm and algae if any light reaches the plumbing
Once the top ring clogs, you get dry cells and dead plants, even if the pump is still running. That’s the opposite of low maintenance.
1.4 Towers that die the moment power cuts
Most budget towers are essentially recirculating drip systems. If the pump stops, they dry out. Compare that with a large Kratky or Deep Water Culture (DWC) tote: the system can run passively for days. A travel-proof tower borrows from that passive stability instead of relying 100% on constant pumping.
1.5 Ignoring EC and pH drift
Reddit growers like the one in this first-time hydroponic tower post often report great early growth, then sudden issues: tip burn, pale leaves, or stunting. That’s usually not “bad nutrients.” It’s EC and pH drift in a relatively small tank with a heavy feeding load.
Even if you don’t want to babysit, you can’t ignore EC/pH completely. A low maintenance tower needs a plan to keep them in range for days, not hours.

2. Why These Problems Happen In Vertical Towers
Now let’s unpack the underlying causes. Once you understand the mechanics, designing a reliable tower becomes much easier.
2.1 Vertical systems magnify small design errors
In a simple Kratky tote, volume and root zone are all in one place. A little pH drift is buffered by the large volume, and roots can find both oxygen and water even when the level drops.
In a tower, you’ve stacked multiple problem zones:
- Head height for the pump
- Distribution at the top
- Return path to the reservoir
- Dozens of small cavities where roots can dry out or clog flow
That means small mistakes in pump sizing, emitter choice, or plant spacing get amplified as you go up.
2.2 Tiny volumes plus big transpiration loads
Vertical towers put a lot of leaf area on a small footprint. That is great for yield per square meter, but it comes with a cost: higher transpiration per litre of nutrient solution.
Every day, water leaves your reservoir as plants transpire and as the tower surface evaporates. If you only have 30 L to begin with, daily losses matter. EC rises as water leaves, and pH tends to drift as roots pull specific nutrients faster than others. A small error in mixing or top-up becomes a big swing.
2.3 Constant-flow mindsets copied from large commercial NFT
Many DIY builders copy commercial Nutrient Film Technique (NFT) systems, where solution flows continuously in channels. Those systems are designed for high throughput and live in highly controlled environments with regular staff oversight.
In your apartment or balcony tower, you don’t have staff, and you probably don’t want to hear a pump 24/7. Continuous flow is not your friend if you want a quiet, low maintenance, travel-proof tower.
A smarter approach is to treat your tower as a DWC/Kratky base with intermittent irrigation. The pump cycles just enough to keep upper roots hydrated and oxygenated, while the base behaves like a forgiving, deep reservoir if power fails.
2.4 Proprietary lock-in and inflexible hardware
Systems like the Mr Stacky Smart Farm show what’s possible when you combine automation, vertical design, and even solar. The downside is that many commercial towers lean on proprietary fittings, custom manifolds, and sealed electronics.
For a DIY builder or someone on a budget, that’s not ideal. You want a system where every critical part can be replaced with a standard pump, timer, or fitting from a hardware store.

3. How To Fix Them: Designing A Reliable DIY Tower
Now we get practical. The goal is a low maintenance hydroponic tower system that uses simple hardware, avoids lock-in, and can ride out several days without you hovering over it.
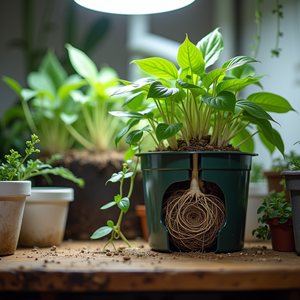
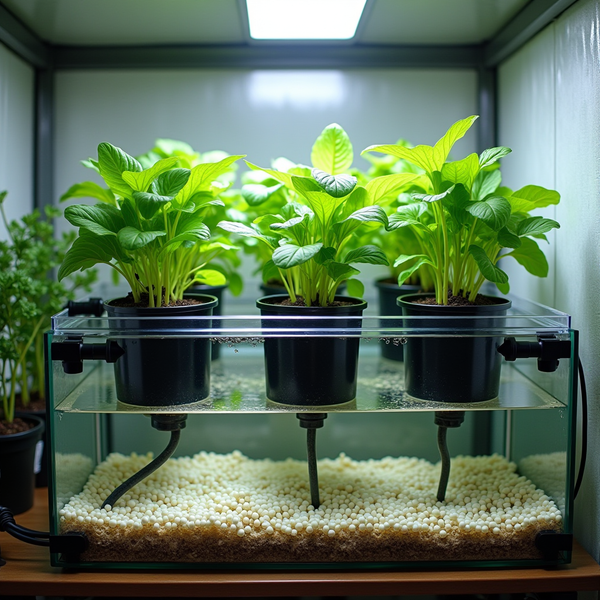
3.1 Choose a forgiving base method: DWC + Kratky hybrid
Instead of building a tower that dies when the pump stops, design a tower that can temporarily act like a big Kratky/DWC bin. That means:
- Oversized base reservoir: 60–200 L, opaque, food-safe tote or barrel
- Air stones in the base for continuous aeration (optional but recommended)
- Net pots positioned low enough that at least some roots can reach solution in the base if circulation fails
This hybrid behaves like a classic Deep Water Culture system in the base, with the tower acting as a vertical distribution and aeration structure. If you lose power for several hours, plants still have a deep, oxygenated reservoir to pull from, especially once roots have grown down.
3.2 Reservoir sizing for real-world travel
Use these practical numbers as a starting point:
- Short trips (2–3 days): at least 3–4 L per plant
- Weekly maintenance (7 days): 5–8 L per plant
- Heavier feeders (tomatoes, peppers): push toward the upper end or add an external top-up reservoir
For a 20-site leafy tower, that means:
- Minimum “comfortable” base: 80–100 L
- Ideal for weekly checks: 120–150 L
Bigger reservoirs give slower EC/pH drift and more time buffer when you are away. That is the single best thing you can do for a travel-proof indoor hydroponic tower.
3.3 Pump sizing and duty cycle
To size your pump:
- Measure the vertical distance from the reservoir floor to the top of the tower outlet. Add 0.5–1 m as a safety margin. That is your required head.
- Decide on a target flow at that head. For most small towers, 200–500 L/h at working head is plenty.
- Choose a pump whose flow curve meets that spec at your height, not just at zero head.
Run the pump on a timer rather than continuously. For expanded clay or similar media:
- Daytime: 1–3 minutes on every 15–30 minutes
- Night: 1–3 minutes on every 45–60 minutes (if temps are moderate)
This “ebb-pulse” approach keeps roots moist and oxygenated while shaving a huge amount off power usage, which is crucial if you are exploring a budget solar powered tower garden.
3.4 Simple, clog-resistant manifolds
Design your top distribution to be simple and cleanable:
- Use a circular “rain ring” or short perforated cross that sits under the top cap
- Drill 3–5 mm holes, not pinholes; fewer, larger outlets clog less
- Use a removable union or quick-connect so you can pull the ring out and scrub it
- Install a coarse pre-filter on the pump intake to catch media and root bits
If you want more reliability, split your main line at the top into two separate loops, each with its own set of holes. If one half clogs, the other still provides some flow.
3.5 Redundancy and fail-safe tricks
A few small details massively increase reliability:
- Wicking backup: run a piece of polyester cord from each net pot down into the tower interior or reservoir. If the pump stops, these wicks keep media damp.
- Mechanical float cut-off: a float switch that cuts power to the pump if water gets too low prevents dry-running and overheating.
- Distributed root anchors: encourage roots to grow into the base reservoir by slightly lowering solution level once plants are established. That way your tower slowly “turns into” a DWC system from the bottom up.
4. What To Watch Long-Term: Nutrients, Monitoring & Solar
A reliable tower is not “set and forget” forever, but it should be “set and lightly monitor.” Once your hardware is dialed in, long-term stability comes from predictable nutrient and power management.
4.1 Nutrient choice and EC strategy
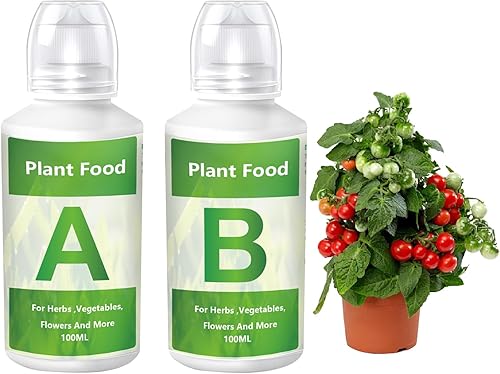
Skip complex multi-bottle regimens at first and choose a complete hydroponic base nutrient marketed for general hydroponics. Follow the manufacturer’s mid-range dose, then refine by EC:
- Leafy greens: target 0.8–1.6 mS/cm
- Fruiting crops (after establishment): 1.8–2.4 mS/cm
For low maintenance, start slightly on the low side. Mild underfeeding is more forgiving than overfeeding in a tower, especially when you’re not there to catch tip burn early.
Routine:
- Top up with plain water whenever the reservoir drops, preferably daily or every few days
- Check EC once or twice a week; if EC falls over time, add a small dose of nutrient to bring it back up
- Do a full reservoir change every 3–4 weeks for leafy greens, more often if EC and plant health suggest imbalance
4.2 pH management that doesn’t demand daily tinkering
Most tower-friendly crops are happiest at pH 5.5–6.5, with 5.8–6.2 as a good general target. To keep pH stable for days:
- Use nutrients designed for hydroponics with built-in buffering
- Measure pH after mixing nutrients and after large top-ups
- If you adjust, do it in small steps with pH up/down, then wait 10–15 minutes before rechecking
As you gain experience with your tap water or RO setup, you’ll notice its typical drift pattern. Some growers deliberately start at pH ~5.7–5.8 knowing it will climb towards 6.2–6.3 over a week, keeping them in range without daily input.
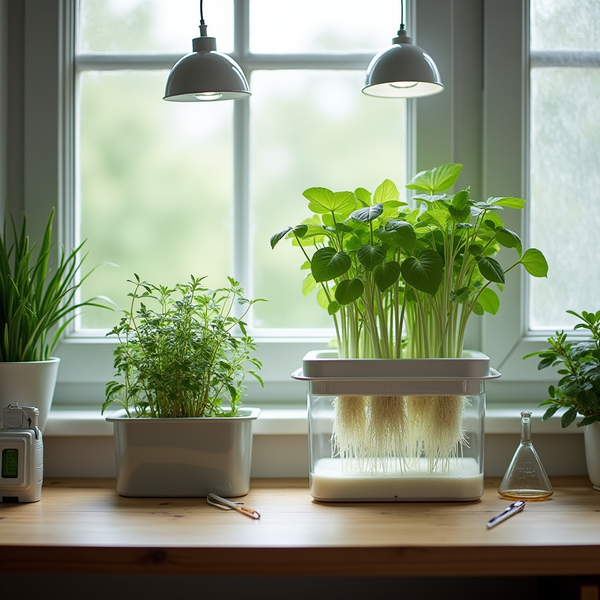
4.3 Simple monitoring setups that actually help
You don’t need a lab. A practical monitoring stack for an automated vertical hydroponic garden design looks like this:
- Manual basics: handheld EC/TDS meter, pH pen or test kit, thermometer
- Smart plug or timer: to control pump and lights, ideally with app-based scheduling
- Optional extras: Wi-Fi camera pointed at the tower, or a simple microcontroller logging water level and sending alerts if it drops too far
The key is that your monitoring should reduce your workload, not create more. Start with manual tools, then layer in automation only where you see clear value.
4.4 Solar and backup power on a budget
If you want your tower to ride out grid outages or run partially off-grid, you don’t need a full rooftop array. Focus on the essentials:
- Air pump and water pump on a small DC system (panel + battery + charge controller)
- Lights left on grid power, since they are the biggest draw
Example minimal setup for a balcony tower:
- One 50–100 W solar panel
- One 12 V, 40–100 Ah deep-cycle battery
- DC air pump (5–10 W) running 24/7
- DC water pump (15–20 W) running intermittently
Duty-cycled pumps plus efficient tower design mean your daily energy consumption is low enough that a modest panel and battery can keep the hydroponic side of things alive, even if lights shut off for a day during bad weather.
4.5 When to consider a pre-built tower kit
If you’d rather not start from scratch, pre-built towers like those seen in vertical hydroponic kit reviews or the Mr Stacky Smart Farm can save build time. Treat them as structural and plumbing shells, not black boxes. You can still:
- Upgrade pumps and timers for better reliability
- Add a larger external reservoir to stabilize EC and pH
- Layer your own monitoring and solar solutions

5. Putting It All Together: A Travel-Proof Tower Blueprint
To wrap this up, here is a concise blueprint you can adapt to your balcony, spare room, or garage.
5.1 Core specs for a reliable DIY hydroponic tower
- Plants: 16–24 leafy greens or herbs for a first build
- Reservoir: 100–150 L opaque tote or barrel; lid cut to accept tower base
- Tower body: 4–6 inch PVC/HDPE pipe or modular tower sections, 1.5–2 m tall
- Net pots: 2–3 inch baskets with expanded clay or similar media
- Pump: rated for at least 200–500 L/h at 2–2.5 m head
- Aeration: at least two air stones in the base
- Automation: plug-in timer or Wi-Fi smart plug for pump and lights
- Monitoring: handheld EC and pH meter, thermometer; optional camera
5.2 Workflow for low-maintenance operation
- Initial setup: mix nutrients to the low end of your target EC, adjust pH, fill reservoir, start pumps, and verify even wetting of all sites.
- Daily (or every 2–3 days): quick visual check, top up with plain water.
- Weekly: measure EC and pH, adjust gently; inspect pump intake and top ring for debris.
- Monthly: full reservoir change, light scrub of tower interior if needed, inspect roots for health and any developing clogs.
5.3 Travel prep checklist (3–7 days away)
- Fill reservoir to max level with slightly weaker nutrient solution
- Adjust pH to the middle of your desired range
- Check timer schedules and run a full cycle test
- Ensure all cables and tubing are secure and drip-proof
- Optionally, connect a gravity-fed top-up tank via float valve for extra buffer
If you want to go further, integrate a small solar panel and battery to keep pumps and monitoring online during outages, and consider a smart plug or controller that lets you check in remotely.
The key idea is simple: design like you expect something to fail. Oversize your reservoir, simplify your plumbing, choose robust pumps and emitters, and give your roots a DWC/Kratky-style fallback. Do that, and your tower moves from “cool weekend project” to a reliable, low-maintenance part of your weekly routine.

As an Amazon Associate, I earn from qualifying purchases.