DIY Aquaponics Fish Farm Tours Are Going Viral – Here’s How Small Growers Can Actually Copy the Best Design Ideas
The hook: why YouTube tours are exciting - and dangerous
Most growers think that if a YouTube aquaponics system looks clean, green, and packed with fish, it must be a good design. In reality, you are only seeing the success snapshots, not the daily juggling act keeping those fish alive.
The FIERY FISH FARM tour and the wave of DIY aquaponics videos that followed are packed with clever layout ideas, gravity hacks, and tidy-looking plumbing. But if you try to clone those builds without the hard numbers - stocking density, biofilter sizing, sump volume, backup aeration - you are gambling with fish welfare and your time.
This guide strips the show-and-tell down to the engineering. We will walk through how to turn viral aquaponics tours into a practical, fish-centric system layout that fits your space, climate, and workload.
1. Common mistakes small growers make when copying YouTube aquaponics builds
Mistake 1: Copying the look, not the load
Viral tours rarely tell you how many fish are actually in the tank, how fast they are growing, or how often solids are purged. Viewers match the tank size and plant count, but ignore the underlying loading.
Typical outcomes:
- Overstocked fish tanks with undersized biofilters.
- Crystal-clear water but chronic nitrite spikes because media volume is too low.
- Plant growth that looks lush early, then stalls once fish output outpaces filtration.
Mistake 2: Ignoring fish welfare for plumbing convenience
A lot of DIY tours highlight clever gravity-fed layouts, looping water through long NFT channels before it returns to the fish. It may be efficient for pumping, but puts fish last in the queue. Warm, low-oxygen water often trickles back into the tank after a long trip through exposed pipework and grow beds.
That is the opposite of a fish-centric system.
Mistake 3: No explicit backup for aeration and circulation
In more than a few builds, the air pump and water pump share the same circuit, sometimes the same cheap power strip. There is no battery backup, no independent airline, and no plan if a breaker trips at 2 a.m.
In an aquaponics fish farm, oxygen is your single point of failure. A well-planted bed will survive a few hours of pump downtime. A heavily stocked fish tank may not.
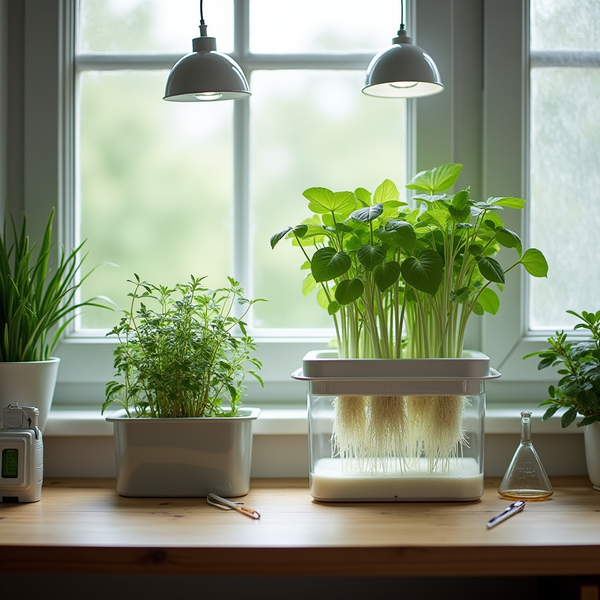
Mistake 4: Mixing media beds, NFT, and DWC with no flow plan
It is tempting to drop every hydroponic method into one system: media beds for solids, DWC rafts for leafy greens, NFT for quick-turn herbs. Without a clear flow sequence and filter sizing, solids accumulate in DWC channels, roots clog NFT pipes, and biofilters get overloaded.
Mistake 5: No allowance for local climate
Tour builders often design around their own climate: mild winters, shaded summers, or constant well water. Copying their tank exposure, cover choice, or insulation in a very different climate can create stress for both fish and plants. For example, shallow exposed tanks that work in a coastal climate can spike lethal temperatures in a hot inland backyard.

2. Why these mistakes happen when you follow tours instead of data
Reason 1: Tours show snapshots, not load curves
The FIERY FISH FARM style tours are great at showing layout, access, and neat tricks like gravity-fed solids removal. What they do not show is the nitrogen load over time, or the seasonal shifts in oxygen demand, stocking, and feeding. In other words, you see a moment, not the performance curve.
Stocking density, feed rate, and biofilter capacity are dynamic. A system that runs safely at 30 kg of fish in spring can be on the edge of disaster by midsummer if feed is increased without expanding filtration.
Reason 2: Aesthetic bias overflows into engineering
Creators understandably design for camera. Exposed pipe runs, shallow decorative tanks, and long NFT runs look impressive on video. Hiding aeration manifolds, sump pits, and overflows does not.
Function-first details like additional sumps, high-capacity air pumps, or ugly but robust IBC totes often get cropped out or mentioned in passing. Viewers then map the visible part of the design and omit the invisible safety infrastructure.
Reason 3: Rules of thumb get lost in translation
Experienced builders carry mental baselines: fish kg per cubic meter, biofilter media per gram of feed, minimum air flow per tank volume. They tweak by feel because they already internalized those numbers.
If you do not know those baselines, copying the shape of the system without matching the math is like copying a race car body without touching the engine or brakes.
Reason 4: Climate and water differences are hidden variables
Aquaponics performance depends heavily on temperature, source water alkalinity, and dissolved oxygen. A design that runs forgivingly in cool, well-aerated water might be fragile in warm, low-alkalinity water.
For example, research and practice commonly point to 0.5 to 1.0 kg of fish per 100 liters as a comfortable range for beginners, assuming good aeration and filtration. That same stocking rate will feel much tighter in hot climates, where oxygen solubility drops and fish metabolism - and oxygen demand - increases as summarized here.
Reason 5: Backup systems do not make good thumbnails
The most important gear - independent aeration, backup power, high-water and low-water alarms - is the least photogenic. It is also the first thing omitted when people copy builds strictly from visuals.
3. How to fix it: a fish-centric design blueprint you can adapt safely
Step 1: Start with fish biomass and welfare targets
Pick your species, temperature range, and target harvest size first. Then design everything else around that.
For small-scale, backyard or balcony-friendly systems with tilapia, perch, or catfish, a conservative starting point for beginners is:
- Stocking density: 0.3 to 0.6 kg of fish per 100 liters of total fish tank volume for grow-out, with room to ramp as you gain experience.
- Fingerling tank / nursery: at least 1 small separate tank or IBC section for new stock, at lower density.
- Target DO (dissolved oxygen): keep above 5 mg/L, preferably 6 mg/L plus, measured at the worst time of day (usually just before dawn).
Use the fish volume and target density to determine how many fish you will grow, not the other way around. That simple inversion keeps you honest.
Step 2: Size biofiltration by feed rate, not by tank volume
Bacteria do not care about your tank size; they care about how much feed passes through the system. A practical working baseline for mixed-media biofilters (gravel, expanded clay, plastic media) is:
- Biofilter media volume: roughly 0.6 to 1.0 liters of high-surface-area media per gram of daily feed input, depending on media type and temperature.
- NH3/NH4 and NO2 benchmarks: keep total ammonia nitrogen under 1 mg/L and nitrite under 0.5 mg/L for most species, as frequently repeated in practical guides like Backyard Aquaponics.
In practice, this often means:
- Using at least 1 full-depth media bed (300 mm) for every 250 to 300 liters of fish tank volume in small systems.
- Or pairing a smaller media bed with a dedicated moving bed biofilter (MBBR) filled with K1 or similar media.
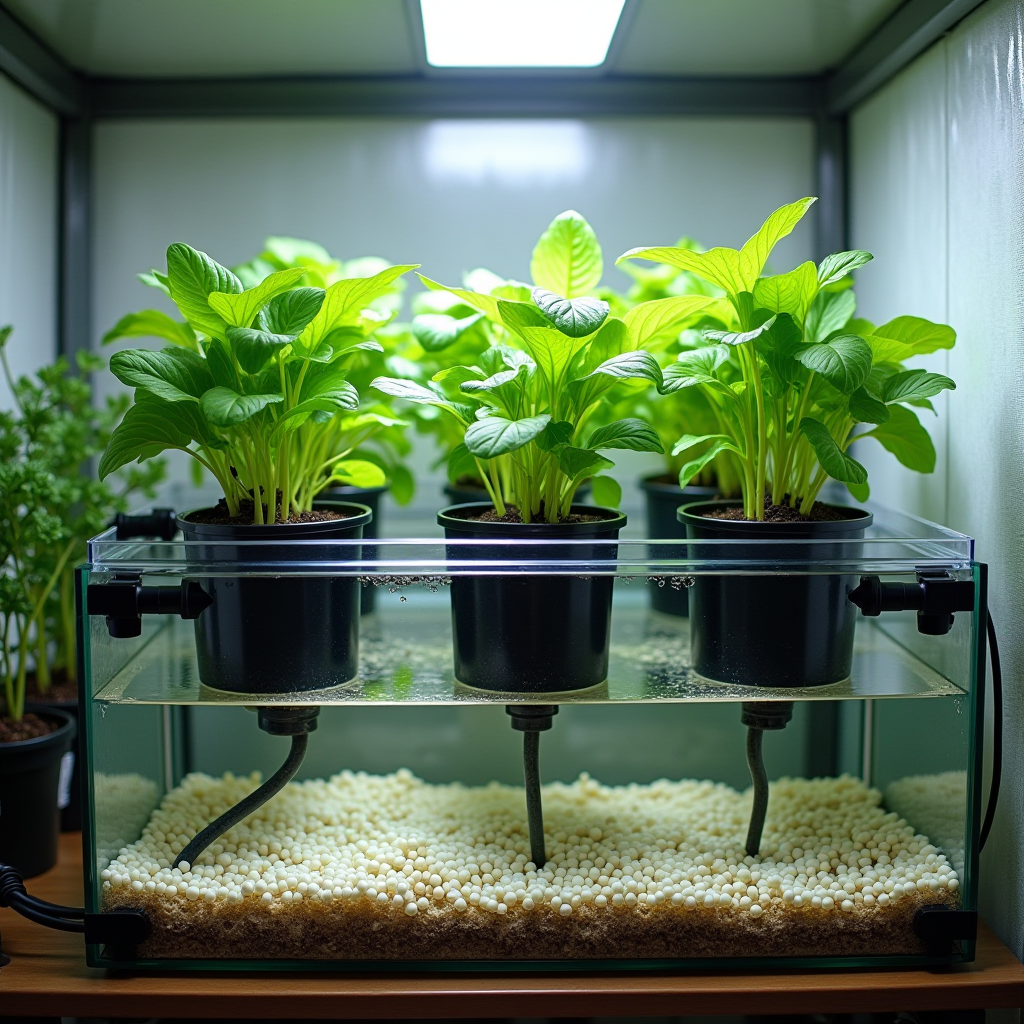
Step 3: Choose a clear flow architecture: CHIFT PIST or constant height DWC loop
Most of the best-performing fish-centric builds use some variant of CHIFT PIST (Constant Height In Fish Tank, Pump In Sump Tank), often highlighted in community resources like this breakdown:
- Fish tank overflows by gravity to a solids capture step (swirl filter, radial flow, or clarifier).
- Water then feeds media beds (and optionally a biofilter) for nitrification.
- Treated water collects in a sump tank, where a pump sends it back to the fish tank.
This structure keeps fish tank level stable, gives you a sump buffer, and makes it easier to integrate multiple hydroponic modules.
For integrating DWC and NFT:
- Run media beds first to strip most solids.
- Feed clarified, oxygen-rich water into DWC rafts.
- Run NFT last in the chain, then return to the sump.
This order keeps heavy solids out of channels and reduces root fouling in NFT lines.
Step 4: Build in a dedicated sump with real volume
A common shortcut in YouTube builds is skipping a real sump and relying on a shallow trough or a corner of the fish tank. That works until evaporation, minor leaks, or plant transpiration pull levels down and expose pumps.
Give your sump enough volume to buffer daily swings:
- Sump size baseline: at least 20 to 30 percent of total system water volume, more if you run large media beds that flood and drain.
- Minimum operating depth: keep the pump intake 100 to 150 mm off the bottom, with another 100 mm of water below as a safety margin.
Place the sump where you can easily service pumps, add top-up water, and install float switches or sensors later.
Step 5: Treat aeration as non-negotiable life support
Borrow the mindset of fish farmers, not only hydro growers. Treat air as your primary life support system.
Practical baselines:
- Air pump size: target roughly 6 to 8 L/min of air per 100 liters of fish tank water as a starting point, distributed through multiple stones or diffusers.
- Independent power: put your air pump on a different circuit from your main water pump where possible.
- Battery backup: even a modest UPS or dedicated 12 V air pump can buy you crucial time during outages, as discussed in many small-farm case studies like those gathered by FAO aquaponics reports.
Place one diffuser in the main fish tank, and another in the sump or biofilter where water movement is slower.
Step 6: Integrate media beds, DWC, and NFT with clear roles
To borrow the best ideas from FIERY FISH FARM style builds, assign each hydroponic module a primary job instead of forcing every zone to do everything.
- Media beds: main solids trap and biofilter, ideal for fruiting crops and heavier feeders. Use 8 to 12 mm gravel or expanded clay at 250 to 300 mm depth.
- DWC rafts: stable root zone for leafy greens. Keep channel depth at 200 to 300 mm; ensure at least 5 to 7 L/min of circulation per square meter of raft surface and active aeration beneath the rafts.
- NFT channels: fast-growing herbs and lightweight greens. Use them last in the chain with clarified water. Maintain enough slope (around 1 to 3 percent) and flow to avoid stagnation.
Keep flow paths as simple as possible: fish tank → solids removal → media beds / biofilter → DWC → NFT → sump → fish tank. Every additional split or bypass should have a clear job, not just look interesting.
Step 7: Design for maintenance from day one
The best-looking YouTube systems often have hidden service points: unions, valves, inspection tees. When you build, make those visible and accessible for yourself.
Checklist:
- Every major run should have a union or coupling you can undo without cutting pipe.
- Solids filters should be easy to isolate and drain without shutting the whole system down.
- Media beds should have standpipes you can pull to fully drain the bed for cleaning.
- All pumps should be removable without draining the tank.
Design for the day you have to blast a clogged NFT line in the rain while your fish are still depending on circulation.
Step 8: Match your climate with shading, covers, and depth
Aquaponics is extremely sensitive to temperature, especially for fish like trout or cold-tolerant species. A shallow, black-lined pond that works in a mild climate may at best stunt growth and at worst cause mass mortality in hotter regions.
Practical guidelines:
- Hot climates: prioritize deeper tanks, light-colored covers, and strong shading. Consider ground contact to help buffer heat.
- Cool climates: smaller, insulated tanks and covered grow areas (greenhouses or hoop houses) help stabilize temperatures, as seen in many small farm case studies summarized by organizations like this university guide.
Match species to the temperature you can realistically maintain most of the year. That matters more than squeezing in a favorite fish from a viral video.

4. What to watch long term: benchmarks that tell you your system is actually working
Benchmark 1: Stable nitrogen cycle under full feed
Do not judge a system by cycling with minimal fish. Judge it when the tank is at your planned working biomass and feed rate.
Targets once fully stocked and cycled:
- Total ammonia nitrogen (TAN) consistently under 1 mg/L.
- Nitrite under 0.5 mg/L; zero is ideal, but small blips can happen.
- Nitrate slowly rising or stable between roughly 40 and 150 mg/L, depending on plant load and harvest rate.
Track readings at least weekly; more often in the first two to three months and after any major change in feed or stocking.
Benchmark 2: Dissolved oxygen and temperature at the worst point of the day
Measure DO and temperature just before sunrise, when oxygen is lowest and temperature may still be elevated from the previous day. If you can maintain DO above 5 mg/L and temperature within your species range at that point, the system is likely safe.
Benchmark 3: Visual fish behavior
Your fish will usually warn you before your test kit does:
- Fish hanging at the surface and gasping often indicates low DO or high nitrite.
- Clamped fins, slow responses, or refusal to feed can signal chronic stress from poor water quality or temperature swings.
Use these daily observations to decide when to test and adjust.
Benchmark 4: Plant performance across modules
If media beds are thriving but NFT channels show root browning or stunting, your solids removal or oxygen distribution is off further down the line. If DWC rafts are yellowing while NFT looks fine, it may be a circulation or nutrient distribution issue.
Keep a simple log of which zone each crop came from and how it responded. That makes it easier to tweak flow, aeration, or plant selection per zone.
Benchmark 5: Maintenance load and downtime
A working fish-centric aquaponic farm is not just about survival; it is about how much time it demands from you.
Practical targets:
- Daily checks under 15 to 20 minutes: quick feed, look, and listen rounds.
- Weekly maintenance under 1 to 2 hours: solids purges, filter rinses, water tests.
- Monthly deeper checks: pull and inspect a few fittings, clean air stones, and verify backup systems.
If your system requires daily heroic troubleshooting, you either copied a layout that did not fit your context, or skipped key buffers like a real sump or oversized biofilter.
Bringing it all together: how to responsibly copy viral aquaponics designs
The FIERY FISH FARM style tours are gold mines of layout ideas, clever use of gravity, and practical plumbing details. The trick is to treat them as inspiration, not blueprints.
To turn a flashy tour into a safe build:
- Extract the layout pattern, then plug in your own numbers for fish biomass, feed rate, and filter volume.
- Commit to a fish-centric flow path that gives them the cleanest, best oxygenated water you can deliver.
- Oversize biofiltration, aeration, and sump capacity relative to what you see online.
- Design with your climate, water source, and realistic maintenance time in mind.
Do that, and you can keep borrowing the best ideas from viral DIY aquaponics fish farms while leaving the risk and guesswork behind.
As an Amazon Associate, I earn from qualifying purchases.