From TikTok Buckets to Real Results: Evidence-Based DWC System Design for 2026 Home Growers
Common mistakes home growers make with DWC bucket kits
Most people think a “5-gallon DWC kit with an air pump” is all you need. The reality: the kit will bubble, plants will grow for a few weeks, and then things get weird. Uneven growth between buckets, random root rot, droopy leaves in a hot spell, and a constant feeling that the system is fragile.
That is not a nutrients-brand problem. It is almost always system design.
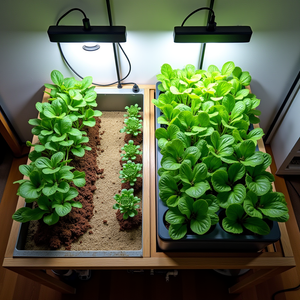
Right now TikTok Shop and retailers like Yarra Supply are pushing Deep Water Culture kits hard: VEVOR 5-gallon 5-bucket systems with a connected reservoir, 8-bucket DWC arrays with a single 8 W pump, and DWC + top-drip hybrids with 5-gallon buckets and 8-inch net-pot lids.[source][source]
The hardware is fine. The issues start when you drop that kit into a real apartment, garage, or spare room without adjusting for:
- Actual air pump capacity vs total water volume
- Root-zone temperature in a hot room vs cool basement
- Bucket layout and access for topping up, pH checks, and cleaning
- Plant spacing vs the marketing phrase “5-bucket system”
- Water level, lid, and net-pot design that either protects or destroys your roots
Let’s walk through the most common design mistakes and what the data and field experience say you should do instead.

Why these DWC bucket problems happen
Mistake 1: Believing “5 buckets” means “5 full-sized plants”
A VEVOR 5-gallon 5-bucket system on Yarra Supply lists one reservoir and four planting buckets, each with a 5-gallon capacity and 5-inch basket.[source] TikTok Shop listings for similar 5- and 8-bucket sets show the same thing: X buckets, one air pump, a handful of stones.[source]
What the marketing doesn’t say:
- Five 5-gallon sites packed shoulder-to-shoulder in a bedroom grow tent is not the same as five sites spread in a greenhouse.
- Large peppers or tomatoes will absolutely fight for light and airflow in those arrays.
- Plant count is limited by canopy space, not bucket count.
This is why new growers often see one or two dominant plants and weak runts on the same multi-bucket kit, especially indoors.
Mistake 2: Underpowered air pumps on multi-bucket systems
Most cheap bundles ship an air pump that is technically adequate but marginal.
DWC-specific pump guidelines consistently suggest around 0.5–1.0 L/min of air per gallon of nutrient solution.[source][source] One rule-of-thumb from One Stop Grow Shop is 1 L/min per 4 L of nutrient solution.[source]
For a single 5-gallon bucket (about 19 L), that means:
- Minimum: roughly 2.5 L/min
- Better target: roughly 5 L/min per bucket
Translate that to a 4-bucket kit holding around 20 gallons total: you are looking for ~20 L/min of pump capacity if you want vigorous bubbling in every bucket, not just a gentle fizz in one corner.
Yet many “all-in-one” kits ship 8 W air pumps rated around 4 × 4 L/min for an 8-bucket system.[source] In a cool basement, you might get away with it. In a warm apartment, that margin disappears and dissolved oxygen drops fast, which is a primary trigger for root rot in DWC.[source]
Mistake 3: Ignoring water temperature
Root-rot guides and chiller manufacturers agree: warm water is the enemy of DWC.[source][source] Once your solution creeps much above about 22 °C (72 °F), dissolved oxygen drops and Pythium and friends are far more comfortable.
If your buckets live in a 26–30 °C room and your only aeration is a borderline air pump, root stress is baked into the design. That is why people report “random” system crashes during summer or heat waves while their setup looked fine in cooler months.
Mistake 4: Water level and lid design that drown the crown
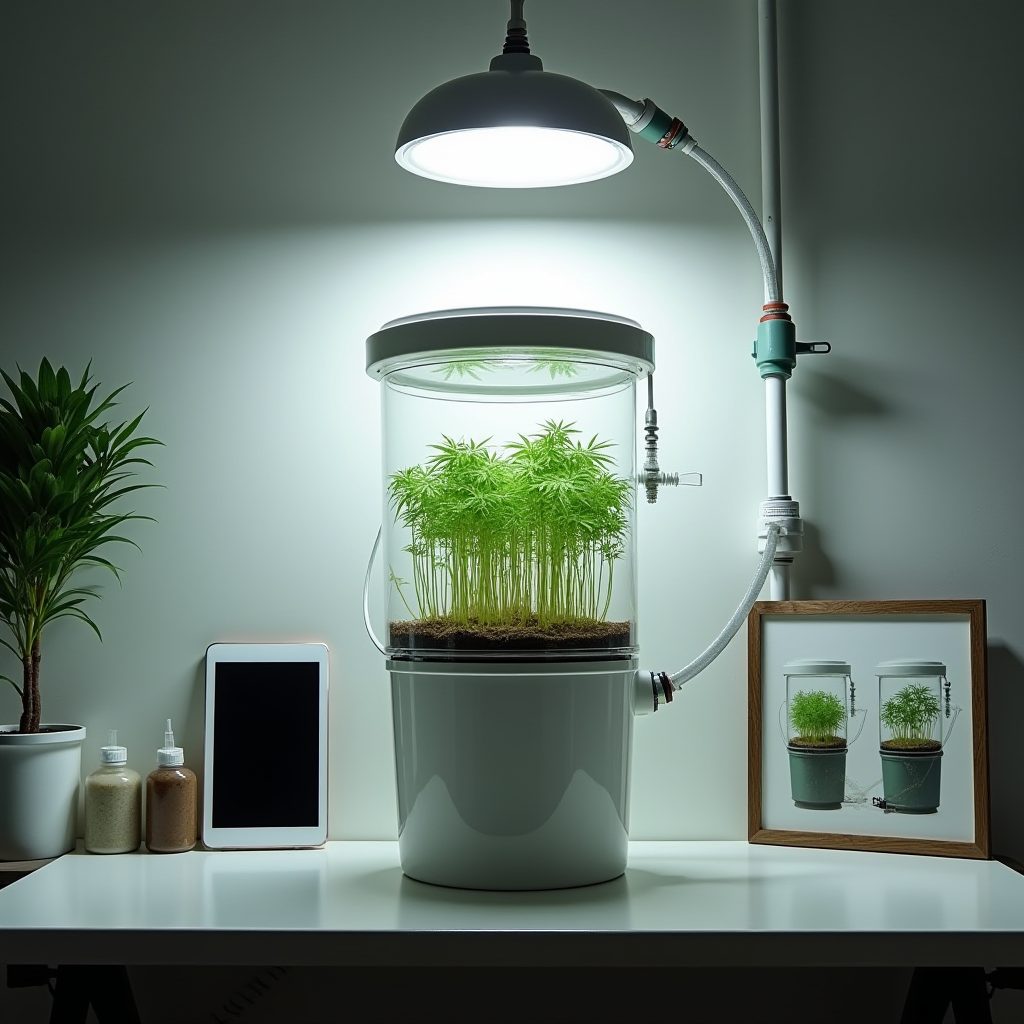
Most TikTok and Yarra DWC bucket kits use 5-inch or 8-inch baskets set into a solid lid with a water-level sight tube.[source][source] That part is fine.
The problem is the way instructions are interpreted. Many growers fill the reservoir up to or into the net pot and never lower it once roots are established. Root-rot prevention guides for hydroponics explicitly tell you not to keep the net pot fully submerged in DWC: you want an air gap at the crown so that the stem and upper roots stay in humid air, not in stagnant solution.[source][source]
If your lid is flimsy or the basket sits too deep, it becomes very easy to overshoot and waterlog the base of the plant.
Mistake 5: No plan for cleaning and monitoring
Deep-water systems concentrate risk. A couple of dirty fills and neglected air stones in a multi-bucket rig are enough to seed biofilm, algae, and pathogens. Root-disease guidance for DWC and NFT systems stresses sanitising surfaces and equipment between runs.[source][source]
Most bucket kits do not fail because the parts are cheap. They fail because the system isn’t designed around temperature, air, and maintenance workflow.

How to fix your DWC bucket design for real-world conditions
1. Match system layout to your room, not the product photo
Start with the constraints of your space.
- Hot apartment (24–30 °C most days): Fewer buckets, larger total water volume (shared reservoir), high aeration, and aggressive light and heat management. Consider a 4–5 bucket RDWC layout with a central reservoir, like the 5-gallon 5-bucket kit on Yarra Supply, but be ready to oversize the pump and insulate or shade buckets.[source]
- Cool basement or garage (15–22 °C): You can safely run more buckets per pump and get away with slightly lower airflow per gallon because cooler water holds more oxygen.[source]
- Small grow tent: Don’t be afraid to “under-fill” a multi-bucket kit. Run 3–4 sites of leafy greens in an 8-bucket kit and leave the rest capped until you see how canopy and airflow behave.
Design backwards from your target plant size:
- Leafy greens / herbs: 1 plant per 5-gallon bucket is generous. In practice you can run 2 smaller lettuce heads in a single 8-inch basket if airflow and light are good.
- Peppers / bush tomatoes: Treat each bucket as one plant, and assume you will not fill every site in a tight space if you want airflow and stable climate.
2. Choose the right air pump size (and type) for multi-bucket DWC
Use evidence-based airflow instead of guessing.
- Estimate total nutrient volume across all buckets and the reservoir.
- Apply 0.5–1.0 L/min per gallon as your airflow target, leaning to the high side in warm rooms.[source][source]
- Choose a pump with a bit of headroom and a manifold or multiple outlets so each bucket gets its own stone.
Example for an 8-bucket, 5-gallon DWC array:
- 8 buckets × 5 gallons = 40 gallons total (ignoring a slightly larger central reservoir).
- Target airflow = 40–80 L/min. In a hot room, aim near the top of that range.
That is more air than many stock pumps in 8-bucket kits offer. If your kit’s pump is rated “4 × 4 L/min” for 8 buckets, treat it as a baseline and upgrade if you see:
- Weak bubbling in some buckets
- Noticeable temperature rise in the pump housing (heat = lost efficiency)
- Any early signs of root browning or slime despite otherwise reasonable hygiene
Grower-focused calculators like the DWC Air Pump Calculator and GrowDoctor guidelines line up with this approach and explicitly recommend sizing to total solution volume, not just plant count.[source][source]
3. Keep water in the safe temperature band
For home DWC, a practical target is 18–22 °C (65–72 °F) in the root zone.[source][source] Below 16 °C growth slows; above 24–25 °C, root-rot risk jumps.
You have three main levers:
- Environment: Run lights at night in hot climates, exhaust hot air from your tent, and keep buckets shaded from direct sun.
- Insulation and placement: Get buckets off bare concrete, wrap them in reflective or insulating material, and avoid placing them right next to heat sources.
- Active cooling when needed: In small systems, frozen water bottles rotated daily can do the job. For larger multi-bucket systems, a chiller or a cool reservoir in a neighbouring room is far more reliable.
If you live somewhere hot and cannot control ambient temperature, consider using fewer active buckets and more total water (larger shared reservoir) to buffer swings.
4. Set water level and lid/net-pot geometry correctly
The rule is simple:
- During early rooting, let the solution just touch the bottom of the starter cube or net pot so roots “chase” the water.
- After roots are established, lower solution so there is a clear air gap between the net pot base and the water surface.
Multiple root-rot resources for DWC stress not filling the reservoir to the very bottom of the net pot once roots are long enough.[source][source] Top roots sit in moist air, lower roots swim in highly oxygenated solution, and the crown stays dry.
With TikTok/Yarra kits that include top-drip assemblies, you can run a lower main water level from day one because the drip ring keeps the media moist while roots grow down. VEVOR’s top-drip DWC listings highlight this: the drip kit “allows for easy water replenishment to the roots during the plant growth stage.”[source][source]
If your lid is thin and flexes, reinforce it or support the net pot so it doesn’t sag deeper into the bucket over time. That small shift can erase the air gap you carefully set up.
5. Build a maintenance workflow that fits your schedule
You do not need to live with your buckets. You do need a consistent routine.
- Daily / every other day: quick glance at water temperature, bubbling strength, leaf posture, and root colour through inspection ports or removable lids.
- 2–3 times per week: check and adjust pH, log EC, and top up with plain water. Most general hydroponic nutrient guides recommend topping off with water first, then nutrients only if EC has dropped too low.[source]
- Every 7–14 days (small systems) or per growth stage (larger): full reservoir change, quick scrub of buckets and lids, rinse or replace air stones as needed. Disease-management guides for deep-water systems put system cleaning at the core of prevention.[source]
If your schedule is tight, a slightly larger shared reservoir on a multi-bucket kit gives you more stability and more calendar days between full solution changes.

What to watch long-term: water, roots, and numbers
1. Root-zone temperature and dissolved oxygen
We already covered the target band (18–22 °C), but it is worth stressing: in DWC, water temperature is the master variable. Root-rot case studies in DWC repeatedly circle back to warm, under-aerated reservoirs.[source][source]
As a home grower, you probably will not run a dissolved oxygen meter. Instead, combine:
- A cheap digital thermometer in the reservoir
- Correctly sized air pump with visible vigorous bubbling
- Visual inspection of roots: white to cream and firm is good; tan, brown, or slimy is a warning
2. pH and EC ranges for leafy vs fruiting crops
Hydroponic nutrient guides broadly agree on workable ranges:
- pH: 5.5–6.5 for most DWC crops, with many growers targeting 5.8–6.2 for greens and fruiting plants.[source]
- EC (rough ballpark):
- Seedlings / delicate herbs: 0.4–0.8 mS/cm
- Leafy greens (lettuce, Asian greens): 0.8–1.6 mS/cm
- Fruiting crops (tomatoes, peppers) in veg: ~1.5–2.0 mS/cm, higher in heavy fruiting if the cultivar tolerates it
Some disease-management research in deep-water culture explores running very low pH (4.0–4.5) specifically to suppress root pathogens in leafy greens.[source] That is not a general home-grow recommendation, but it reinforces how strongly pH interacts with root health.
For a home DWC bucket grow, keep it simple:
- Pick one reputable hydroponic nutrient line and use their chart as your starting EC.
- Check pH and EC at least twice a week and log readings so you spot trends.
- If EC is climbing and water level is falling, plants are taking more water than nutrients: top off with plain water.
- If EC is dropping quickly, they are eating nutrients faster than water: top off with nutrient solution or schedule a full change.
3. Sterile vs biologically active DWC: pick a lane
Root-rot guides for DWC usually describe two strategies:
- Sterile: Clean hardware, use oxidisers like hydrogen peroxide or hypochlorous acid at low doses, and keep all organic inputs out of the system.[source][source]
- Biological / hybrid: Still keep things clean but intentionally add beneficial microbes (often Bacillus strains) to occupy root surfaces and compete with pathogens.[source]
Both can work. What does not work is randomly alternating: sterilising with high peroxide one week and dumping in biological additives the next. Decide up front and stick with one operating mode for the full crop cycle.
4. Noise, power, and scalability
Multi-bucket DWC setups live in real homes. Oversizing your pump solves oxygen problems but introduces noise and power draw. Air pump comparison guides suggest focusing on L/min per watt and noise ratings, then mounting the pump on vibration-damping foam or hanging it to reduce hum.[source]
If noise is a constraint, use a single efficient linear-piston or diaphragm pump feeding a manifold, rather than several cheap noisy aquarium pumps. Design your bucket manifold so you can close valves on unused buckets without re-plumbing the whole system when you scale plant count up or down.
Evidence-based benchmarks for a solid 5-gallon DWC bucket system
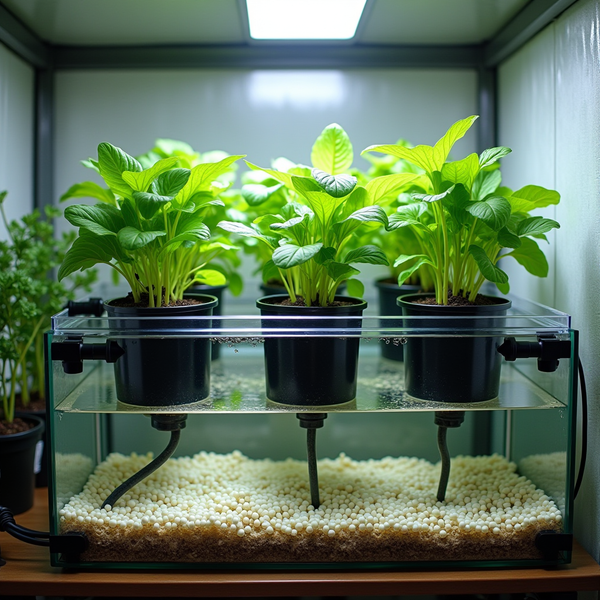
1. Single-bucket DWC: what “correct” looks like
A well-tuned single 5-gallon bucket DWC, like the classic DIY builds covered by hydroponic tutorials, typically has:[source][source]
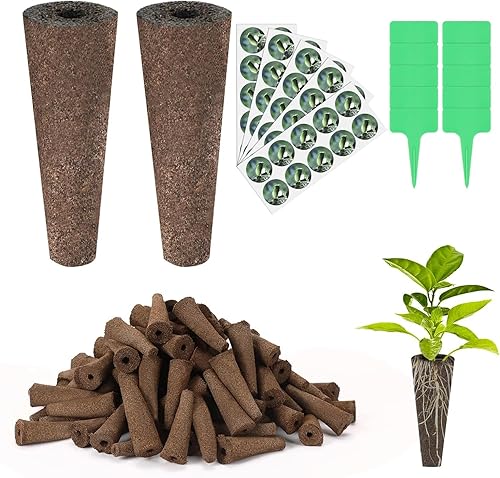
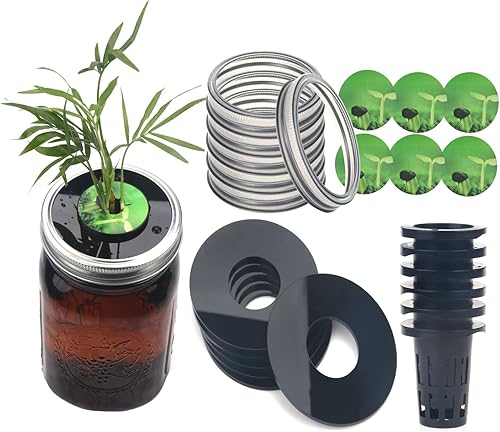
- Opaque bucket and lid with a 5–8 inch net pot
- Air stone sized for the bucket, with a dedicated line from a small but decent pump
- Water level initially touching the net-pot base, then lowered to create an air gap
- Nutrient solution mixed to the low end of the EC range for the crop
- pH kept between 5.5 and 6.5 with small, frequent adjustments
- Water temperature in the 18–22 °C band
In that configuration, leafy greens can go from transplant to harvest in 3–5 weeks with compact, dense heads and crisp roots. Tutorials repeatedly show that, with that baseline, you can assemble a reliable bucket for a modest cost and scale from there.[source][source]
2. Multi-bucket kits (VEVOR, VIVOSUN, TikTok Shop, Yarra)
Looking at current listings:
- VEVOR DWC Hydroponic System, 5 Gallon 5 Buckets at Yarra Supply: 1 reservoir + 4 plant buckets, each 5 gallons, 5-inch baskets, air pump, air stones, and plumbing.[source]
- VEVOR DWC Hydroponic System, 5 Gallon 8 Buckets: 8 planting buckets, 5-gallon capacity, 5-inch baskets, 8 W pump delivering 4 × 4 L/min airflow (16 L/min total), and air stones.[source]
- VEVOR DWC Hydroponics Grow System with Top Drip on TikTok Shop: 5-gallon bucket(s) with 8-inch basket and a top-drip ring plus water-level indicator for easier water management.[source][source]
From a system-design perspective, here is how to treat those specs:
- Bucket count is potential capacity, not mandatory capacity. Start with fewer active sites.
- Factory pumps are a starting point. Use the airflow rules to check whether you should upgrade.
- Top-drip assemblies are a tool for early root development and more even moisture, not a licence to run high water levels forever.
Product category pages on Yarra Supply group these in the “Deep Water Culture (DWC)” section and highlight use for indoor and outdoor leafy vegetables.[source] TikTok Shop’s DWC kit descriptions emphasise faster growth and oxygen-rich roots when correctly set up.[source] Your job is to match that hardware with sound fluid dynamics and plant physiology.
3. When to choose DWC buckets vs simpler Kratky setups
TikTok Shop is also full of passive Kratky-style jar and bucket kits: net cups, self-watering wicks, and mason-jar lids for herbs and small greens.[source] The Kratky method uses no pump; oxygen comes from a growing air gap as water is consumed.[source]
Use this rule of thumb:
- Kratky: best for small, short-cycle leafy crops (lettuce, basil) where simplicity is more important than absolute speed. Great for windowsills, countertops, and ultra-low-maintenance grows.
- DWC buckets: best for year-round indoor food production, larger crops, and growers who are willing to manage air, water, and nutrients actively.
If you are already committed to “buckets of water with air stones,” focus on getting DWC right instead of fighting its physics. Good air, safe temperatures, correct water level, and a realistic plant count will take you most of the way.
4. A simple checklist for your next DWC bucket build
- Opaque 5-gallon buckets with rigid lids and 5–8 inch net pots
- Air pump sized at 0.5–1.0 L/min per gallon of total solution volume, with one stone per bucket
- Water temperature held around 18–22 °C
- Water level just touching the net pot at transplant, then dropped to leave an air gap once roots are well established
- pH in the 5.5–6.5 range, EC matched to crop type and stage
- A weekly or biweekly full solution change and sanitation routine
- A canopy plan that respects real plant size, not just bucket count
Do that, and those TikTok buckets stop being toys and start behaving like a serious, repeatable growing system.
As an Amazon Associate, I earn from qualifying purchases.