Off‑Grid Indoor Hydroponics in 2026: How to Design Low‑Power DIY Systems That Actually Work
Common Mistakes: Why Most “Off‑Grid” Hydroponic Setups Fail Fast
“No pump, no problem” sounds great in a reel. In a real apartment, it usually ends with wilted lettuce and a smelly tote.
The biggest mistake in 2026’s off‑grid indoor hydroponics trend is simple: people copy aesthetic builds, not the physics behind them. You see beautiful jars on a windowsill, a solar panel propped on a balcony, maybe a USB pump, and assume that’s enough. Then the first cloudy week hits or a power outage stretches past a few hours and everything stalls or dies.
From current DIY reels and forum posts, a few failure patterns show up over and over:
- Calling any mason jar with a seedling in it “off‑grid hydroponics,” without sizing the reservoir or matching the crop to the method.
- Running classic DWC buckets with a tiny battery that can’t keep an air pump alive overnight.
- Underestimating how much power lighting eats compared to pumps.
- Using power‑hungry tower or NFT systems indoors that were really designed to run on stable grid power.
- Ignoring failure modes: “What happens if the pump, timer, or Wi‑Fi smart plug stops?”
The result: great first‑week growth, then stalled plants, root rot, or complete crop loss the first time something in the power chain hiccups. In greenhouse visits and recent grower reports, the systems that keep running are brutally simple: big reservoirs, passive or ultra‑efficient circulation, and crops chosen to match the energy budget.
If you want a low‑power indoor setup that survives real outages, you need to treat “off‑grid hydroponics” as a design problem, not a style.

Why These Mistakes Happen: Chasing Gadgets Instead of Resilience
Most “off‑grid” hydroponic failures come down to three things: misunderstood energy math, mismatched system choice, and missing backup paths.
1. Misunderstanding where the watts really go
The common assumption: “Hydroponics is power hungry because of pumps.” In reality, indoors the lighting dominates your energy bill. A small, efficient air pump might pull 5 W. A modest grow light for one shelf can easily pull 60 to 120 W for 14 to 16 hours a day.
So people will proudly run a 20 W solar panel and a USB air pump, but hang a 100 W LED off the wall socket or a tiny inverter and expect it to be “off‑grid.” When that inverter or battery pack runs flat, the lights die first, and anything running full DWC with no backup aeration is next.
2. Choosing the wrong system for low‑power use
Not every hydroponic method is a good candidate for off‑grid indoor use. Watching IG reels of stacked NFT rails and tower systems makes them look efficient, but those builds usually assume constant pump uptime and stable grid power.
What actually works in low‑power and outage‑prone situations:
- Kratky (passive, no pump, deep reservoir).
- Hybrid Kratky/DWC (root air gap plus gentle aeration that can be interrupted).
- Gravity‑fed or low‑head drip systems with a simple timer and generous emitters.
- A small, centralized DWC section with ultra‑efficient air, not a house full of bubbler buckets.
As seen in many beginner greenhouse tours, the stable systems are often boring: big black tanks, short runs of pipe, and crops matched to the easiest system. That is exactly the mindset you want indoors if your power is limited.
3. No plan for pump, power, or Wi‑Fi failure
A lot of “smart” hydroponics fails dumb. If your irrigation schedule lives in a cloud‑connected plug or an app‑only timer, a flaky router can kill your flow. If your system can’t survive a single missed pump cycle, it is not off‑grid‑ready.
In practice that means:
- Pumps that can run directly from DC (battery/solar) without Wi‑Fi in the loop.
- Systems that tolerate at least a few hours without active flow.
- Backup ways to move water or air by hand in a pinch.
Off‑grid design is about graceful degradation: if something fails, the system slides into a slower, less efficient mode, not instant crop loss.

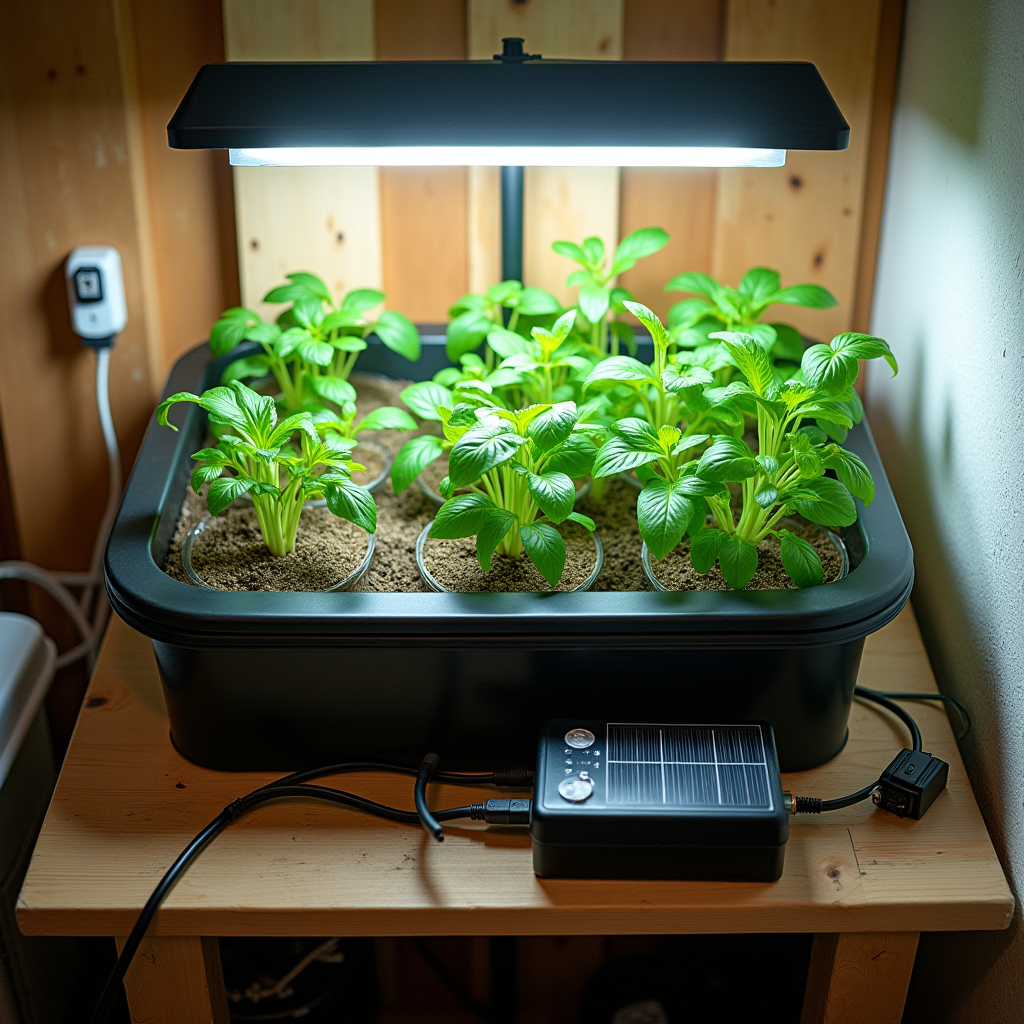
How To Fix It: System Designs That Actually Survive Low Power
Fixing off‑grid hydro is about picking the right method for the right job, then sizing power and reservoirs to match. Below are four practical system types that are working right now in small DIY builds and beginner greenhouses, adapted for indoor and balcony use.
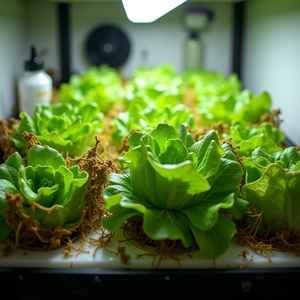
1. Pure Kratky: Your zero‑power base layer
If you want indoor hydro that stays running through any outage, Kratky is the foundation. No pumps, no air stones, no timers. Just a light‑proof container, nutrient solution, and plants.
Design rules for reliable Kratky indoors:
- Container depth and volume: For lettuce and herbs, aim for 8–12 L per plant site in a tote or bucket. Bigger volume means more stable pH, EC, and temperature.
- Light‑proof the reservoir: Algae eats oxygen and nutrients. Use opaque totes, black buckets, or blackout sleeves on jars to keep light off the solution.
- Correct starting level: Begin with the solution touching the bottom third of the net cup so early roots hit water.
- Let the air gap form: As the level drops, roots adapt. Do not keep topping right back to the net cup or you remove the plant’s built‑in oxygen zone.
- Top up only when needed: If plants are close to maturity and roots are well developed, you can let the level fall quite low. For longer cycles, top up to halfway between the current level and the original fill line with pH‑adjusted water.
Best crop choices for off‑grid Kratky:
- Loose‑leaf lettuces and cut‑and‑come‑again greens.
- Basil, cilantro, dill, parsley, chives.
- Fast Asian greens like pak choi and tatsoi.
Indoors, you will still need either a window with strong natural light or an LED, but the water side of the system is 100% outage‑proof.
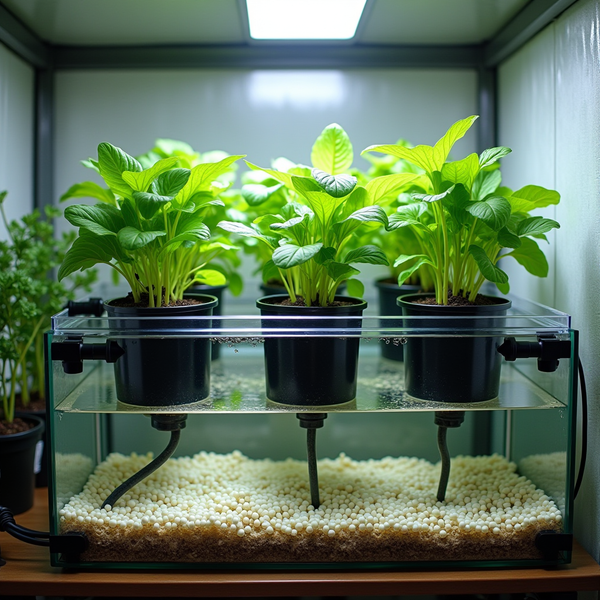
2. Hybrid Kratky/DWC: Resilient, low‑air demand buckets
Hybrid buckets combine the deep, mostly still reservoir of Kratky with gentle aeration. The idea is simple: design so the plants can tolerate hours without air if they have to, but run a low‑watt pump most of the time for faster growth.
Build outline:
- Use a 10–20 L opaque bucket or tote with a net‑pot lid.
- Fill to around the bottom third of the net pot, as in Kratky.
- Add a small air stone at the bottom, driven by a 3–5 W air pump.
- Allow the level to gradually drop to create a permanent air gap, even while aerated.
Why this works off‑grid:
- With that air gap, roots are not fully dependent on 24/7 bubbling.
- A power cut stops optimal growth, but usually does not instantly suffocate the root mass.
- A single efficient air pump can feed several buckets via a manifold, reducing total power draw.
Use this pattern for more demanding herbs (large basil bushes, mint) and compact fruiting plants like dwarf peppers or cherry tomatoes, where pure Kratky tends to struggle late in the cycle.
3. Gravity‑fed or low‑head drip: Controlled, intermittent flow
A gravity‑fed drip system is a smart move indoors when you want multiple plants but still need resilience. Instead of a strong submersible pump pushing water up high, you elevate a main reservoir and let gravity do the work.
Basic gravity‑fed layout:
- Reservoir on the top of a rack or wall shelf.
- Feed line running down to each plant site with simple drip emitters or open‑ended tubes.
- Return path (if recirculating) draining back to a lower catch basin.
- Optional low‑head pump used only to refill the top reservoir from a storage tank.
For indoor, low‑power use:
- Favor larger‑bore lines and simple outlets so minor debris does not clog and stop flow.
- Use a short duty cycle timer (for example, 1–2 minutes on every 30–60 minutes) to keep roots moist but not drowned.
- Keep reservoir sizes generous so a missed cycle does not instantly dry the medium.
This approach pairs well with coco/perlite or similar media in buckets or troughs. It consumes very little pump runtime and is easy to convert to partial manual watering during outages.
4. Low‑power DWC “core” with backup air
If you want true water‑culture indoors for heavier feeders, keep it small and over‑engineered on the air side.
Design guidelines:
- Centralize to one quality 3–5 W air pump feeding multiple buckets with a manifold.
- Run DC‑compatible air pumps where possible so you can power them from a small battery or USB power bank during outages.
- Use larger reservoirs (15–25 L per plant in buckets) to buffer temperature and nutrient swings.
- Maintain a slight air gap at the top of the root zone rather than flooding to the lid.
This “core DWC” layer should be treated as your most power‑sensitive zone. It gets priority on your battery and solar output, and you design the rest of the system (and crop choice) around keeping those roots oxygenated first.

What To Watch Long‑Term: Power, Crops, and Failure‑Proofing
Once you have a basic system running, keeping it alive for months or years under low‑power constraints comes down to four things: realistic crop choice, honest power math, simple nutrient management, and clear failure plans.
1. Choose crops that match your energy budget
Not every plant belongs in an off‑grid indoor rack. Fruit and large biomass cost you watts. To keep a low‑power system productive:
- Make 70–90% of your system leafy greens and herbs that thrive under 100–200 µmol/m²/s PPFD and moderate EC.
- Limit heavy fruiting crops (tomatoes, peppers, cucumbers) to a small, well‑lit corner if you really want them.
- Use compact or dwarf varieties where possible to reduce both lighting and nutrient demand.
This is exactly what you see in many efficient greenhouses: large areas in lettuce and herbs, with smaller zones for high‑energy crops.
2. Do the lighting and solar math up front
Lighting is the load that will push you off your solar or battery limits if you ignore it.
Quick sizing framework for an apartment rack:
- Decide how many shelves you truly need (start with one or two).
- For leafy greens, target 20–35 W of good LED per 0.1 m² (about 1 ft²) of grow area.
- Multiply by your planned photoperiod, typically 14–16 hours for greens.
- Add ~0.2 kWh/day overhead for air pumps and small fans.
Now check that against your solar and battery capacity. For example, if the total comes to ~2 kWh/day and you only have a 500 Wh battery and a 100 W panel, you are not off‑grid, you are on borrowed time. In that case you either shrink the grow area, reduce hours, or accept that the lights stay on grid and you only back up the pumps.
3. Keep nutrients and pH simple and stable
You don’t need lab‑grade management, but you do need consistency.
Baseline approach:
- Use a complete, reputable hydroponic nutrient suited to your water type.
- Run leafy greens at roughly 0.8–1.8 mS/cm EC and keep pH in the 5.8–6.3 band.
- Top up with plain, pH‑adjusted water as levels drop.
- Fully change solution every 1–3 weeks depending on reservoir size and crop load.
For off‑grid resilience, bigger reservoirs are your friend. A 40 L tote will ride out more pH and EC drift than a 4 L jar, especially when you are not watching it every day during a busy week.
4. Design explicit failure plans
Resilient systems are designed from the question, “What if this fails?”
Run through this checklist:
- If the power dies: Kratky keeps going. Hybrid/DWC gets emergency air from a small USB or battery air pump. Non‑critical lights shut off first.
- If the main pump fails: You can manually cycle nutrient through gravity or by lifting and dipping net cups. Drip systems can temporarily be watered by hand.
- If Wi‑Fi or smart plugs fail: Core life‑support (air, essential drip) runs on dumb mechanical or stand‑alone digital timers, or stays always‑on from DC.
For indoors in 2026, a very common pattern is: passive Kratky for the bulk of plants, a small DC‑powered air pump for a few DWC buckets, and then lights and non‑critical gadgets sitting on whatever power is left.
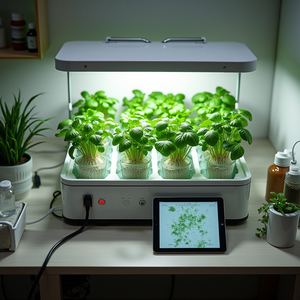
5. Example: A realistic off‑grid‑leaning apartment layout
Here is a simple, failure‑tolerant design you can copy and customize.
- Rack: 3‑tier metal shelf.
- Top shelf: Two or three 20–40 L Kratky totes, each with 6–8 net pots of lettuce and herbs. No pumps at all.
- Middle shelf: 2–3 hybrid Kratky/DWC buckets with a shared 5 W DC air pump. This is where you grow bigger basil, one dwarf tomato, or peppers.
- Bottom shelf: Battery, small charge controller, and nutrient mixing jugs. Keep electronics ventilated and away from spills.
- Lighting: One or two 60 W LED fixtures covering top and middle shelves, at ~25–35 cm over the canopy.
- Power: If running partial solar, a small LiFePO4 battery feeding the air pump and possibly one dimmable LED, with the rest on grid as backup.
This layout respects the reality most growers are facing: you want resilience and lower power use, not a romantic fantasy of running a full indoor farm on a phone‑charger‑sized panel.

Evidence From Real‑World Builds
None of this is theory‑only. Current DIY builds and greenhouse tours are already proving what works under power constraints.
- In recent system walk‑throughs, the most stable operations almost always revolve around a few core tanks with high volume and very simple plumbing, rather than dozens of small, fragile loops.
- Growers sharing their first greenhouse visits on Reddit consistently notice how “boring” but robust the commercial setups look: short pipe runs, oversized reservoirs, and crops matched to the easiest, most reliable method rather than the flashiest hardware.
- On social platforms, the no‑pump Kratky jars that last longer all have the same traits: opaque or sleeved containers, generous solution volume, and crops that mature fast. The pretty, over‑crowded jars with tiny volumes are the ones that crash.
The pattern is clear: low‑power hydroponics that actually works in 2026 is not about stacking more gadgets; it is about stripping the system down until you are left with only what the plants truly need. If you start from that point, then layer in solar, small pumps, and smart controls carefully, your system will keep running long after the trending reels have moved on.
As an Amazon Associate, I earn from qualifying purchases.