Stop Patchy Hydroponic Greens: How to Measure and Fix LED Lighting Uniformity in DWC & Aeroponics
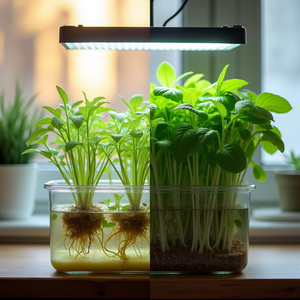
If half your DWC raft looks like a lush salad bar and the other half looks like it regrets ever germinating, it is probably not your nutrients. It is your light map - and right now, your plants are reading it like a bad weather forecast.
Dynamic, full-spectrum LEDs and closed-loop farms grab the headlines, but most home growers are still fighting the same boring enemy: uneven LED coverage that creates hot spots, shadows, and patchy growth. The good news: you do not need a lab, a PhD, or a rack of $1,000 sensors to fix it. You need a plan, a PAR meter (or a smart workaround), and a bit of geometry.
This guide walks through how to map PPFD in your DWC and aeroponic systems, set realistic uniformity targets, and then tune mounting height, spacing, diffusion, and reflectivity so your lettuce, basil, and coriander finish together this winter instead of in waves.
The Problem: Beautiful Lights, Ugly Canopy
Indoor hydroponic growers are used to chasing problems: root rot, pH drift, slimy airlines, or airstones that quit the day you leave town. But when your environment is stable, nutrients are dialed, and you still get:
- One side of the DWC tub with compact, dark green leaves, and the other side pale and stretched
- Aeroponic towers where the top tiers bolt and the bottom tiers sulk
- Outer plants with tight heads and a bright green core while the middle row never really bulks up
- Consistent roots but wildly inconsistent shoot size at harvest
you are usually looking at a lighting problem, not a nutrient problem.
Typical symptoms of poor LED uniformity in DWC and aeroponics:
- Patchy yields: you harvest the "good corner" a week earlier than the rest.
- Leggy or twisted growth: plants lean or stretch toward the brightest strip of the fixture.
- Bitter or stressed leaves: some plants run too hot under intense central diodes while others sit in the shade and sulk.
- Uneven maturity: in aeroponic towers, middle rings can get less light than top or bottom if the LED angle is wrong.
The frustrating part: your light looks bright and the advertised wattage seems plenty. But your plants respond to PPFD at leaf level, not lumens printed on a box. Light that is overly concentrated under the center of a fixture while dropping off sharply at the edges is exactly how you end up with a "salad gradient" across your raft or tower.
Because hydroponic systems like DWC and aeroponics already remove soil variability, lighting flaws show up more dramatically. If your EC, pH, and root health are all solid, the canopy becomes the loudest indicator that your photons are not evenly distributed, as many indoor growers find when they move from basic lighting to a properly mapped setup, as noted in this guide.

The Cause: PPFD, Uniformity Ratios, and Why Your Corners Suck
Plants do not care how "bright" a room looks to you. They care how many photosynthetically active photons hit a given square meter of leaf area every second. That is PPFD: Photosynthetic Photon Flux Density, measured in micromoles per square meter per second (µmol/m²/s).
For leafy greens and herbs in vegetative growth, most sources recommend the following ballpark PPFD ranges under LED lighting:
- Low light / nursery: 100 - 200 µmol/m²/s
- Standard leafy greens (DWC rafts, aeroponic towers): roughly 200 - 350 µmol/m²/s
- High-performance lettuce / basil: up to 400 - 500 µmol/m²/s if CO₂, nutrients, and temperature are controlled
That is the intensity side. The other half of the equation is uniformity: how similar that PPFD is from one plant site to the next. A setup where your center readings hit 450 µmol/m²/s and your corners slump at 150 µmol/m²/s will produce exactly what it measures: overdriven centers and malnourished edges.
When lighting designers talk about uniformity, they often use simple ratios like:
- Min:Avg PPFD - the lowest point divided by the average
- Min:Max PPFD - the lowest point divided by the highest
For small home grow setups, a practical target is:
- Min:Avg PPFD ≥ 0.7 across your active canopy area
- Min:Max PPFD ≥ 0.6 if you are running a single fixture over a rectangular bed or tower face
If your minimum PPFD is less than half your maximum, you will see noticeably uneven growth. This is especially common when:
- Your LED is too close to the canopy. Intensity spikes under the center diodes while edges fall off sharply.
- The fixtures are too small for the system footprint. Classic example: a single board light over a 4-foot DWC raft.
- No reflective boundaries. Light that hits dark walls or an open room is wasted instead of bouncing back into the canopy, as highlighted in this overview of hydroponic lighting.
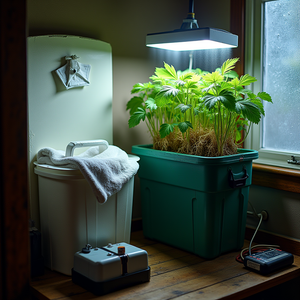
- Complex geometry in aeroponics. Vertical towers, bucket aeroponics, and multi-tier rigs create weird shadows if the LED angle and distance are not thought through.
Because DWC and aeroponic roots are supplied with near-constant nutrients and water, the shoot growth rate is often limited by light and temperature before anything else. When you clear up basics like EC, pH, and dissolved oxygen, any non-uniformity in lighting shows up very clearly in the canopy, which is why many growers see dramatic improvements in consistency when they invest in proper light layout, as reinforced in this hydroponics lighting guide.

The Solution: How To Map PPFD and Fix LED Uniformity
Now to the fun part: treating your grow area like a mini test lab and tuning it until every plant site sits in the same light zone. You do this in two phases:
- Map PPFD across your canopy.
- Adjust mounting height, angle, diffusion, spacing, and reflectivity until your uniformity hits your target.
Step 1: Choose a PPFD target for leafy greens
For home DWC and aeroponic greens, pick a realistic band rather than chasing maximum intensity. A good working range under LED for winter indoor production is:
- Low-power setups: Aim for 180 - 250 µmol/m²/s across most of the canopy.
- Decent modern LED panel or bar: Aim for 250 - 350 µmol/m²/s.
- Heavily optimized sealed room with great cooling and CO₂: Up to 400 - 450 µmol/m²/s.
More is not always better. Above your plants' comfort zone, you will drive tip burn, excess transpiration, and nutrient imbalances faster than you will add grams.
Step 2: Get a PAR meter (or the closest thing you can)
The ideal tool is a dedicated PAR meter that measures PPFD, as discussed in many modern lighting guides like this 2025 hydroponic lighting setup guide. Good quantum sensors are not cheap, but there are workable options:
- Full quantum PAR meter: Best accuracy; you plug in the sensor, hold it at canopy level, and read µmol/m²/s directly.
- Budget PAR/PPFD meter: Cheaper, less accurate at spectrum extremes, but still good enough to map hot and cold spots.
- Smartphone + manufacturer PPFD map: If you absolutely cannot get a meter, combine the fixture's published PPFD grid (at your mounting height) with a lux meter app to at least confirm relative brightness. This is not ideal, but better than guessing.
The key is consistency: use the same tool, at the same angle, at the same height as your plant canopy while you map.
Step 3: Build a simple PPFD grid
You do not need a fancy rig to gather useful data. Start with:
- DWC raft / lid: Divide the active grow area into a 3x3 or 4x4 grid. Mark the squares with a marker or tape.
- Aeroponic tower: Treat each ring or vertical face as a separate grid. Mark positions roughly where plant sites are.
Turn the light on, let it warm up for a few minutes, then hold your PAR sensor at canopy height and record the PPFD at each grid point. For a tower, measure at the same distance from the light each time (for example 15 cm from the tower wall) at several heights.
Write the numbers down or drop them into a spreadsheet. You want three things:
- The average PPFD.
- The minimum PPFD.
- The maximum PPFD.
From there, calculate:
- Min:Avg = Min ÷ Avg
- Min:Max = Min ÷ Max
If Min:Avg is below 0.7 or Min:Max is below 0.6, expect visible unevenness.
Step 4: Raise and/or spread your LEDs
The quickest way to reduce hot spots is to raise the light. As distance increases, the intensity drops, but the pattern smooths out.
- Start high, come down: If your fixture manufacturer recommends 12 - 18 inches (30 - 45 cm) for veg, start at the higher end, map PPFD, then lower in 2 - 3 cm steps until your average PPFD and uniformity look good.
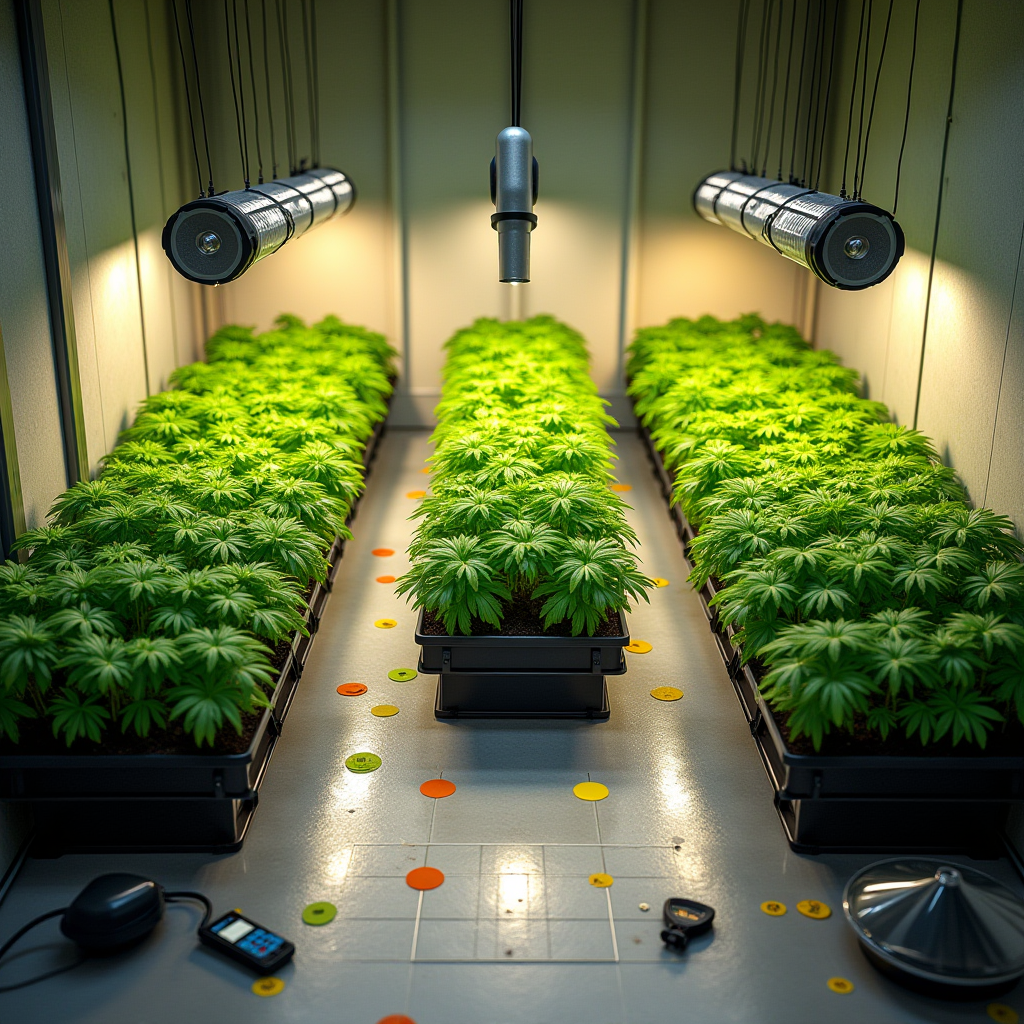
- Use bar-style or multi-panel layouts: A single tight diode cluster creates a harsh hot spot. Splitting power across two smaller fixtures or bar lights spreads light more evenly over a DWC tub or tower face.
- Stagger over aeroponics: With towers or bucket aeroponics, angle multiple fixtures so beams overlap across the "shadowy" middle bands.
Re-map PPFD after each change. The goal is to land in your target intensity band while getting your Min:Avg ratio close to or above 0.7.
Step 5: Add diffusion and reflective surfaces
Once mounting height and spacing are improved, you can fine-tune with diffusion and reflectivity.
- Diffusion: A frosted acrylic sheet or diffusing film a few centimeters below harsh diodes can smooth out hot streaks, trading a bit of peak intensity for a much nicer uniformity curve.
- Reflective boundaries: Wrap the sides of your DWC or aeroponic area with flat white walls or Mylar. As lighting guides repeatedly note, light that bounces off white or reflective surfaces gets recycled back into the canopy instead of being lost to the room, improving overall efficiency and uniformity, as highlighted in this grow light setup article.
- Beware mirrors and shiny foil: They cause specular reflections and weird stripes. Flat white paint or horticultural Mylar is safer and more predictable.
Step 6: Match plant layout to the light footprint
Even after optimizing the light, you will still have a few slightly stronger and weaker zones. Use them deliberately:
- High-intensity zones: Place fast-growing, light-hungry greens like basil and chard under the center of the footprint.
- Moderate zones: Put more shade-tolerant greens such as some lettuces and herbs in peripheral areas.
- Aeroponic towers: If the top tier is brighter, plant crops that tolerate higher light up top and more sensitive greens lower down.
This is the same idea commercial vertical farms use, just scaled to your balcony tent or spare-room rack.
The Evidence: Dialing In Real-World Numbers For DWC & Aeroponics
You do not need to copy commercial farm numbers exactly, but it is worth anchoring your DIY tweaks to some real benchmarks from controlled-environment agriculture and experienced indoor growers.
Light levels and uniformity
Modern LED-focused hydroponic lighting guides repeatedly point to three pillars: correct spectrum, adequate intensity, and even distribution, as summarized in resources like this lighting overview and this practical guide. For leafy greens and herbs in DWC, NFT, and aeroponics:
- PPFD: Many successful indoor growers run 200 - 350 µmol/m²/s for lettuce and similar greens under LEDs, with higher values reserved for tightly managed environments.
- Photoperiod: 14 - 18 hours of light per day is typical for vegetative crops, as noted in multiple hydroponic lighting discussions such as this article on lighting requirements.
- Uniformity: Commercial vertical farms often design for Min:Avg PPFD ratios above 0.75 to keep consistency high and harvest scheduling predictable. A home grower hitting 0.7 or better over a small footprint will already see a visible improvement in evenness.
Environmental context
Light will only translate into yield if the rest of your environment is in the right ballpark. For DWC and aeroponics with LEDs:
- Temperature: Most leafy greens like 18 - 24°C at the canopy. Higher temps increase water and nutrient demand under strong light.
- Reservoir temps: For DWC and aeroponics, 18 - 22°C is a good target to balance growth and oxygen levels.
- pH: 5.8 - 6.3 fits most common hydroponic nutrient lines for greens.
- EC: Somewhere in the 1.0 - 1.8 mS/cm range for leafy greens, depending on cultivar, stage, and environment.
The nice part is that once you stabilize pH, EC, and temperature, adjusting light uniformity becomes very obvious: you tighten the spread of PPFD across the raft or tower, and harvest day stops being a lottery. Plants finish within a much narrower window and look like they grew in the same room, because they finally did - in terms of photons.
So this winter, instead of just bumping your LED to "max" and hoping for the best, treat your DWC tub or aeroponic tower like a tiny controlled-environment farm. Map PPFD, set clear uniformity targets, and then move hardware until your numbers agree with your goals. Your greens will tell you quickly when you have it right: no more good corner, bad corner - just a wall of ready-to-cut, evenly grown plants.

As an Amazon Associate, I earn from qualifying purchases.