Rooftop Hydroponic Farm Design (2026): Load Limits, Wind Anchoring, Waterproofing, Drainage, and Urban Permits
“Rooftop farms are light, it’s only water and pipes” is the fastest way to end up with a leaking, overloaded roof that no engineer will sign off on.
If you want a rooftop hydroponic farm that actually passes structural checks, survives wind, keeps the roof warranty intact, and doesn’t drown the floor below every time it rains, you need to treat it like a small piece of infrastructure, not a hobby build.
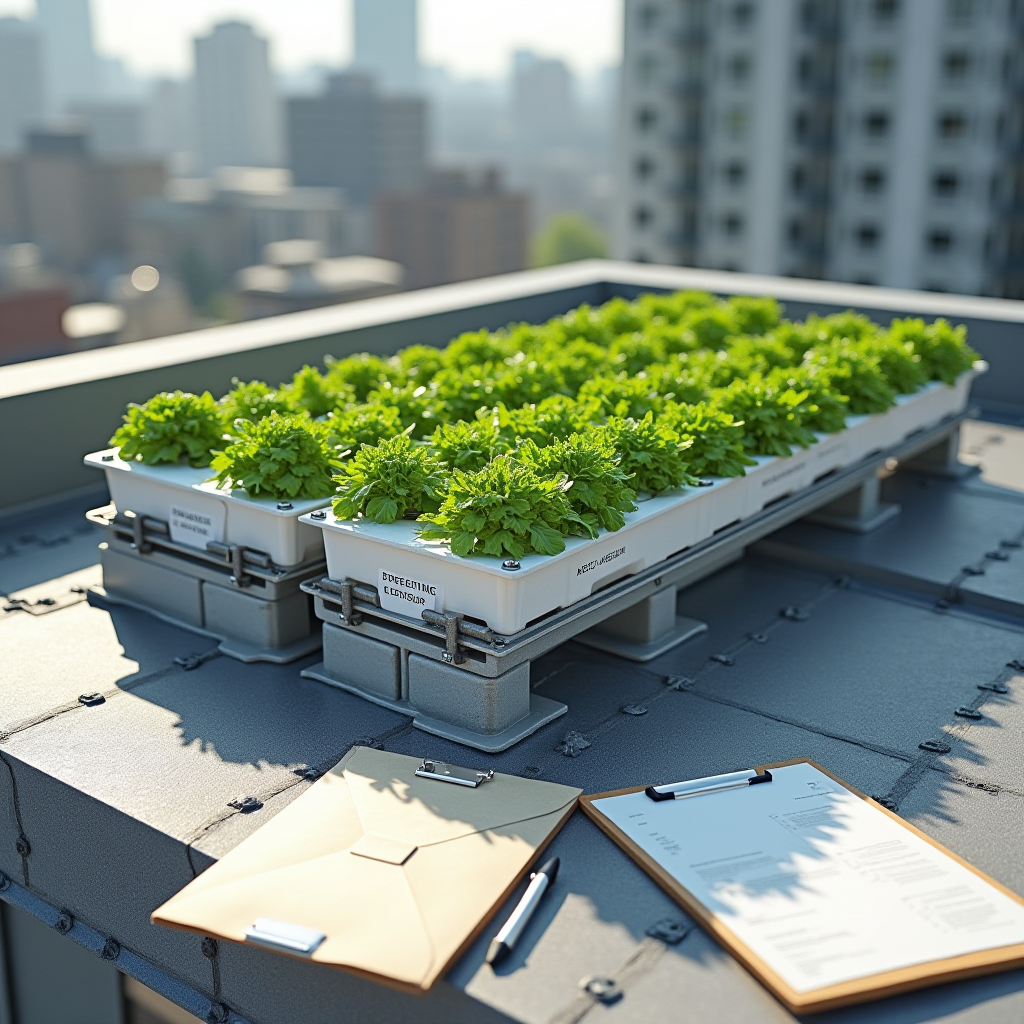
Projects like the new Cape Town rooftop hydroponic trial are showing how much yield you can pull out of underused roofs in dense cities, but they also highlight the gap: most growers have never seen proper load, drainage, and permit numbers spelled out in grower language.This Cape Town project uses compact hydroponics to supply local households, and it sits on a real roof, with real engineering constraints. That’s our reference point here.
This guide walks you through the rooftop-specific design moves: working out structural capacity, choosing lighter systems (NFT vs DWC vs Kratky), anchoring against wind, building waterproof and root-safe layers, designing drainage and rain capture, and getting through permits and fire code without nasty surprises.
1. Common mistakes in rooftop hydroponic design
Let’s start with the failure points I see over and over when growers try to “scale up” to a roof.
1.1 Guessing at structural load instead of doing the math
The biggest mistake is treating the roof like infinite capacity. Typical flat roofs on older urban buildings were never designed for concentrated water tanks, greenhouses, or dense racks of nutrient film channels.
- No one checks kg/m² or lb/ft²: Growers stack NFT channels or place IBC totes, assuming “it’s just water.”
- Loads are not spread: Heavy DWC beds sit on a few feet of roof instead of over beams or load-bearing walls.
- No allowance for live load: People, tools, occasional stockpiles, snow (in cold climates), or wet media are ignored.
Water is heavy. 1 L = 1 kg. If you build a DWC bed with 20 cm water depth across 10 m², that’s 2,000 L or ~2,000 kg of water alone, before structure, plants, or people. That is 200 kg/m² from water, concentrated in one patch.
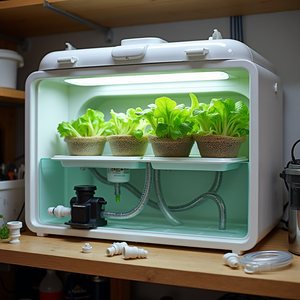
1.2 Choosing heavy systems (deep beds, big tanks) by default
On the ground, I love big DWC beds and chunky media-based systems. On a roof, they can be dead weight:
- DWC and flood-and-drain tables carry 100–250 kg/m² or more if not carefully designed shallow.
- Large storage tanks (1000 L IBCs) create big point loads if not spread over beams or a plinth.
- Thick media like gravel adds massive dead load with very little benefit vs lighter options.
Meanwhile, NFT, thin-film DWC, and well-designed Kratky totes can deliver harvestable biomass with a fraction of the water per square foot.
1.3 Ignoring wind: unsecured systems on open roofs
Roofs behave like wind tunnels. Even “moderate” gusts that you barely notice on the street can rip lightweight systems apart at parapet height.
- Unanchored NFT channels acting like sails.
- Poly tunnels or hoop structures not tied into the roof structure.
- Loose Kratky totes and barrels that can shift, tip, or slide in storms.
That’s not just a crop loss risk; it’s a public safety and liability problem.
1.4 Damaging the waterproofing and killing the roof warranty
Another classic: screwing frames directly into the waterproofing, dragging tanks across the membrane, or letting nutrient spills sit under trays.
- Penetrations without proper detailing lead to leaks.
- No root or chemical barrier between nutrient spills and the membrane.
- No sacrificial layer under racks, tanks, and walkways.
Most roof warranties are voided by unapproved fixings or chemical contact. That matters if you ever want the building owner or insurer on your side.
1.5 Poor drainage layout: ponding, overflow, and salt stains
Hydroponic farms handle both irrigation water and rain. If you ignore slope and drainage points:
- Water ponds under racks and tanks instead of flowing to drains.
- Overflow from reservoirs runs across the roof instead of into a controlled gully or collection tank.
- Nutrient spills leave salt streaks that degrade membranes over time.
Rain events then become stress events, not free water.
1.6 Skipping fire code, access, and permit checks
Rooftop systems sit in a uniquely regulated zone. Urban codes often treat roofs like mechanical plant areas.
- Blocked access paths to roof hatches or fire stairs.
- Improvised electrical extension leads lying on the deck.
- No permits for added structures, greenhouses, or load changes.
The Cape Town rooftop initiative was deliberately designed within local municipal frameworks to enable replication and community access (as outlined here). That is not accidental; it is planned around policy and safety from day one.

2. Why these rooftop mistakes happen
2.1 Confusing plant weight with system weight
Most growers think in terms of plant count and canopy coverage. Structural engineers think in kN/m² or kg/m². Those are not the same thing.
- Plants are light compared to water and structure. A full head of lettuce may weigh 0.3–0.5 kg. The channel and water under it can be 5–20 times that per plant footprint.
- Support structures add up: frames, walkways, handrails, and greenhouse structures often weigh more than the hydroponic hardware.
On the engineering side, many professionals are unfamiliar with hydroponic layouts, so their default answer is “no” or “limit everything,” because no one is bringing them clean weight per square foot estimates.
2.2 Misunderstanding how weight distributes on roofs
Roofs are not uniform slabs of strength. Key concepts:
- Dead load is permanent static weight: tanks, frames, reservoirs, media.
- Live load is changeable weight: people, movable tanks, temporary storage, snow.
- Point vs distributed load: A 500 kg tank on a 1 m² base is much more critical than 500 kg spread over 10 m² of decking.
Your DWC bed might be “only” 150 kg/m², but if it sits over a weak span or unsupported area, that can be a problem even if the code live load rating is higher.
2.3 Underestimating wind pressure on small, light systems
Urban winds accelerate over roofs and around parapets. Lightweight hydro hardware, especially empty channels or partially filled Kratky tubs, behaves like a mix of sails and kites.
Where a ground-level NFT table shrugs off a gust, a roof-mounted one can lift, pivot, or walk across the surface if it is not anchored or ballasted. Even enclosed roof greenhouses have to deal with uplift forces on the structure itself.
2.4 Treating waterproofing like “just another floor”
Waterproofing membranes are engineered assemblies, not generic plastic flooring.
- They can be chemically sensitive to fertilizers, acids, and alkalis.
- They are mechanically sensitive to abrasion, point loads, and penetrations.
- They often have a warranty backed by strict conditions about what can sit on them.
Hydroponic farms introduce constant water exposure, salt, and traffic. Without a protective build-up (root barrier, drainage mat, pavers), failure is a matter of time.
2.5 Assuming “it’s just a garden” so permits don’t apply
Once you add structures, electrical systems, or change the use of the roof, regulators do not see a casual garden. They see a change in load, risk, and sometimes occupancy.
- Structural modifications and significant added load usually require engineering sign-off.
- Greenhouses or shade structures may be treated as accessory buildings.
- Commercial activity (selling produce) can trigger different zoning or health requirements.
The Cape Town project was integrated as a local food and skills initiative that aligns with city objectives for resilience and livelihoods as the researchers explain, and it still had to navigate ownership, access, and maintenance responsibilities. Expect the same in your city, if not more.

3. How to design a safe, efficient rooftop hydroponic farm
3.1 Step 1: Confirm structural load limits (kg/m² or lb/ft²)
This is non-negotiable: before buying hardware, get structural information.
- Obtain building data:
- Ask the owner or facilities manager for structural drawings or the original design live load rating for the roof (often 1.5–4.0 kN/m², roughly 150–400 kg/m², but this varies by region, age, and use).
- If unavailable, budget for a structural engineer to do an assessment.
- Clarify design intent:
- Is the roof rated only for maintenance access, or for occupied terraces?
- Are there designated “no-load” zones (e.g. over lightweight services or skylights)?
- Map structural lines:
- Locate beams, columns, parapets, and load-bearing walls under the roof slab.
- Plan heavy tanks and main systems directly above these lines.
Your design target should always leave margin. If your engineer says 250 kg/m² allowable, aim to stay comfortably under that for permanent loads, then add live loads on top in your calculations.
3.2 Step 2: Estimate hydroponic system weight per square foot
Now translate your grow plan into numbers. Here’s a simplified comparison for typical systems, assuming modest frame weights and 50–70% coverage efficiency.
NFT (Nutrient Film Technique)
- Water depth in channels: ~3–5 mm.
- Approximate water weight: 5–15 kg/m² of canopy area.
- Total system weight (channels + water + light frame): often in the ~20–40 kg/m² range when designed with lightweight frames.
This is why NFT is a strong candidate for roofs when you need low mass per square foot.
Shallow DWC / raft systems
- Water depth: 10–15 cm.
- Water weight: 100–150 kg/m².
- Add rafts, framing, and access walkways: 130–200 kg/m² typical.
Still workable on many roofs with proper engineering, but you are now using a big chunk of your load budget on water alone.
Deep DWC beds and media-heavy systems
- Water depth: 20–30 cm or more.
- Water weight: 200–300 kg/m².
- Media beds with gravel or wet expanded clay can exceed this easily.
These often push you near or past allowable roof loads unless you stay very local to beams or accept a much smaller footprint.
Kratky bins and totes
- Individual totes usually hold 40–100 L (40–100 kg) each.
- Spread over shelving or racks, you can keep localized loads moderate.
- System weight per square meter depends heavily on spacing; treat them like mini DWC reservoirs and calculate case by case.
For quick estimates, use this process:
- Calculate total water volume (L) in each system element, multiply by 1 kg/L.
- Add hardware: channels, racks, tanks, lights. If unsure, assume 10–20 kg/m² as a placeholder for lightweight frames.
- Add people: assume at least 100 kg per worker in the area, then distribute over the area of their working zone (e.g. 100–150 kg/m² added live load locally).
- Divide by footprint area to get kg/m² or convert to lb/ft² (multiply kg/m² by 0.2048).
Take that to your engineer for a sanity check.
3.3 Step 3: Choose roof-friendly systems and layouts
With numbers in hand, choose systems that meet your load budget and crop goals.
- Prefer NFT or low-profile channels for leafy greens and herbs. Low water volume, high plant density.
- Use shallow DWC / raft selectively in areas with known structural strength (over beams, near columns).
- Use Kratky totes where you need modularity, but manage clustering so local loads stay within limits.
- Avoid deep, media-heavy beds unless a structural engineer explicitly allows them and you keep them small and well-positioned.
Layout tips:
- Run channels perpendicular to parapets where possible to reduce wind exposure.
- Group heavy tanks near structural supports and drainage points.
- Keep clear, code-compliant walkways to roof access points and mechanical equipment.
3.4 Step 4: Design wind anchoring and parapet-friendly layouts
Wind design is as critical as weight design.
- Use ballast, not random fasteners: Weight down racks and channels with concrete pavers or ballast trays sitting on protective mats, instead of drilling into the membrane.
- Tie into parapets and structural elements using approved brackets and flashings where penetrations are allowed.
- Orient systems with wind: Lower profiles near exposed edges, taller frames further back, creating a stepped windbreak.
- Secure lids and rafts on DWC and Kratky systems so they cannot lift in gusts.
If you are adding a greenhouse or poly tunnel, work with an engineer familiar with local wind codes. Even lightweight structures require proper anchoring and uplift calculations.
3.5 Step 5: Waterproofing build-up and root/chemical protection
Your job is to farm on top of the roof, not directly on the membrane. A typical safe build-up (always adapt to manufacturer specs) looks like:
- Existing waterproofing membrane (left intact).
- Root barrier / chemical-resistant layer rated for contact with fertilizer solutions.
- Drainage mat or board to allow water to flow under pavers or racks.
- Protective geotextile or slip layer to prevent abrasion.
- Pavers, grating, or raised feet for racks and tanks, spreading load and allowing water flow.
Key rules:
- Never drag heavy tanks or frames directly on the membrane.
- Use wide feet or pads under legs to reduce point loads.
- Contain all reservoirs so overflow is directed to drains, not across the roof.
3.6 Step 6: Drainage slope, overflows, and rainwater capture
Roofs usually have a built-in slope (often 1–2%) toward drains. Your design must respect that.
- Map high and low points of the roof and locate existing drains and scuppers.
- Keep drains accessible: no blocking or burying under racks.
- Route system overflows via pipes or hoses directly into drains or storage tanks, not onto open roof.
For rainwater capture:
- Use pre-filtration (leaf screens, first-flush diverters) before storage tanks.
- Test collected water and adjust pH/EC before blending with nutrient stock.
- Protect tanks from light to avoid algae.
This is exactly where rooftop farms can shine in water-stressed cities like Cape Town: decoupling food production from municipal water as far as quality and regulations allow, while staying within building limits.
3.7 Step 7: Electrical, nutrient management, and safety
Rooftop hydroponics combines water, electricity, and exposure. Respect that combination.
- Electrical:
- Use weather-rated conduits, boxes, and outlets (IP-rated for outdoor use).
- Keep all connections off the deck and away from pooled water areas.
- Use RCD/GFCI protection on all circuits serving pumps and controllers.
- Nutrient management:
- Store concentrates in secondary containment trays.
- Calibrate pH and EC meters regularly; rooftop heat and UV are rough on cheap gear.
- Plan shaded spots for reservoirs to avoid overheating and rapid pH drift.
- General safety:
- Install non-slip walkways or grating, especially near tanks and drains.
- Use guardrails if you work within reach of roof edges.
- Keep a simple spill response kit on-site (absorbent pads, neutralizing agents, tools).

4. What to watch long-term: permits, fire code, and performance
4.1 Navigating permits and urban regulations
Every city has its own rules, but the process usually follows a similar pattern.
- Stakeholder buy-in:
- Get the building owner or body corporate on board early.
- Clarify responsibilities for maintenance, access, and liability.
- Planning and zoning check:
- Confirm whether rooftop farming is allowed as-of-right, or needs a special permit.
- Check rules on height, setbacks, and visibility for any greenhouse or shade structures.
- Building permit / structural sign-off:
- Submit a load plan with engineer’s calculations and details on anchoring and waterproofing interfaces.
- Include manufacturer data sheets for key components if required.
- Health, safety, and environmental:
- For commercial projects, check requirements for food safety, chemical storage, and worker safety.
- Some cities have incentives or frameworks for green roofs and urban farms; plug into those where possible.
The Cape Town research team worked with city partners to ensure their rooftop hydroponics model could be replicated in low-income neighborhoods, which meant deliberately aligning with existing policies rather than treating the roof as a free-for-all (see their overview). Do the same in your jurisdiction.
4.2 Fire code and access
Fire code is where many rooftop farms stumble late in the process.
- Maintain egress routes: Roof doors, hatches, and pathways to stairs or ladders must stay clear to the width required by code.
- Non-combustible structures: In some regions, rooftop greenhouses and enclosures must meet specific fire ratings.
- Storage limits: Keep flammable materials minimal and stored in rated cabinets if required.
- Signage and lighting: Emergency lighting and clear signage may be required if staff are working at night.
Work with your fire authority early; they can be allies if you show a clear, safe layout.
4.3 Monitoring structural and waterproofing health
Once you are live, treat structure and waterproofing like you treat pH and EC: monitored and logged.
- Inspect for cracks, ponding, or settlement under heavy systems every few months.
- Look for stains or damp patches on ceilings below the roof, especially after storms.
- Record any changes in system layout or tank sizes and update your load map.
- Schedule regular membrane inspections with the building’s waterproofing contractor.
4.4 Performance metrics: making the roof earn its keep
Finally, make the engineering work worth it. Track how the rooftop farm is performing.
- Yield per m² of roof: track harvest weight vs usable growing area.
- Water use per kg of produce: tighten leaks, evaporation, and overflows.
- Energy use per kg: especially if you add supplemental lighting or climate control.
- System uptime: days of continuous operation without pump or power failures.
This is the “data backbone” that allowed the Cape Town rooftop hydroponics pilot to argue for scaling: measurable contributions to food access, water savings, and job creation, not just nice photos of pipes and plants.
4.5 When to scale up, and when to stop
If your pilot layout is robust, the temptation is to keep packing the roof. Resist that until you re-check the numbers.
- Recalculate total load and submit updated plans if you add new tanks or heavy systems.
- Revisit wind and drainage as your footprint grows; what worked at 20 m² might not work at 200 m².
- Keep yield and reliability per m² as your benchmark, not “maximum coverage.”
A safe, well-documented rooftop hydroponic farm is an asset that landlords, insurers, and city planners can get behind. A risky, overloaded one closes doors for everyone.
Design yours like it has to pass a structural inspection tomorrow, ride out a storm next week, and still be feeding people five years from now. Because it will.
As an Amazon Associate, I earn from qualifying purchases.