Reusing Dehumidifier & HVAC Condensate in Hydroponics: A Safe, Food‑Grade SOP for Water‑Scarce Indoor Farms (2026)
1. Common mistakes growers make with condensate reuse
“Dehumidifier water is basically distilled, so it has to be clean.” That assumption is one of the fastest ways to put both yields and food safety at risk in a modern indoor farm.
Right now, water is the limiting input for a lot of growers. Cape Town’s urban farms are turning to hydroponics to stretch every liter in a drying climate, as covered in this report on Cape Town’s urban farmers. Abu Dhabi is seeing a surge in food and beverage and agri‑tech licenses, with capital flowing into climate‑controlled production in one of the most water‑stressed markets on earth, as noted in this overview of Abu Dhabi’s food sector growth. Community projects in arid regions are also leaning on hydro to make local food possible, as described in this desert community hydroponics feature.
At the same time, indoor farms are literally throwing away thousands of liters of “free” water every month from dehumidifiers and HVAC coils. Most growers know it feels like a waste, but do not have a validated, food‑grade way to reuse it. So they either:
- Dump all condensate to drain “to be safe”, and overspend on municipal or RO make‑up water.
- Or they pipe raw condensate straight into their Kratky, DWC, or fertigation tanks with no air gap, no treatment, and no records… and hope nothing shows up in an audit.
Here are the most common mistakes I see when people try to reuse dehumidifier or HVAC condensate in hydroponics.
1.1 Assuming condensate is automatically potable and food‑safe
Condensate looks like distilled water, but it is not guaranteed clean:
- It can pick up metals (copper, zinc, sometimes lead) from coils and fittings.
- Drain pans and lines often host biofilms, especially in warm, humid rooms.
- Dust, spores, and VOCs in grow‑room air can end up in the water as it condenses and drains.
Untreated condensate can still give you good‑looking plants in the short term, but you are flying blind on both food safety and long‑term system health.
1.2 Direct plumbing with no air gap or backflow protection
A very common “quick fix” is to run a hose from the dehumidifier or AHU drain straight into a nutrient reservoir. That creates several problems:
- No air gap: you risk back‑siphoning nutrient solution into the HVAC system if a pump stops or a line gets blocked.
- No cross‑connection protection: from an auditor’s perspective, it looks like a direct connection between process water and sanitary or building drains.
- Zero control over where first‑flush dirt and coil debris go; it all ends up in your nutrient tank.
1.3 Skipping pretreatment and disinfection
Another big mistake: treating condensate as if it were pure RO water and skipping filtration and disinfection. In practice:
- Fine particles and biofilm chunks get pulled straight into DWC reservoirs, NFT channels, or drip lines.
- Microbial loads build up in storage tanks, especially if they are translucent or left open.
- Any pathogens that do get in now have a direct path into roots and recirculating systems.
For small Kratky jars on a home shelf, the risk is mainly root health. In a commercial leafy‑green line, it becomes a food safety issue that will show up in a HACCP review.
1.4 Using 100% condensate without remineralizing or blending
Condensate is typically low‑EC, low‑alkalinity water, very similar to RO. If you dump nutrients into it without thinking about calcium, magnesium, and alkalinity, you can run into:
- Weak buffering and fast pH swings in both Kratky and DWC.
- Calcium and magnesium deficiencies in fast‑growing crops.
- Unstable EC when plants are under heavy transpiration load.
The net result: plants that look good for two weeks and then start throwing tip burn, edge necrosis, and patchy chlorosis once tanks are a few weeks old.
1.5 Zero documentation for audits
As indoor farming scales in water‑scarce cities, regulators are paying more attention to environmental and food‑safety tradeoffs, like those discussed in this analysis of sustainable foods and hidden costs. If you are selling wholesale or under a recognized safety standard and your HACCP plan says “source water: potable”, but you are feeding untested HVAC condensate to your roots, an auditor will notice.
Typical documentation gaps:
- No schematic of how condensate is collected and treated.
- No written SOP defining filters, UV/ozone, sampling, or corrective actions.
- No testing records for metals or microbial indicators.
The good news: all of these mistakes are fixable with a clear SOP and a small amount of hardware.

2. Why these mistakes happen (and what the water is really doing)
To design a safe, repeatable condensate SOP, you need to understand what this water is and how it behaves in hydroponic systems.
2.1 What dehumidifier and HVAC condensate actually is
Any time warm, humid air passes over a cold coil (dehumidifier, mini‑split, rooftop AHU, etc.), water vapor condenses and runs off into a drain pan. In a sealed grow room or vertical farm, a huge portion of the water you feed to your Kratky, DWC, NFT, or drip systems eventually comes back out as condensate on those coils.
Key properties of untreated condensate:
- Very low EC. It is close to distilled water, so starting EC is often near zero.
- Low alkalinity. There is very little natural buffering, so pH can swing quickly after nutrient dosing.
- Slightly acidic pH (often 5 to 6) due to dissolved CO₂ and contact with metals or plastics.
- Zero nutrients. No N, P, K, Ca, Mg. You must supply everything in the nutrient solution.
- Potential contaminants: biofilms in pans and drains, metals from coils, dust and spores from room air.
So it is a great technical starting point for nutrient control, but only after you clean it up and verify it.
2.2 Why it is attractive for water‑scarce indoor farms
In arid cities or during drought restrictions, make‑up water and discharge are often the biggest operating constraints on indoor farms and community hydro projects. The same climate pressures pushing Cape Town growers toward hydroponics and pushing desert communities to set up sheds full of leafy greens also make condensate too valuable to waste.
In a well‑sealed farm, it is realistic to cover 50–80% of your irrigation demand with treated condensate if you:
- Capture most of the dehumidifier and HVAC condensate in dedicated lines.
- Return it to a central water treatment skid instead of to drain.
- Blend it with any RO or municipal feed as needed.
That level of reuse is enough to change the economics of running a farm in a desert industrial park or a water‑restricted suburb.
2.3 Where the risk actually lives: metals, microbes, and paperwork
From a plant and food‑safety standpoint, the critical risks are:
- Metals: Copper and zinc can leach from coils and fittings. Copper in particular is phytotoxic at relatively low concentrations in hydroponic systems. Lead is a concern in older buildings or where legacy plumbing is present.
- Microorganisms: Biofilms in pans and drains are a reservoir for bacteria and fungi. Once those cells or fragments get into a recirculating DWC or NFT system, they spread everywhere.
- Unknown coil treatments: Some HVAC maintenance programs rely on coil coatings or pan tablets that are not intended for food‑contact water.
- Documentation gaps: Even if your treatment is solid, if you do not have a written SOP, monitoring plan, and test results, it will not pass a serious audit.
If you address those four items directly in your design and SOP, the technical side of reusing condensate in Kratky, DWC, and similar systems becomes straightforward.

3. How to fix it: a step‑by‑step, food‑grade SOP for condensate reuse
This section gives you a practical, auditable workflow you can adapt straight into your farm’s SOP binder. The goal: safely cover 50–80% of your irrigation with condensate without compromising yield or food safety.
3.1 Collection: keep it clean and separated from waste
3.1.1 Map and label your condensate sources
- Identify every dehumidifier, AC, heat pump, and AHU that serves grow rooms.
- Confirm how its condensate currently drains (to floor drain, sump, outside, etc.).
- Decide which units will feed your “food‑use condensate” system. Label those drain lines clearly.
3.1.2 Use food‑compatible plumbing and hardware
- Run dedicated condensate lines in PVC, PE, or PP from each selected unit to a central condensate header.
- Avoid copper wherever possible to minimize Cu pickup.
- Maintain consistent slope (1–2%) and avoid low spots where water pools.
- Install clean‑out tees so you can flush biofilms and debris.
3.1.3 Air gaps and first‑flush diverters
- Terminate the final condensate header above your storage tank with a visible air gap. No submerged inlets.
- Add a simple first‑flush diverter if coils get dusty: the first few liters after each shutdown/startup cycle can be sent to drain before the flow switches to the tank.
- Install backflow prevention on any line that could conceivably see pressure from pumps downstream.
3.2 Storage: dark, closed, and easy to sanitize
3.2.1 Tank selection and layout
- Use opaque, food‑grade tanks (HDPE or similar) rated for water and compatible with NSF/ANSI 61 concepts where possible.
- Size for at least 1–2 days of expected condensate production to buffer fluctuations.
- Fit tanks with secure lids, sampling ports, and bottom drains for cleaning.
3.2.2 In‑tank management
- Install a small recirculation loop (low‑head pump) to keep the tank mixed and avoid stagnant zones.
- Place a coarse screen or basket strainer (80–100 mesh) on the inlet line to catch larger debris.
- Log basic parameters (volume, visual clarity, odor) daily or weekly depending on scale.
3.2.3 Cleaning schedule
Write a simple CIP‑style procedure:
- Frequency: at least every 3–6 months, more often in warm climates or early in system life.
- Steps:
- Drain tank completely.
- Scrub internal surfaces with brushes and a surfactant cleaner.
- Rinse, then disinfect with an approved sanitizer (for example, PAA at label rates or a chlorine solution).
- Final rinse with treated water if needed. Return to service.
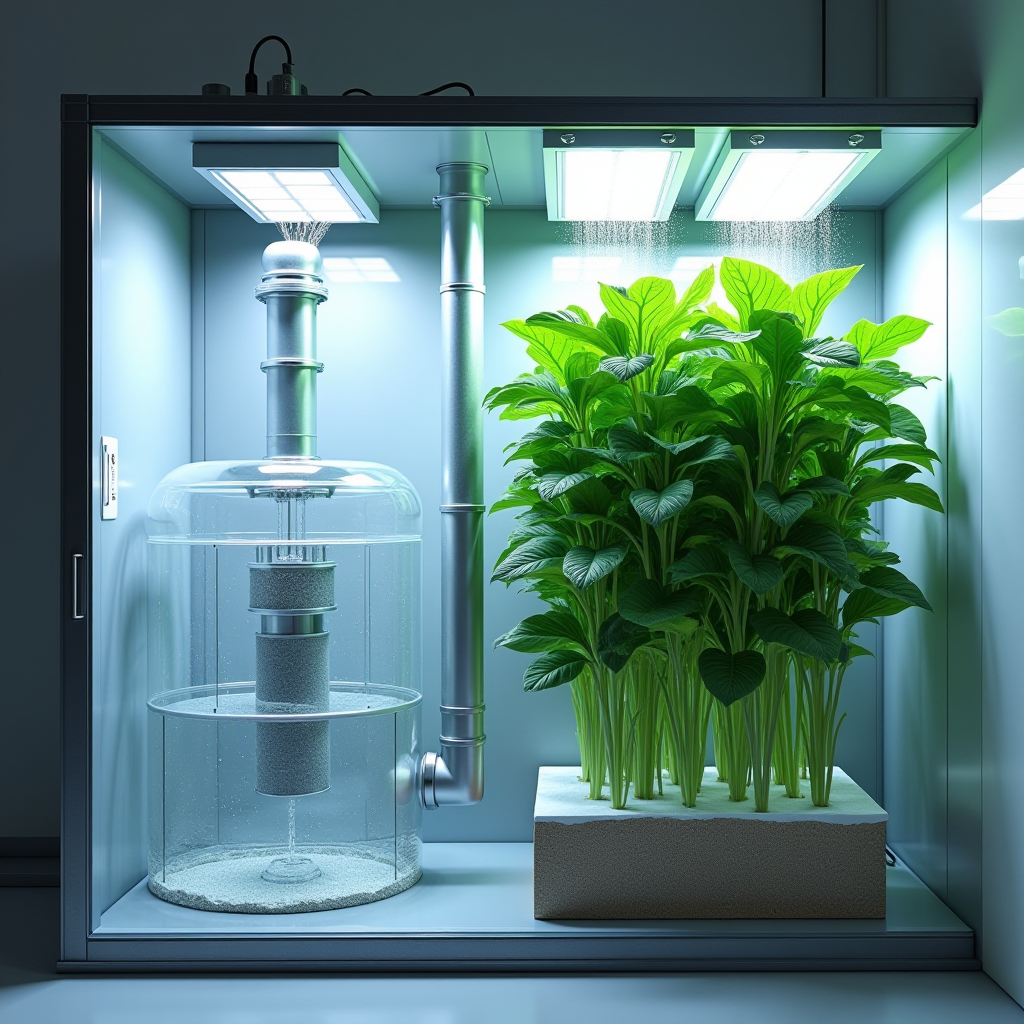
3.3 Pretreatment: sediment and carbon
Next, set up a simple low‑maintenance Pretreatment Train between the condensate tank and your main disinfection step.
- Stage 1: Sediment filter
- 5–20 µm cartridge or bag filter to remove fine particles and biofilm fragments.
- Monitor pressure drop or set a visual replacement schedule based on hours and appearance.
- Stage 2: Carbon filter (optional but recommended)
- Granular activated carbon (GAC) or carbon block to remove organics, off‑odors, and some residual chemicals.
- Carbon can support bacterial growth if left idle. Put it upstream of a strong disinfection step, and change it on a defined interval.
3.4 Disinfection: UV or ozone for hydroponic compatibility
For most indoor farms, a UV disinfection skid is the most practical choice. Ozone is powerful but needs tighter control and gas management.
- UV system
- Size it for your peak flow with sufficient dose for 3‑log (or better) inactivation of bacteria and viruses.
- Install UV intensity monitoring or follow lamp‑hour logs.
- Clean quartz sleeves on a schedule and replace lamps per manufacturer specs.
- Ozone (optional / advanced)
- Use a contact tank to allow sufficient reaction time, with off‑gas safely vented.
- Keep ozone out of the grow room atmosphere and away from sensitive surfaces.
- Ensure materials in the loop are ozone‑compatible (no rapid gasket degradation).
- Chemical residuals
- If you maintain a small chlorine or PAA residual in the condensate tank, make sure it is neutralized or reduced to safe levels before the water reaches roots.
- Document your target residuals and neutralization methods in the SOP.
3.5 Polishing: RO or ultrafiltration where risk is high
If you are growing high‑value crops or operating under strict retail standards, run the disinfected condensate through RO or UF before it becomes “make‑up water”.
- RO will strip most remaining metals, organics, and salts, giving you a very consistent low‑EC feed.
- Ultrafiltration or 0.2 µm cartridge filtration helps ensure you are not feeding live bacteria into the system.
- In many farms, the simplest setup is: blend condensate with municipal feed in a buffer tank, then send the mix through your main RO skid as usual.
3.6 Remineralization and mixing ratios
3.6.1 Target chemistry for hydroponic base water
For Kratky and DWC, most growers are aiming for:
- Calcium: at least 40–60 ppm in the final nutrient solution (often higher for fruiting crops).
- Magnesium: 20–40 ppm.
- Alkalinity: 40–80 ppm as CaCO₃ for reasonably stable pH without losing control.
Treated condensate will not provide any of that. You get there via:
- Your main nutrient formula (part A/B or equivalent).
- Optional Ca/Mg supplements or a controlled blend with harder water.
3.6.2 Practical blending rules
Here is a workable starting point that avoids shocking plants:
- Initial adoption: 25–50% of your make‑up water from treated condensate, blended with your current RO/municipal source.
- After 2–4 weeks of stable results: increase to 50–80% condensate if metals tests and plant performance stay clean.
- Do not change 100% of the water source at once in a live system with heavy crops on. Adjust over a few nutrient change cycles.
3.6.3 Step‑by‑step nutrient mixing with condensate
- Pull treated condensate from the clean water header into your nutrient mix tank.
- Measure EC and pH of the condensate blend. EC should be close to zero. Log it.
- Add your hydroponic nutrients (for example, two‑part salt or liquid program) to target EC for the crop and stage.
- Mix thoroughly, then adjust pH to the target range (often 5.5–6.0 for leafy greens).
- Log the batch: time, date, EC, pH, volumes, and which water sources were used.
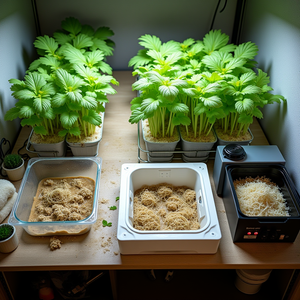
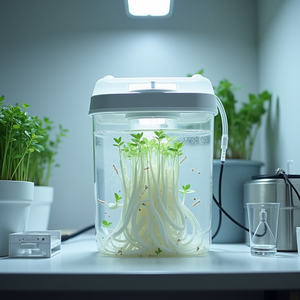
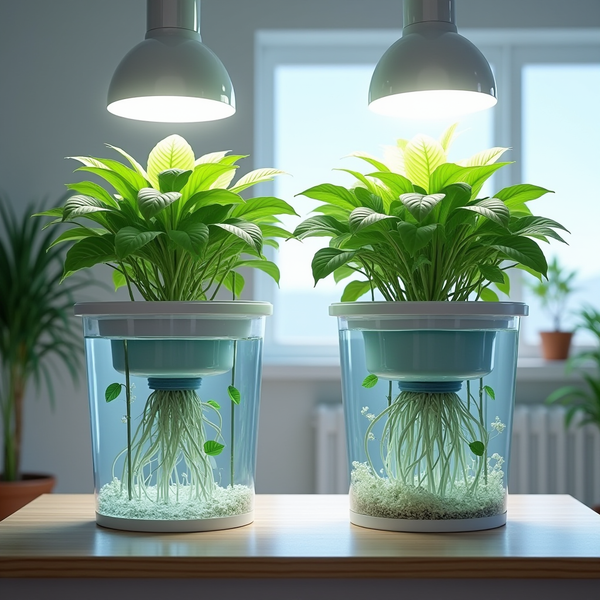
3.7 System‑specific notes: Kratky vs DWC vs recirculating systems
- Kratky jars and buckets
- Because solution is static, good upfront treatment and clean containers are everything.
- Use treated condensate only; do not bypass your filtration and UV just because the batch is small.
- Watch pH drift weekly and refresh solution at reasonable intervals rather than pushing it for months.
- DWC / RDWC
- Feed treated condensate into a make‑up tank, not directly to the main reservoir.
- Keep DO high and biofilms low; if you see slimy roots or cloudy water, review the condensate line for bypasses or dirty prefilters.
- NFT and drip systems
- Fine particles and biofilms from poorly treated condensate will show up as clogged emitters. If plugs increase after you switch to condensate, your pretreatment or UV is not doing its job.

4. What to watch long‑term: monitoring, HACCP, and performance benchmarks
Once the condensate system is built and your SOP is written, the work shifts to monitoring and continuous improvement. This is where you protect yields and pass audits.
4.1 Water quality monitoring: what to test and how often
4.1.1 Routine operational checks
At the farm level, operators should track:
- Daily or weekly
- EC and pH of treated condensate at the point of use.
- Visual clarity, color, and odor of condensate in the tank.
- UV system status (lamp hours, alarms) or ozone generator indicators.
- Monthly
- Filter pressure differential or a simple “visual inspection and replace if dirty” log.
- Volume of condensate captured vs total irrigation demand to track your reuse percentage.
4.1.2 Laboratory or third‑party tests
Build these into your HACCP plan as verification steps:
- Quarterly (or as risk assessment dictates)
- Total coliforms and E. coli in treated condensate (absence in 100 mL as a typical target).
- Metals panel: at minimum copper, lead, zinc, and sometimes aluminum and iron.
- Basic water chemistry: pH, alkalinity, hardness, EC.
- After any major change
- New HVAC units, coil replacements, or chemical programs.
- Significant remodels that disturb building plumbing.
4.2 HACCP and documentation: making it audit‑ready
To keep auditors comfortable with condensate reuse, build a small but tight documentation set:
- System description: diagram and written description of condensate collection, storage, treatment, and distribution to nutrient tanks.
- SOPs:
- Condensate collection and tank operation.
- Filter replacement and UV/ozone maintenance.
- Cleaning and sanitation of tanks and lines.
- Water testing, including pass/fail criteria and corrective actions.
- Records:
- Log sheets for EC, pH, volumes, and maintenance.
- Lab reports for microbial and metals testing.
- Corrective action reports when anything falls outside limits.
In your HACCP plan, condensate reuse usually appears under “Water Supply & Quality” as a potential hazard (chemical and microbiological), with your treatment train and monitoring plan as the control measures.
4.3 Plant‑side indicators to track
On the agronomy side, tie your water system into routine crop scouting:
- Roots: look weekly at representative plants in Kratky and DWC.
- Healthy: white to cream, firm, no slime.
- Alerts: brown or grey slime, sulfur odor, sudden loss of fine roots.
- New growth:
- Watch for sudden tip burn, marginal necrosis, or interveinal chlorosis that coincides with changes in water source or blending ratio.
- If you see issues, test for metals and review your remineralization and pH control.
- System behavior:
- Track how often you need to adjust pH in each system.
- A jump in pH volatility after increasing condensate percentage may mean alkalinity is too low and you need to tweak your program.
4.4 Performance benchmarks: is the condensate system doing its job?
After 3–6 months of running the SOP, you should be able to answer these questions with data:
- Water reuse: what percentage of your total irrigation volume is now covered by condensate? Hitting 50–80% is realistic in sealed indoor farms with strong dehumidification.
- Yield and quality: have yields, harvest uniformity, and shelf life stayed stable or improved? If not, correlate any changes to water chemistry logs.
- Issue frequency: are you seeing fewer, more, or similar rates of root disease, emitter clogs, or pH swings?
- Audit outcomes: are auditors accepting the condensate SOP and records without major findings?
If you can document high reuse, stable yields, clean lab reports, and smooth audits, your condensate program is doing what it should: turning wasted water into a controlled, food‑grade input.

5. Bringing it all together
The question “Is dehumidifier water safe for hydroponics?” does not have a yes‑or‑no answer. Raw condensate out of an HVAC pan is not automatically food‑grade. But with a simple, well‑designed system and a written SOP, it can become a reliable, low‑EC input that lets water‑scarce indoor farms cover most of their irrigation demand from water they already paid to remove from the air.
The workflow looks like this:
- Collect: dedicated food‑use condensate lines with air gaps, backflow protection, and first‑flush handling.
- Store: dark, closed, mixable tanks that you can actually clean and sanitize.
- Treat: sediment + optional carbon, then UV or ozone, plus RO/0.2 µm polishing where risk is high.
- Remineralize: dose nutrients to defined Ca/Mg/alkalinity targets and blend sources gradually to avoid plant stress.
- Monitor: EC, pH, metals, microbes, system hygiene, and crop response, all documented in a HACCP‑friendly format.
Do those things consistently, and you are not just “reusing dehumidifier water”. You are running a controlled, auditable condensate recovery program that cuts make‑up water by 50–80% without sacrificing yield, root health, or food safety.

As an Amazon Associate, I earn from qualifying purchases.