Indoor Farm Drone Scouting That Works: Fix LED Flicker, GPS‑Denied Navigation, and Safe Canopy Imaging for Hydroponic Greenhouses & Vertical Farms (2026 Guide)
"Most indoor growers think their drone problems are about the drone. In practice, it is almost always the lights, the navigation, or the airflow."
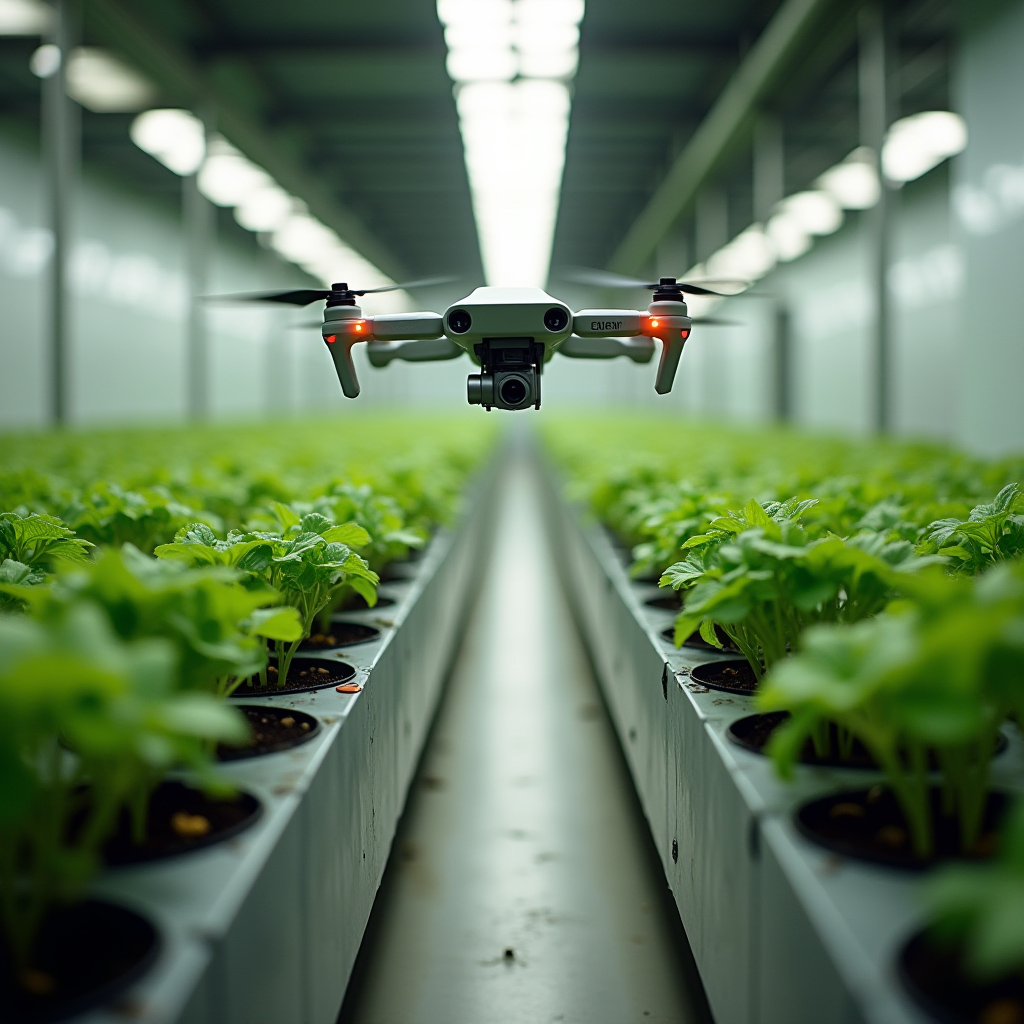
If you have tried flying a UAV through a hydroponic greenhouse or vertical farm, you have probably seen the same three failure modes:
- Striped, unusable images because the LEDs "fight" the camera.
- Unstable navigation or drift in GPS‑denied corridors and racks.
- Downwash snapping young lettuce or stressing vine crops near the canopy.
With agriculture robotics revenue projected to grow from about 12.2 billion USD in 2025 to 139.4 billion by 2035, according to this market outlook, indoor farms that solve these basics now will have a real edge. Drones in greenhouses are already being used for scouting, pollination, and coating tasks, as highlighted in this greenhouse drone overview. The tech is here. What is missing on most sites is a practical, system-level setup that gives clean, actionable data without damaging plants.
This guide is not about which drone to buy. It is about how to make indoor drone scouting actually work in hydroponic greenhouses and vertical farms: flicker‑free imaging under PWM LEDs, robust SLAM/VIO navigation in GPS‑denied rooms, safe airflow near sensitive canopies, and a field-ready data capture SOP for pests, PPFD, and thermal hotspots.
1. Common mistakes that ruin indoor drone scouting
1.1 Treating LED flicker as a "camera problem" only
Most teams start by blaming the drone camera when they see banding. In reality you have a system problem: driver electronics, dimming method, mains frequency, and camera exposure are all interacting.
In hydroponic greenhouses and vertical farms, LEDs are often driven with PWM dimming at 200 Hz to 3 kHz. If your camera shutter and frame rate are not synchronized to that flicker, you get horizontal bands, color shifts, and unreliable NDVI or vigor indices. You can lose half your scouting data in a single flight.
1.2 Flying "out of the box" in GPS‑denied farms
Outdoor drones live on GPS. Indoors, that crutch disappears. If you rely on default GPS/vision modes in a long rack corridor, your drone will:
- Drift sideways into gutters or rails.
- Lose position when it sees repetitive patterns (same NFT channels, same trays).
- Struggle at turns where aisle geometry changes.
Extension teams have already noted that indoor greenhouse drones need visual markers or assist-lines to navigate reliably, as described in this UF/IFAS greenhouse drone article and in work on assist lines for drones in greenhouses from Flanders Make.
1.3 Ignoring downwash and corridor aerodynamics
Hover a 2+ kg quadcopter 20 cm above a floating raft DWC bed, and you have built a lettuce shredder. Downwash and induced flow interact with existing HVAC, HAF fans, and vertical farm ducting. If you do not model that, you can:
- Snap apical tips on young tomatoes.
- Flatten NFT lettuce near aisle edges.
- Redistribute spores or insects in ways you cannot track.
Nearly every indoor farm that "tried drones and gave up" underestimated airflow around the canopy.
1.4 No imaging SOP: random footage, no repeatability
The last major mistake is running ad‑hoc scouting flights. Different pilots, different altitudes, different camera settings. You cannot compare plant health week over week if your imaging is not repeatable. A lot of beautiful footage never turns into pest pressure maps, PPFD heatmaps, or thermal diagnostics.

2. Why these problems happen in real hydroponic and vertical systems
2.1 LED drivers, mains frequency, and camera timing
Almost every hydroponic greenhouse or vertical farm now runs high‑efficiency LEDs. Many use PWM dimming tied to local mains (50 or 60 Hz) or to proprietary driver frequencies. Cameras see that as rapid on/off modulation.
When your camera shutter "samples" a different part of the PWM cycle each frame, brightness and color bounce between frames. With a rolling shutter sensor, parts of the frame even see different brightness during the same exposure, which shows up as dark and light bands.
That turns into a serious agronomy problem when you try to use those images for subtle issues: early nutrient deficiency, marginal tip burn from EC spikes, or slight wilt from localized airflow problems.
2.2 GPS‑denied SLAM and repetitive crop geometry
Indoors, drones must rely on visual odometry, SLAM, and inertial sensors. Vertical farms are especially nasty environments for this:
- Rows of identical gutters or towers increase the risk of aliasing in visual SLAM.
- Shiny PVC, aluminum rails, and wet concrete can degrade depth perception.
- Misting and fogging systems add particles that confuse depth sensors.
Research groups building autonomous greenhouse drones use a mix of fiducial markers, assist-lines, and carefully tuned sensor fusion to keep drones locked in corridors, as described in this autonomous greenhouse drone work and in various indoor positioning guides like this IPS overview.
2.3 Aerodynamics in dense canopies
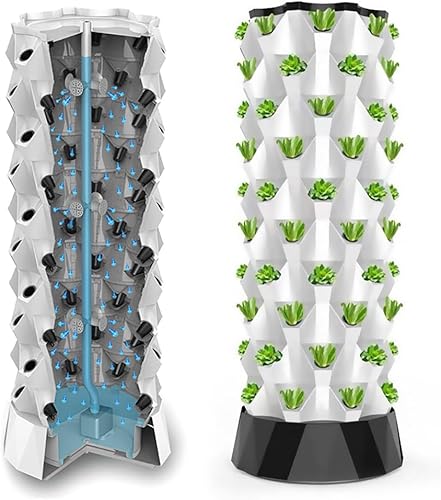
Hydroponic systems pack biomass into tight volumes: stacked NFT channels, tower systems, DWC rafts with minimal aisle spacing. When you drop a multirotor into that environment:
- Rotor wash hits the canopy and deflects sideways into neighboring rows.
- Return flows interact with HAF fans, creating oscillations and vortices.
- Lightweight leaves and young stems respond immediately to transient loads.
You might not see dramatic damage on a single flight, but you can easily stress plants if you repeat aggressive profiles daily over a crop cycle.
2.4 Poor link between images and agronomic decisions
Finally, most drone trials are run from a tech-first perspective instead of a crop-first perspective. Footage is evaluated by whether it looks cool, not by whether it lets you:
- Flag a pest outbreak while it is still confined to one bay.
- See PPFD dead zones near rack edges or tower bottoms.
- Confirm that nutrient and temperature gradients are not creeping across a DWC pond or NFT ladder.
Without a clear agronomic question tied to every flight, you end up storing terabytes of images with no return on the robotics spend.
3. How to fix LED flicker, navigation, and canopy safety
3.1 Build a flicker‑free imaging stack
3.1.1 Start with the lighting and driver
- Prefer constant‑current drivers with high PWM frequency (above 3 kHz) or DC dimming when you upgrade fixtures. Many "flicker‑free" horticulture drivers are designed with cameras in mind.
- Standardize dimming profiles in the bays you intend to scout. Avoid oddball dimming curves that vary by zone; they complicate camera tuning.
- Test at the dim levels you actually use, not only at 100%. Flicker artifacts usually get worse at lower dim levels.
3.1.2 Lock in camera settings for your mains frequency
You want your camera's exposure and frame interval to play nicely with the mains and PWM frequency.
- In 50 Hz regions, start with shutter speeds like 1/50, 1/100, 1/200 s.
- In 60 Hz regions, start with 1/60, 1/120, 1/240 s.
- Disable auto-exposure and auto-flicker if possible. Use manual exposure presets per bay.
- Use a global shutter sensor where possible for multispectral or detailed RGB scouting.
Do a quick grid test in one bay: hover at fixed waypoints, capture 10–20 frames at each shutter speed, and check for banding. Once you find a clean combination, save it as a profile and reuse it for that bay type.
3.1.3 Add software insurance
- Use de‑flicker options in your processing pipeline to normalize residual brightness fluctuations.
- Standardize white balance and color profiles per lighting recipe to keep indices comparable over time.
3.2 Robust GPS‑denied navigation: SLAM/VIO plus markers
3.2.1 Choose your core navigation stack
For modern indoor UAVs, a practical combination looks like this:
- VIO (visual‑inertial odometry) using a stereo or depth camera + IMU for short‑term stability.
- SLAM (camera or LiDAR based) to build a persistent map of aisles and racks.
- Optional indoor positioning such as UWB beacons at aisle ends to bound long‑term drift, as outlined in this indoor positioning guide.
3.2.2 Add fiducial markers and assist lines
Repetitive crop geometry is a SLAM headache. You fix that by giving your drone unique visual features to lock onto:
- Place AprilTags or ArUco markers at regular intervals (for example, every 5–10 m) at a consistent height.
- Use high‑contrast assist lines (colored tape, rope, or rails) down the main aisles, similar to the assist line approach described in greenhouse drone navigation work.
- Make markers robust to humidity, condensation, and cleaning routines.
Every time the drone passes a marker, it can correct accumulated drift and keep itself centered in narrow corridors.
3.2.3 Design flight corridors into your hydroponic layout
If you are building or refitting a greenhouse or vertical farm, treat drone corridors as real infrastructure:
- Reserve at least one drone-ready aisle per block with consistent width and free overhead clearance.
- Keep hard obstacles like valve handles, dosing lines, and cable trays out of the flight envelope.
- Align NFT ladders, DWC rafts, or tower rows so the drone sees clear, straight lines instead of zigzags.
Retrofitting a few centimeters of clearance now is much cheaper than building a separate robot system later.
3.3 Managing airflow and downwash near the canopy
3.3.1 Pick the right platform and operating envelope
- Smaller, lighter UAVs with larger, slower‑spinning props generally disturb the canopy less than heavy, high‑disk‑loading platforms.
- Set a minimum canopy clearance (for example, 40–60 cm above mature leaf height) for all autonomous flights in dense leafy crops.
- Use side‑looking cameras or angled gimbals to scout rows from the aisle instead of flying directly above DWC rafts or NFT channels.
3.3.2 Align flights with HVAC behavior
Take advantage of how your air already moves:
- Fly during periods of lower fan speed where possible to minimize complex turbulence.
- Avoid flying immediately after misting or fogging, when droplets make both vision and aerodynamics erratic.
- Run a one‑time smoke or fog test in an empty or test bay to visualize airflow patterns with the drone hovering at planned altitudes.
3.3.3 Safety margins near high‑value crops
For vine crops, fruiting tiers, or young transplants, create "no fly" or "high only" zones:
- Prohibit low‑altitude hovers above fragile crops.
- Use higher‑altitude passes with stronger zoom or higher resolution instead.
- Log any in‑flight deviations and review them alongside crop damage reports.
3.4 Turn drone flights into agronomy decisions
Once the hardware is stable, you need a pipeline that serves your hydroponic operation, not your video reel.
- Link waypoints to crop zones: every image should tie back to bed ID, rack level, nutrient loop, and setpoints.
- Define what you are scouting for on each route: pests, PPFD uniformity, canopy temperature, or mechanical issues like leaks.
- Connect outputs to actions: for example, a threshold for thrips counts that triggers a biological control release or a PPFD map that triggers a dimming tweak or fixture move.

4. A step‑by‑step indoor drone scouting SOP for hydroponic canopies
Below is a practical SOP you can adapt for Kratky rafts, DWC ponds, NFT ladders, or vertical tower farms. The goal: repeatable, crop‑driven data every week.
4.1 Pre‑flight: system checks and route planning
4.1.1 Hardware and environment
- Confirm drone firmware, SLAM/VIO stack, and camera profiles are up to date.
- Check propellers, guards, and sensors for residue from foliar sprays or condensation.
- Verify that HVAC, HAF fans, and curtains are in normal operating mode, not in a transient state.
- Record environmental conditions: air temperature, RH, CO2, solution temperature for each nutrient loop.
4.1.2 Route definition
- Define waypoints by hydroponic zone: NFT block A, DWC pond 3, tower rack level 2, and so on.
- Set cruise altitudes that keep you at least 40–60 cm above the tallest expected canopy for the crop stage.
- Set separate routes for:
- Pest and disease scouting (higher resolution, slower speed).
- PPFD mapping (grid pattern, stable exposure, often with a sensor instead of, or in addition to, a camera).
- Thermal scouting (FLIR or similar sensor, slightly higher altitude for wider coverage).
4.1.3 Camera profiles per mission
- Create locked presets for each lighting recipe (for example, propagation, veg, fruiting) that fix shutter speed, ISO, and white balance.
- Test and record which shutter speeds are flicker‑free in each bay type.
- For thermal missions, calibrate the sensor with a known reference (for example, a small plate at known temperature in frame).
4.2 In‑flight: executing the mission
4.2.1 Takeoff and stabilization
- Perform initial hover in a safe staging area, away from crops, to confirm SLAM/VIO lock and marker detection.
- Confirm live video and telemetry, including altitude and obstacle distances.
4.2.2 Corridor flight in hydroponic environments
- Keep lateral clearance from towers or gutters consistent; do not rely on "eyeballing" distance.
- Limit speed in narrow aisles (for example, < 1 m/s) so you do not outrun the SLAM pipeline or your own reaction time if you need to abort.
- Use gimbal tilt and side‑looking angles so you can stay above aisles while imaging canopy centers.
4.2.3 Image capture patterns
- Use at least 60–70% forward overlap and 30–40% side overlap for mapping runs you intend to stitch.
- For scouting runs, define discrete capture points (for example, every 3 m along an aisle) so you can compare specific positions week to week.
- Tag images or video segments with zone and loop identifiers (for example, "NFT-A-loop1-level2").
4.3 Post‑flight: data handling and analysis
4.3.1 Data ingestion
- Download footage and sensor logs immediately after the flight.
- Store in a structured folder or database keyed by date, mission type, and zone.
- Run automated de‑flicker and color normalization where needed.
4.3.2 Pest and disease scouting workflow
- Use AI‑assisted or manual tagging to flag suspected pest damage, nutrient deficiency patterns, or localized wilt.
- Cross‑check drone findings with ground truth from a quick walk‑through in flagged zones.
- Log pest incidence per bay or loop and feed it into your IPM schedule.
4.3.3 PPFD uniformity and lighting diagnostics
- If you integrate a light sensor or mapping pass, convert readings into heatmaps for each rack level or raft zone.
- Look for recurring low‑PPFD pockets near edges, under mounting rails, or around duct runs.
- Adjust dimming curves or fixture spacing in those areas, then re‑fly a short validation mission.
4.3.4 Thermal hotspots and HVAC tuning
- Use thermal imagery to find hot or cold stripes that align with undersized ducts, blocked vents, or water temperature issues in DWC/NFT channels.
- Correlate canopy temperature deviations with solution temperature and EC logs to catch issues like chilled roots or stagnant zones.
4.4 Continuous improvement and safety reviews
- Review any near‑miss or contact incidents, and adjust routes, altitudes, or no‑fly zones accordingly.
- Update SLAM maps when you reconfigure racks, add new NFT ladders, or move towers.
- Train staff to interpret drone data alongside standard pH, EC, and visual checks so the system becomes part of your normal crop walk rhythm, not an isolated "tech" project.

5. Benchmarks and metrics for "working" indoor drone scouting
By 2026, drones in indoor agriculture are moving from "nice demo" to daily tool. Vertical farm operators that survived the early consolidation phase, including players documented in news coverage of companies like AeroFarms in indoor farming reports, are leaning hard into automation and data. To know if your scouting setup actually works, track a few hard numbers.
5.1 Imaging quality benchmarks
- Flicker rejection: > 95% of frames in a mission free of visible banding or exposure pulsing.
- Spatial resolution: leaf features of interest (for example, thrips scarring, early mildew) clearly visible at planned altitude.
- Repeatability: same waypoint images week to week show consistent framing and exposure.
5.2 Navigation reliability metrics
- Route completion rate: > 98% of autonomous missions completed without manual intervention once the system is mature.
- Deviation: maintain lateral and vertical deviation within a small window (for example, ±10 cm) in narrow aisles.
- Marker reacquisition: zero unexplained losses of visual markers in normal lighting conditions.
5.3 Crop safety and impact
- Zero contact incidents per month on production crops after initial commissioning.
- No measurable yield reduction or mechanical damage correlated with drone flights in your crop logs.
- No new pest spread patterns linked to flight paths in IPM records.
5.4 Agronomic value and ROI
- Detection lead time: number of days earlier you catch a pest or nutrient problem compared to pre‑drone operations.
- Coverage per labor hour: canopy square meters scouted per hour of staff time (including analysis), before versus after deploying drones.
- Decision rate: percentage of missions that result in an action (for example, EC tweak, lighting change, biological release, hardware fix).
If you are not seeing faster detection, safer canopies, and clearer decision‑making within a season, treat that as a signal to refine routes, camera profiles, and the way your agronomy team consumes the data.
Bottom line
Indoor drones will not fix a bad nutrient recipe or a poorly balanced lighting plan. But when you solve LED flicker at the source, give your UAVs proper GPS‑denied navigation tools, respect the aerodynamics around hydroponic canopies, and enforce a disciplined imaging SOP, drones become a sharp, repeatable tool in your hydroponic greenhouse or vertical farm.
Start small: one bay, one mission type, one crop. Nail flicker‑free settings, stable SLAM, and a clean workflow from images to actions. Then scale across your farm. In a robotics market that is growing quickly, the farms that win will be the ones that can turn airborne pixels into real yield, not just pretty footage.
As an Amazon Associate, I earn from qualifying purchases.