Indoor Aquaponics DWC: Build a Compact Raft System with Proper Filtration, Nitrification, pH & Iron Control
If your first aquaponic lettuce came out yellow, leggy, and sad while your tank smelled like a swamp, it’s not because “aquaponics is hard” - it’s because the system wasn’t designed for what you’re asking it to do.
Indoor DWC raft aquaponics can absolutely crank out dense, dark-green salads all winter with very low inputs. But most home setups choke on the same three problems: bad solids filtration, weak nitrification, and chronic pH/iron issues that starve plants while stressing fish.
This guide is laser-focused on small indoor raft (DWC) aquaponics: think 80-300 L fish tank, 60-150 L DWC bed, and a handful of rafts under grow lights. We’ll walk through how to size filtration and biofiltration, balance fish feed to plant uptake, keep pH stable around 6.4-6.8, and avoid iron chlorosis - so your greens stay lush without sacrificing fish health.
The Problem: Gorgeous Idea, Terrible Water
Here’s the usual winter aquaponics story:
- You set up a fish tank, a tote with a foam raft, an air stone, and a pump.
- Stock a few fish, throw in some feed, plant some lettuce and basil.
- Two weeks in: plants yellow between the veins, growth stalls, and roots look slimy or brown at the tips.
- pH is either drifting relentlessly up or crashing down, and test strips never look “right.”
- Fish are still alive, maybe even fine, but plants look like they live on sadness and low nitrogen.
Common symptoms in small indoor DWC raft systems:
- Yellow, pale leaves with green veins (classic iron deficiency / high pH lockout).
- Slow or stalled growth despite “plenty” of fish waste.
- Brown, gunky roots grabbing solids and suffocating in low-oxygen pockets.
- Foamy, cloudy water and filter sponges clogging every few days.
- pH stuck near 7.6-8.2, or yo-yoing if you keep adding random pH up/down.
That’s not “aquaponics being finicky.” It’s a system that’s not doing the three core jobs it must handle:
- Remove solids before they rot on plant roots.
- Provide enough biofilter surface for nitrifying bacteria.
- Hold pH and key micronutrients (especially iron) in the right window for plants.
In DWC raft aquaponics, the roots are fully submerged in the same water the fish live in. That gives you gorgeous, efficient nutrient transfer when the water is right, but it also means any mistake is shared instantly by fish and plants. As noted in this DWC aquaponics guide, suspended solids and poor water quality can quickly damage roots and stall growth.

The Cause: Undersized Filtration, Weak Biofilter, and pH/Iron Mismatch
Let’s strip it down to the physics, biology, and chemistry.
1. Solids are clogging roots and killing oxygen
In a raft system, plant roots hang directly in the water. If you don’t pull out solid waste before it reaches the DWC bed, those particles settle into the root mass. As pointed out in this design overview, suspended solids trapped by roots can cause root death when concentrations are high.
What usually goes wrong in home builds:
- Only a small aquarium sponge or internal filter is used.
- No dedicated swirl/settling tank between fish tank and DWC bed.
- Flow is either too fast (solids blown through) or too slow (solids settle in lines).
Result: a thick bio-sludge builds up on roots and container bottoms, burning oxygen and leaking ammonia right at the root surface. Your air stones can’t keep up.
2. Nitrification surface area is too small
Fish excrete ammonia. Ammonia is toxic to fish at surprisingly low levels, and it is not directly plant-friendly in the concentrations you get from fish. Nitrifying bacteria need a stable, high-surface-area home to convert ammonia to nitrite then nitrate.
Many small indoor systems rely only on:
- The tank walls and bottom.
- The little sponge in a pump or aquarium filter.
- Whatever biofilm forms in pipes.
That’s nowhere near enough surface area for a stocked tank. Commercial DWC designs use dedicated biofilters with media (like K1, bio-balls, or gravel) to get this right, as summarized in this review on aquaponic system design.
When biofilter capacity is too small:
- Ammonia and nitrite spike after feeding or when you add fish.
- Nitrate stays oddly low despite feeding, so plants starve.
- Any change (filter cleaning, temperature dip) crashes nitrification and causes big swings.
3. pH stuck in the “no man’s land” for iron and micronutrients
Fish and nitrifying bacteria do fine in a fairly wide pH range, roughly 6.5-8.0, depending on species. Plants are fussier. Iron, manganese, and other micronutrients become less available as pH climbs above ~7.0. That’s why aquaponics guides like this one recommend a compromise zone of about 6.8-7.0.
In practice, many indoor systems sit at 7.4-8.0 because:
- Tap water has high KH (carbonate hardness).
- Growers add crushed shell or limestone without understanding buffering.
- No acids are used for top-ups or pre-treatment, so pH drifts up.
At pH above ~7.2-7.4, iron solubility drops hard. Even if iron is in the system, plants can’t grab it efficiently, so you see interveinal chlorosis on new leaves.
4. No iron supplementation or wrong iron form
Fish feed brings some trace iron, but not enough to keep up with fast leafy greens in a tightly stocked system. At the same time, the biofilter and precipitation reactions strip iron out of solution.
Two more common mistakes:
- Using non-chelated iron (like plain iron sulfate) which rapidly precipitates at typical aquaponic pH.
- Using the wrong chelate type: Fe-EDTA stops being effective much above pH ~6.5, while Fe-EDDHA or Fe-DTPA stays available at higher pH, as noted in many aquaponic nutrient discussions.
5. Fish load and feeding not matched to plant area
Every gram of feed you put in eventually turns into a mix of ammonia, nitrate, and solids. If you feed too much for your plant area:
- Ammonia/nitrite can spike above safe levels.
- Nitrate climbs but plants cannot keep up, leading to water quality issues.
If you feed too little:
- Nitrate stays chronically low, plants starve and look like a weak hydro system with underfed nutrients.
Indoor DWC is forgiving on temperature and lighting because you control them, but unforgiving on nutrient balance because you have less water volume and fewer buffers than big outdoor systems.

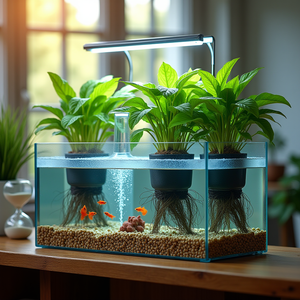
The Solution: A Compact, Stable Indoor DWC Raft System
Let’s build (or retrofit) a small indoor aquaponic DWC that actually works. I’ll assume a typical apartment or garage footprint, with roughly:
- Fish tank: 100-150 L (about 25-40 gallons).
- DWC raft bed: 60-120 L, footprint around 60 x 90 cm.
- One LED grow light bar or panel over the raft.
You can scale these numbers up or down, but the ratios and logic stay the same.
1. Flow layout: keep solids away from roots
A robust small system layout:
- Fish tank
- Mechanical filter (swirl or radial-flow + sponge/pad)
- Biofilter (static or moving-bed media)
- DWC raft bed
- Return to fish tank
Target flow rate: turn over the fish tank volume 2-4 times per hour. For a 120 L tank, that’s ~240-480 L/h after head losses.
Mechanical filtration sizing (solids capture)
For a compact indoor system:
- Use a 10-20 L bucket or container as a swirl or radial-flow separator.
- Inlet enters tangentially (for swirl) or down a center standpipe (for radial), outlet is near the top.
- After that, run water through a sponge/pad chamber you can rinse every 2-3 days.
Rough rule of thumb: aim for a mechanical filter volume of at least 10-20% of fish tank volume for small systems. So a 120 L tank gets 12-24 L of solids settlement capacity. This gives enough dwell time for heavier solids to drop before hitting your biofilter or raft.
2. Biofilter: give nitrifiers a real home
Dedicated biofiltration is where most hobby builds cheat and pay later.
Use a separate 10-30 L container filled with high surface area media (e.g. K1, bio-balls, or lava rock in mesh bags):
- Static media bed: media sits in a crate or bucket, water flows through it from bottom to top.
- Moving bed (MBBR): media floats and tumbles with strong aeration.
Look up the manufacturer’s specific surface area (SSA) per liter of media. For rough indoor numbers, many growers aim for enough media to handle the feed load. A practical starting target is:
- At least 10-20 L of quality media for a 150 L tank lightly stocked with leafy-green-only production.
During the first 4-6 weeks, feed lightly and let the bacteria colony establish. Monitor ammonia and nitrite. If either is regularly above 0.25 ppm, slow feed and add more aeration to the biofilter.
3. Matching fish feed to plant area
For leafy greens (lettuce, pak choi, herbs), a simple, conservative starting ratio is:
- Feed input: around 10-20 g of fish feed per day per square meter of DWC raft area, once the biofilter is mature.
So if your indoor raft is 0.5 m², you’re looking at roughly 5-10 g/day at full production. Start at the low end and watch both fish condition and plant color. If nitrate stays near zero and plants are pale, you can carefully raise feed in 10-20% steps.
Fish stocking: for a 120 L indoor tank with good aeration, many home systems run roughly 3-6 medium fish (tilapia, carp, or similar) or a small school of goldfish. Think in terms of daily feed, not fish count. You can always add more plants; do not pile in more fish just to “boost nutrients.”
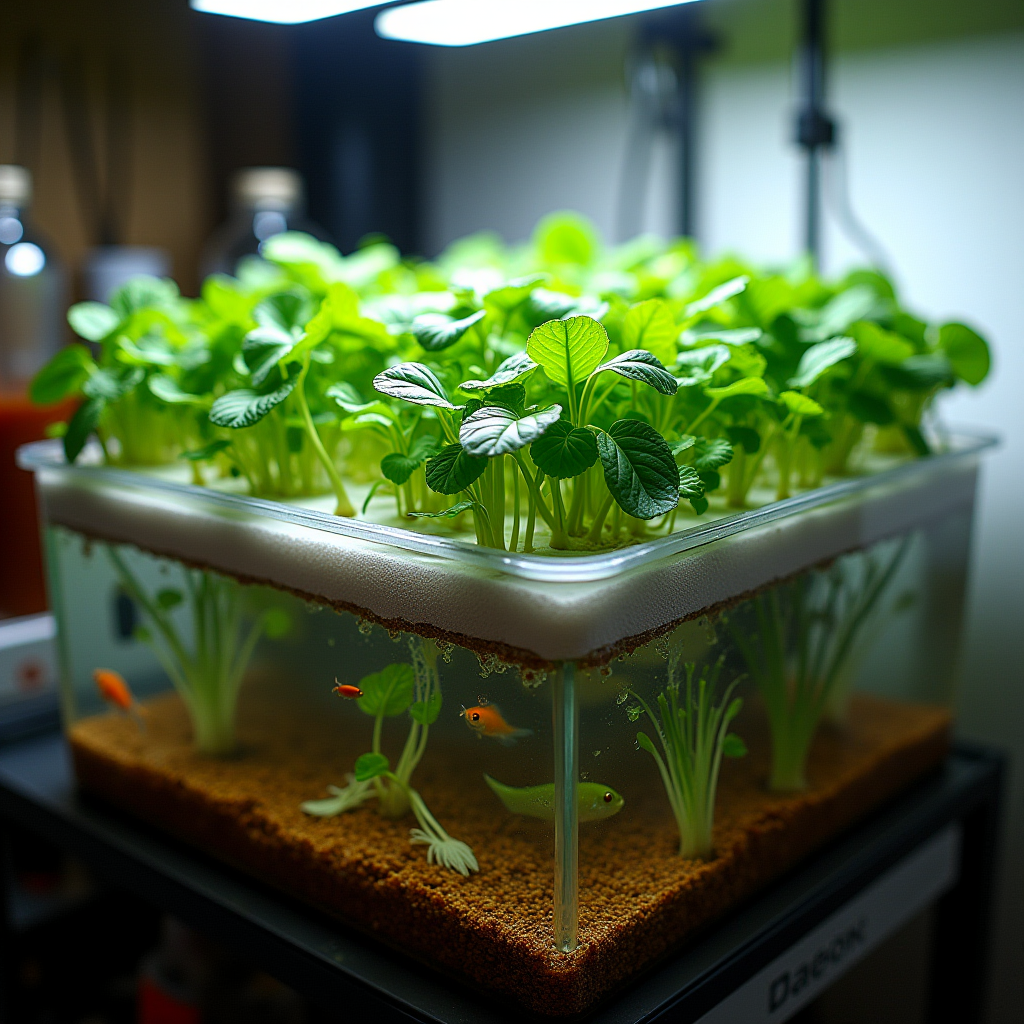
4. DWC bed design for indoor stability
Key parameters:
- Depth: 20-30 cm of water under the raft works well for roots and oxygen distribution.
- Raft material: 25-50 mm thick polystyrene or foam board with net pots snugly fit.
- Aeration: at least one airstone per 40-60 L of DWC volume, placed under the raft, especially toward the outlet end.
As highlighted in this DWC overview, strong aeration is non-negotiable: it keeps roots white and prevents anaerobic zones.
5. Target pH: 6.4-6.8 and how to hold it there
Your goal: keep system pH in the sweet spot for both plants and fish, and for iron availability. For leafy greens and common aquaponics fish, 6.4-6.8 is an excellent target band.
Steps to get there and stay there:
- Test your tap water KH and pH. If KH is very high (lots of carbonate), raw tap will keep pushing system pH upward.
- Pre-condition top-up water. In a separate bucket, mix dechlorinated water with a mild acid (many growers use food-grade phosphoric or hydrochloric, added dropwise) to bring that bucket to around pH 6.0-6.5 before adding slowly to the system.
- Avoid big pH swings. Never change system pH more than ~0.2 units per day if you can help it. Fish and bacteria hate rapid shifts.
- Use potassium and calcium sources that do not spike pH. Instead of loading up on crushed shell, consider smaller, regular doses of Ca and K supplements chosen for aquaponics (e.g. calcium carbonate in measured amounts, or alternating potassium bicarbonate and small doses of acid to keep the buffer in check).
Because nitrification naturally produces acid, many mature systems slowly drift downward over time, especially if KH is low. In that case, tiny doses of potassium bicarbonate or calcium carbonate can keep you in the 6.4-6.8 zone. The point is not to chase pH up and down with big corrections, but to let it gently oscillate inside a narrow band.
6. Preventing and correcting iron deficiency
Once pH is under control, you can actually solve iron chlorosis instead of fighting it every week.
For indoor leafy-green systems:
- Use a chelated iron source that stays available at your pH. For pH up to ~7.0, Fe-DTPA can work. If you sometimes run closer to 7.2, Fe-EDDHA is more robust.
- A common starting dosage is around 1-2 mg/L of iron added every 3-4 weeks, but always follow the product’s instructions and start on the low side.
- Add iron to a high-flow zone, not directly on fish. Pre-dissolve if needed.
- Watch new leaves: they should green up within 5-10 days if iron deficiency was the main issue.
Because aquaponics is not a typical hydro system, keep total supplementation light. Your aim is to fill gaps (iron, sometimes potassium and calcium), not to build a full hydroponic profile on top of fish waste. As discussed in broader aquaponic nutrient management resources like this design checklist, small, regular corrections beat large, sporadic blasts of nutrients.
7. Monitoring routine: what to actually test
For a compact indoor raft system, this weekly routine keeps you out of trouble:
- 2-3x per week: pH, ammonia, nitrite, nitrate (drop test kits are fine).
- Weekly: water temperature (keep most leafy bends with common fish around 18-24°C), visual root check (should be white/cream, not brown and slimy).
- Every 2-4 weeks: top up chelated iron if leaves start to pale, verify KH if pH is drifting unexpectedly.
If ammonia or nitrite is above 0.25 ppm, reduce feed and check aeration in both tank and biofilter. If nitrate is perpetually near 0 and plants are pale, either increase feed slowly or reduce plant density until the system balances.
8. Lighting and density for tight indoor spaces
Healthy plants also need enough photons to use the nutrients you’ve worked so hard to make available.
- Light hours: leafy greens do well at 14-16 hours of light indoors.
- Intensity: target roughly 150-250 µmol/m²/s at the canopy for lettuce and herbs with modern LED fixtures.
- Spacing: 15-20 cm between net pots for lettuce in a compact raft keeps good airflow and prevents overcrowding.
If you push plant density very high, nutrient demand spikes. Make changes one variable at a time: either increase planting density or increase fish feed, then monitor nitrate and plant response for 1-2 weeks before changing again.
Indoor aquaponic DWC can absolutely be clean, stable, and productive. The trick is to stop treating it like a fish tank with a foam lid and start treating it like a small, closed-loop bioreactor:
- Size mechanical filtration so solids never choke roots.
- Give nitrifiers plenty of biofilter volume and oxygen.
- Hold pH in the 6.4-6.8 window and supplement iron with the right chelate.
- Match feeding and stock to your raft area, not your enthusiasm.
Do that, and your winter raft will stop being an experiment and start being a reliable salad machine.