Common Mistakes
Most community hydroponic projects don’t fail because the technology is too complex. They fail because the build, the budget, and the people side were never aligned with the crops and the neighborhood.
You see the same pattern everywhere: a donated container farm that never hits its projected yields, a warehouse full of half-lit racks, or a community center system that becomes “that room no one wants to manage.” Meanwhile, places like Acres Homes in Houston are quietly bringing hydroponics back as a practical tool for food access and skills training, not a gadget in a press release, as covered in this report. In Canada, experts are pushing for more domestic food production with greenhouses and vertical farms to cut imports and build resilience, as noted in this analysis. Jakarta is using sustainability programs to build eco-aware students with hands-on systems, according to this coverage.
The difference between a stalled project and a productive neighborhood hydroponic farm is simple: the productive farm is designed like a utility and a training center, not a science experiment.
Below is a 2025–2026 blueprint for community organizations that want reliable output and real local impact. We’ll keep it practical: system selection, zoning, power and water sizing, food safety workflows, training ladders, and realistic cost and ROI expectations.
Mistake 1: Starting With the Container or Gadget, Not With Demand and Layout
Many groups start with a shipping container, a prebuilt tower, or a grant-eligible gadget, then try to force crops and workflows into whatever fits inside. That is backwards.
For a neighborhood-scale project, you need to define:
- Who eats the produce: pantry distribution, CSA shares, on-site kitchen, local retail.
- What they actually use: salad mixes, herbs, microgreens, or a mix.
- How often they need it: weekly box, daily kitchen prep, school snack schedule.
Only then do you set zones and systems.
A proven pattern for a small warehouse or large community center room (80–200 m²):
- Zone 1 – Propagation & microgreens (high turnover): shallow flood tables or NFT for microgreens; nursery trays for transplants.
- Zone 2 – Leafy greens (steady volume): raft-style Deep Water Culture (DWC) or NFT channels.
- Zone 3 – Herbs & specialty (higher value, slower): Kratky totes, DWC buckets, or small NFT lines.
- Zone 4 – Training & packing: open bench space for lessons, packing, and QA.
You can implement the same ideas inside a container, but the planning sequence is identical: demand first, workflow second, hardware last.
Mistake 2: Treating All Crops the Same Instead of Building Multi-Zone Systems
Leafy greens, herbs, and microgreens behave very differently in hydroponics. Mixing them in one generic system usually leads to poor utilization or constant compromise on nutrient strength, spacing, or lighting.
For a neighborhood-scale program, design up front for at least three technical zones:
- Zone A – Propagation & microgreens
This is your engine for fast output and constant transplants.
- System: flood tables or simple NFT for microgreens; 1020 nursery trays; low-height racks.
- Light: 150–250 µmol/m²/s PPFD at canopy, 16–18 hours per day.
- Cycle: 7–14 days for microgreens; 10–21 days for transplants.
- Zone B – Leafy greens production
This is your volume zone for heads and loose-leaf lettuce, Asian greens, and similar crops.
- System: raft DWC tanks or NFT channels in runs you can reach from both sides.
- Plant density: 20–30 heads/m² of floor space is realistic for a tightly run system.
- Light: 200–300 µmol/m²/s PPFD, 14–18 hours per day.
- Zone C – Herbs & specialty
This is where you run basil, mint, chives, and other herbs or small-fruited crops.
- System: individual DWC buckets, small Kratky totes, or dedicated NFT lines.
- Light: 250–400 µmol/m²/s PPFD depending on species.
- Cycle: longer, but higher value per plant or per gram.
If you are working in a community center classroom, you can compress these zones into one or two racks: top shelf for propagation and microgreens, middle for leafy greens, bottom for herbs or a demonstration DWC. In a container, split the length of the unit into hot side (equipment, nutrient mixing, dehumidifier) and cool side (plant area) in your planning.
This zoning also simplifies education. Beginners start on Zone A, learn seeding, germination, and basic sanitation. More advanced trainees move to Zones B and C to manage EC, pruning, and harvest scheduling.

Mistake 3: Underestimating Power, Water, and Environmental Control
Most grant applications and early budgets underestimate ongoing electricity and water handling. They often assume residential-level loads and ignore dehumidification and seasonal swings.
Here is a practical sizing snapshot for a small community farm running leafy greens, herbs, and microgreens indoors:
- Target production: 80–120 kg of greens per week in a 100–150 m² space (or a 12–13 m container plus an adjacent workroom).
- Lighting load: 8–12 kW of LED lighting, running 14–18 hours per day.
- Pumps & controls: 200–500 W total for air pumps (DWC), water pumps (NFT), and controllers.
- Dehumidification: Often equal to or greater than lighting in real energy use. Expect 1–2 liters of water transpired per m² of active canopy per day.
In practice, a 100–150 m² grow area may need a 15–20 kW electrical service allocation when you include lights, HVAC, dehumidification, and general building load. Check this with a qualified electrician and your utility before you commit to equipment.
On water, hydroponic systems are efficient, but not water-free. A well-run leafy green system may use around 1–3 liters of water per kg of produce, far better than field production, but you still need:
- A reliable potable supply.
- Backflow prevention for code compliance.
- A clear plan for nutrient solution changes and wastewater (often via municipal sewer).
Dehumidifiers return a lot of low-mineral water. With a basic filtration and sanitization step, some sites recover that for non-potable uses or even back into nutrient mixing, depending on local regulations and your food safety plan.
Renewable energy can offset some of this load, but rooftop solar on a single building will rarely cover everything. Treat it as a cost reducer, not the core power source.
Mistake 4: Ignoring Food Safety, Workflow, and Training Pathways
Community hydroponic farms live or die on trust. That means clean workflows, clear responsibilities, and training that fits the people you have, not the people you wish you had.
Food safety does not need to be complicated, but it must be explicit. At minimum, plan for:
- Unidirectional flow: People move from "dirty" to "clean" zones, not back and forth. For example, street clothes and deliveries at the entrance, then handwash, then grow area, then harvest and packing, then cold storage and dispatch.
- Basic hygiene rules: Handwashing, hair restraints, glove use where needed, and no open drinks or food in grow areas.
- Sanitation schedule: A written weekly and batch-end schedule for cleaning tanks, channels, trays, and tools, plus a quarterly deep clean.
- Water testing: Periodic microbial testing if required by local rules and a simple log for source water EC and pH.
From a staffing and training perspective, think in levels:
- Level 1 – Helpers & students: Seeding, basic cleaning, moving harvested trays, observing pH/EC readings.
- Level 2 – Operators: Mixing nutrients, adjusting pH, checking pumps and timers, logging temperatures and humidity.
- Level 3 – Lead grower / coordinator: Crop planning, troubleshooting, training others, and reporting on yield and quality.
This is where schools and youth programs can shine. Jakarta’s approach of building eco-aware students through structured sustainability activities translates well to hydroponic farms when you break tasks and learning outcomes into visible steps.
Finally, put it in writing: standard operating procedures (SOPs) for seeding, transplanting, harvesting, nutrient changes, and emergency actions (power outage, pump failure, contamination). Laminated SOPs at each zone are worth more than a thick binder that never leaves the office.
Why These Mistakes Happen
Most community hydroponic projects sit at the intersection of three worlds: growers, organizers, and funders. Each brings a different mental model, and the gaps between them cause the problems above.
- Growers think in terms of EC, pH, and grams per square meter per week.
- Organizers think in terms of participation, equity, education, and visibility.
- Funders think in terms of narratives, measurable outcomes, and risk.
If you do not translate between those worlds early, you get undersized budgets, unrealistic production promises, and systems that do not match the skills on the ground. The result: inconsistent harvests and burnout.
Technical Causes: System Design and Controls
On the technical side, most failures trace back to a few specific design and management issues:
- One oversized, complicated system instead of modular zones. If the one big system fails, everything fails. Modular DWC, NFT, and Kratky units can be isolated and serviced without stopping the whole farm.
- No clear plan for nutrient management. Without a simple EC and pH monitoring routine, most sites either run too weak (poor yields) or too strong (tip burn and wasted inputs). Practical guidance on pH and EC control, like that covered in many hydroponic farming references, is often skipped in community builds.
- Inadequate climate control. LED lights are efficient but still produce heat. Add plant transpiration, and you quickly overload residential-grade AC units, causing disease pressure and worker discomfort.
- Insufficient redundancy. One air pump, one nutrient reservoir, and no backup power plan is acceptable for a hobby tent, not for a program that feeds people weekly.
Operational Causes: People, Schedules, and Turnover
On the human side, community farms often rely on volunteers, students, or part-time staff. That is not a problem, but it requires appropriate system design and training.
- Too much manual fiddling. Systems that need daily valve changes or complex reservoir rotations will fail whenever the key person takes a week off.
- No cross-training. One “hydroponics person” becomes a single point of failure. When they leave, knowledge leaves with them.
- Training not tied to tasks. General workshops without task-specific practice create confidence but not competence. People feel involved but cannot run the system when something breaks.
Projects like Acres Homes that continue to function do the opposite: they connect system complexity to the people available, and they keep roles clear and teachable.
Financial Causes: Misaligned ROI Expectations
Container farms and vertical systems are often sold with marketing numbers that assume perfect conditions, steady skilled labor, and premium pricing. Community farms rarely operate on those terms.
Expect realistic, blended outcomes:
- Direct revenue: sales to local restaurants, small retailers, or CSA-style members.
- Indirect value: reduced food insecurity, workforce development, education, and neighborhood cohesion.
- Grants and sponsorship: partial coverage of capital and early operating costs tied to clear metrics (meals produced, trainees graduated, workshops delivered).
Your ROI model should reflect all three, not just the crop sales line.
How to Fix Them: A 2025–2026 Community Hydroponic Blueprint
Now let’s turn this into a working plan you can adapt to your space, whether it is a spare room in a community center, a small warehouse, or a container farm with an attached classroom.
Step 1: Define Demand, Crops, and Throughput
Before sketches or quotes, answer six numbers:
- How many households, students, or customers will you serve?
- How many grams of greens or herbs do they get per week?
- How many weeks per year do you plan to operate?
- What price (or equivalent value) per kg do you assign to the produce?
- How many hours per week can your team reliably commit?
- Do you need a teaching component or just production?
Example: 75 households, each receiving 400 g of greens per week, 48 weeks per year. That is 30 kg per week, or about 1,440 kg per year. At a conservative internal value of $15/kg retail equivalent, that is $21,600 of food value per year. This anchors your system size.
Step 2: Choose Systems by Zone
For simplicity and resilience, mix low-tech and higher-output systems.
- Propagation & microgreens zone
- Hardware: 2–4 rack units with 3–4 shelves each, 1020 trays, shallow flood tables or hand-watered microgreen trays.
- Systems: simple flood-and-drain or hand-watering. No complex plumbing required.
- Outputs: 10–40 trays of microgreens per week, plus transplants for the other zones.
- Leafy greens zone
- Preferred: raft DWC in insulated tanks, or NFT if your team is comfortable managing flow and root mass.
- Size: to hit 30–100 kg/week, expect 20–60 m² of active channel or raft area depending on density and crop choice.
- Controls: continuous aeration (DWC), simple timers (NFT), EC and pH monitoring.
- Herbs & specialty zone
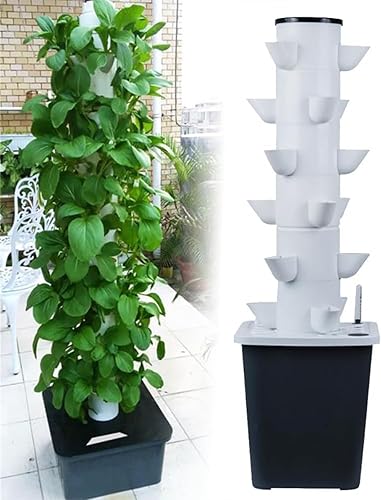
- Hardware: DWC buckets, Kratky totes, or a tower system for visibility and demos.
- Use: higher-value herbs for sales, plus training on crop steering basics.
Keep nutrient management simple at first. Use one leafy green formula for DWC/NFT and a slightly stronger mix for herbs. Aim for EC ranges like:
- Microgreens: 0.8–1.2 mS/cm.
- Lettuce & leafy greens: 1.2–1.8 mS/cm.
- Herbs: 1.6–2.2 mS/cm depending on species.
Maintain pH between 5.8 and 6.2 for most mixed crops, checking at least every other day.
Step 3: Map Power and Water Up Front
Before you sign lease agreements or order equipment, walk the space with two questions in mind:
- Where is my electrical panel, and what spare capacity do I have?
- Where is my water source and drain, and how do I protect them?
Work with a contractor to estimate:
- Total lighting load (watts).
- HVAC and dehumidification needs (BTU/h and kW).
- Dedicated circuits for pumps, lights, and environmental controls.
- Emergency lighting and backup power for at least core aeration.
On the water side, plan for:
- At least one deep sink or hose bib in or near the grow space.
- Backflow prevention as required by your jurisdiction.
- A safe path to dispose of nutrient solution into the sewer, never into storm drains.
Consider a simple filtration setup (sediment plus carbon) if your tap water is hard or has high chlorine/chloramine. It will stabilize pH and reduce nutrient issues.
Step 4: Build Food-Safe Workflows
Design your physical layout like a food facility, not a hobby grow. Sketch it from the point of view of a leaf of lettuce:
- Seed storage and seeding station.
- Propagation racks.
- Production systems (DWC, NFT, Kratky).
- Harvest station (trimming, washing if your process requires it, weighing).
- Packing area with scales, bags or clamshells, labels.
- Cold storage.
- Distribution point (pick-up or delivery staging).
Ensure the path never doubles back through "dirty" areas. Provide handwash sinks or stations at logical transitions. If you plan to sell to retailers, verify local food safety rules early and design to meet them while you are still moving imaginary boxes on paper.
Step 5: Set Up Training and Roles
Use your zones as a built-in curriculum:
- Intro workshops: focus on microgreens and propagation. Quick wins, visible results in 1–2 weeks.
- Intermediate training: transplanting, EC and pH monitoring, pruning, and harvest scheduling.
- Advanced path: system troubleshooting, climate tuning, and data logging tied to yield outcomes.
For each role (helper, operator, coordinator), define:
- Daily tasks.
- Weekly tasks.
- What they are authorized to adjust.
- When they must call someone else.
This structure makes it easier to apply for workforce development grants, because you can show a clear ladder from exposure to employment-ready skills.
Step 6: Build a Realistic Cost and ROI Model
At neighborhood scale, think in three cost categories:
- Capex (one-time): build-out, systems, lights, HVAC, dehumidification, plumbing, electrical work.
- Opex (recurring): electricity, water, nutrients, media, packaging, seeds, pest control, repairs, salaries.
- Program costs: training materials, outreach, admin, evaluation.
A small warehouse or large community center build producing 30–80 kg/week might see capital costs in the mid five to low six figures depending on location, spec, and whether labor is donated. Container farms typically have higher capex per m² but arrive pre-integrated. Operating costs will be dominated by labor and energy.
For ROI, include:
- Sales revenue.
- In-kind value of produce distributed.
- Grant funding tied to measurable outputs.
Track yield per m² per cycle, energy per kg of produce, and labor hours per kg as your core efficiency metrics.
What to Watch Long-Term
Once your community hydroponic farm is up and running, the job shifts from building to tuning. Long-term success comes from watching the right signals and adjusting steadily, not from constant redesign.
Key Technical Benchmarks
- Yield consistency: Are weekly harvest weights within ±10–15 percent of your target?
- System uptime: Are pumps, lights, and climate controls running without unplanned outages?
- Water quality: Is your source water stable, and are pH and EC staying within your target ranges with reasonable adjustment?
- Plant health: Are tip burn, chlorosis, or root issues rare and isolated rather than systemic?
People and Training Metrics
- Number of participants who can safely run a full irrigation cycle and adjust nutrients.
- Number of trainees moving from Level 1 to Level 2 and Level 3 roles.
- Attendance and retention in workshops or training cohorts.
These numbers matter when you renew funding or approach new partners, especially in education and workforce programs similar to those highlighted in Jakarta’s sustainability initiatives.
Financial and Community Metrics
- Net operating cost per kg of produce after all revenue and grants.
- Households or institutions served per month.
- Percentage of produce staying within the immediate neighborhood.
- Partnerships developed with schools, health clinics, or local chefs.
In places like Canada, where experts are calling for more domestic production using greenhouses and vertical farming to reduce imports, these metrics help show that small community systems contribute to larger food security goals, not just local goodwill.
Scaling and Replication
When you know your numbers and workflows, it becomes much easier to add a second site, expand into a larger warehouse, or plug into regional programs. Treat your first build as a pilot plant with documentation:
- Keep updated floor plans and system diagrams.
- Maintain SOPs with revision dates.
- Log major changes (new nutrient brand, different lighting, altered spacing) and the yield impacts.
This turns your community hydroponic farm into a template others can copy or adapt. That is how you move from “interesting project” to a piece of local infrastructure that quietly delivers fresh, reliable harvests year-round.
As an Amazon Associate, I earn from qualifying purchases.