DWC/RDWC Reservoir Access That Prevents Contamination: Sample Ports, Dosing Wells, and Sensor Placement
Common Mistakes
“Clean roots start with clean water” is only half the truth. The other half is clean access. Most bucket DWC and small RDWC builds are sabotaged by how growers touch the water: lifting root-heavy lids, dipping dirty pens between systems, or pouring concentrates straight through the net pot.
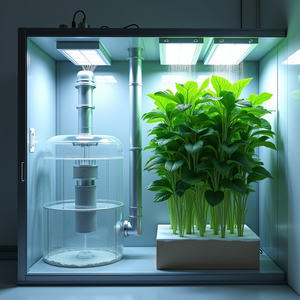
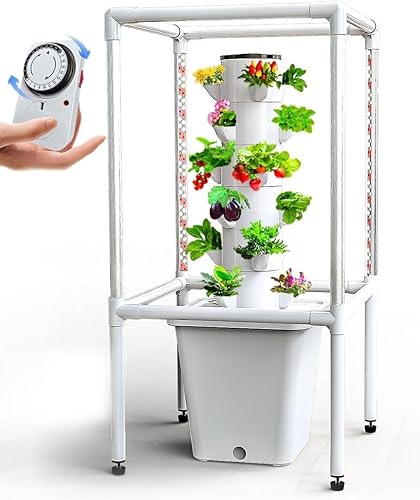
Newer products like the HydroBucket and pro RDWC platforms such as HydraMax Professional highlight the gap. They have built-in side access, service bays, and proper ports so you can sample, dose, and mount sensors without disturbing roots. Most DIY setups do not. That is where contamination, inaccurate data, and avoidable root problems creep in.
Here are the recurring mistakes I see in DWC and RDWC reservoir access design.
1. Lifting lids every time you test or dose
- Heavy lids drag tangled roots, snap laterals, and stress plants.
- Every lift dumps light, dust, and spores straight into your nutrient solution.
- Sloshing solution throws pH/EC readings off for several minutes.
HydroBucket solves this by moving access to a sealed side well so the plant lid can stay put while you test and top up, as noted in this HydroBucket product page.
2. Sampling from the wrong place
- Grabbing solution right under an airstone gives foamy, gas-loaded samples that skew EC and pH.
- Scooping near a return waterfall in RDWC catches a localized “hot spot” right after dosing.
- Pulling from a stagnant corner or dead leg of piping tells you nothing about the main root zone.
3. Pouring concentrate directly onto roots
- Strong nutrient or pH adjusters dumped through the net pot can burn the root crown.
- Undiluted acids and bases strip biofilms unevenly and can shock beneficial microbes.
- Localized EC spikes cause the classic “mystery burn” on otherwise healthy plants.
4. Dirty probes and shared sampling tools
- Using the same unwashed cup or syringe across multiple systems cross-contaminates pathogens.
- pH and EC pens dipped straight into buckets pick up biofilm and slime that distort readings.
- Sensor cables pushed through unsealed holes wick condensation and dust into the reservoir.
5. Random sensor placement in RDWC loops
- Probes jammed into low-flow tees or dead ends see stale solution.
- Probes sat right next to dosing lines see every correction as a huge spike.
- DO probes near violent aeration pick up bubbles and noise rather than stable oxygen levels.
Pro systems like HydraMax avoid this by designing around proper flow, Venturi circulation instead of airstones, and “doser-ready” manifolds where inline sensors can sit in a fast, representative stream of solution, as described in their system overview.
Why These Mistakes Happen
Most of this is not carelessness, it is design. Standard black buckets and tote lids were never meant to be hydro reservoirs. They lack ports, light-tight access, or any thought about sensor mounts. So growers improvise.
1. Hardware that was never designed for hydro
Plain buckets and storage totes do not include:
- Side access wells or service bays like HydroBucket’s dedicated reservoir compartment.
- Raised, center-drain geometry and under-bucket plumbing like HydraMax’s pro buckets.
- Any molded bosses for bulkheads, sight tubes, or cable glands.
The result: every access point is a hole drilled “wherever it fits,” often low in the wall, without a plan for ergonomics or contamination control.
2. Tools chasing symptoms instead of preventing them
Growers often respond to recurring root issues by adding more products: sterilizers, beneficials, root tonics. Those can help, but if every pH check requires lifting a lid and exposing the entire reservoir, you are constantly reintroducing infection opportunities.
Systems built from the ground up for clean access flip the script. HydroBucket’s side reservoir lets you:
- Test pH and EC/ppm through an opaque side port.
- Inspect roots and interior without moving the plant.
- Transfer fluid through a covered, light-blocked opening.
These design elements are explicitly highlighted in the HydroBucket description, and they are exactly what most DIY builds are missing.
3. No clear sampling or dosing SOP
Without a simple, repeatable procedure, sampling becomes whatever is fastest in the moment: one quick dip, one quick pour. That is how you end up with inconsistent readings and abrupt nutrient or pH swings.
HydraMax Professional systems are sold with a “doser-ready” architecture and media-less Root Halo sites specifically to support consistent, reproducible workflows across large canopies, as described in their product overview. You can borrow those ideas even in a single-bucket grow.
4. Underestimating what “food-safe” really means
Many DIY builds lean on cheap irrigation fittings, soft PVC, and random cable glands labeled only “plastic.” That can mean:
- Plasticizers leaching into warm nutrient solution.
- Gaskets that swell, crack, or harbor biofilm.
- Seals that weep slowly around sensor cables and ports.
Brewing and aquarium hardware, by contrast, is usually transparent about materials and ratings. Food-grade buckets and lids, like those used in HydroBucket’s Canadian-made design, are spec’d for long-term contact with water and nutrients.

How To Fix Them: Retrofit-Friendly Access Design
Good reservoir access is not complicated. You are aiming for three things:
- Clean sampling from a representative, well-mixed point.
- Gentle dosing into a high-flow mixing zone, away from roots.
- Stable sensor placement with sealed, food-safe penetrations.
Here is how to build that into buckets and small RDWC loops without replacing everything.
1. Add a dedicated sample/dosing port to each bucket
If you like the HydroBucket concept but are working with plain 5-gallon buckets, you can mimic the functionality.
Option A: Sidewall access port (single-bucket DWC)
- Drill a 32–50 mm hole in the upper sidewall, about 30–50 mm below the lid line.
- Install a food-safe bulkhead (HDPE or polypropylene body, EPDM or silicone gasket).
- Thread in a short nipple and a cap, or a small ball valve capped when not in use.
Use this port to:
- Insert a sample tube or syringe down to mid-depth for EC/pH tests.
- Pour in pre-diluted nutrient or pH correction into a moving stream, not onto roots.
Option B: Small “control bucket” for RDWC
For multi-bucket RDWC, you are better off copying the HydraMax mindset: centralize all service into a single control reservoir rather than cutting ports into every plant site.
- Add one extra bucket or tote connected into the loop with the same pipe size as the others.
- Plumb returns so flow passes through this control bucket before heading back out.
- Put your main access ports, drain valve, sensor mounts, and dosing lines in this vessel.
HydraMax even eliminates a traditional epicenter and uses raised, center-drain buckets with under-floor plumbing to keep the system clean and accessible, as described in their feature list. For DIY, one dedicated control bucket is usually enough.
2. Spec food-safe bulkheads and cable glands
Any fitting wet by nutrient solution should match potable water standards. Look for:
- Bulkhead bodies: HDPE, polypropylene, or potable-grade PVC.
- Gaskets: EPDM or food-grade silicone. Avoid random black rubber.
- Metals: Prefer plastic. If you must use metal (for temperature probes), go with 316 stainless or titanium, not brass or zinc.
For sensor cables, use IP68-rated nylon or stainless cable glands mounted above the waterline in the lid or top sidewall. Cables pass through the dry side, while the probe bodies hang into solution. This mirrors how many commercial manifolds mount probes while keeping enclosures dry.
3. Place inline sensors where the data means something
Submersible probes in a control bucket
- Mount EC, pH, and DO probes at mid-depth in the control reservoir.
- Keep them several centimeters away from airstones or Venturi outlets to avoid microbubbles and turbulence.
- Use a rigid probe holder or a short perforated pipe so they do not smack the walls.
Inline manifold on the recirculation loop
If you want a more “HydraMax-style” arrangement:
- Add a small side-stream manifold (PVC or polypropylene) tee’d off the main return line.
- Plumb a small, throttled flow through the manifold so probes see continuous, moderate flow.
- Include unions or threaded tees so you can pull probes for calibration without draining the system.
Avoid these placements
- Right after nutrient or pH injection points. Give solution some pipe length or a mixing chamber first.
- Dead-end stubs where flow is minimal.
- Low points where sediment accumulates around the probe body.
4. SOP: sterile sampling & gentle dosing
Here is a simple RDWC/DWC SOP you can run daily. Adjust volumes for your system size.
Sampling SOP
- Mix the system: Run the circulation pump and aeration for 5–10 minutes.
- Prep gear: Use a dedicated, clearly labeled sampling cup or 60–100 mL syringe per system.
- Pre-rinse: Rinse the sample tool with system solution 2–3 times and discard the rinse.
- Draw sample: Pull from the control bucket at mid-depth, away from returns and airstones. In single buckets, sample via the side port with a tube to mid-depth.
- Measure: Check EC and pH with calibrated meters. Rinse probes with RO or distilled water between systems.
- Log it: Record EC, pH, temperature, water level, and any notes on plant behavior.
Dosing SOP
- Calculate target change: Decide how much you need to move EC or pH, then plan to correct in two or more small steps.
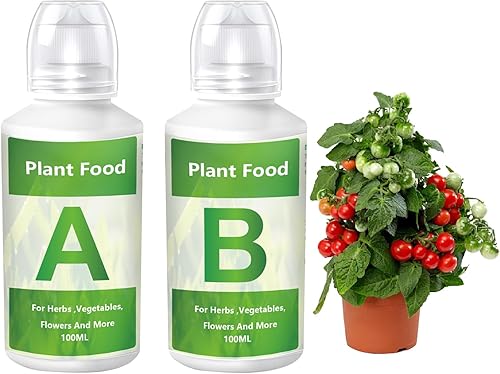
- Pre-mix nutrients: In a clean bucket, add your A/B nutrients to 5–10 L of water according to the manufacturer’s mixing order, then stir until clear.
- Add to high-flow zone: Pour 25–50% of this pre-mix into the control reservoir at a return or high-flow area, not into the net pot or root zone.
- Mix and re-test: Let the system circulate for 10–20 minutes, then re-measure EC and pH.
- Repeat in small increments: Only add more pre-mix if you are still below target. Avoid EC jumps larger than about 0.4–0.5 mS/cm in one move.
- pH adjust: Pre-dilute pH up/down in a small container of water, then dose via the same high-flow point in small steps, allowing 10–15 minutes between corrections.
The goal is to keep the root environment calm while still letting you move the chemistry where it needs to be.
What To Watch Long-Term
Once you have clean access ports, proper fittings, and sensible probe placement, you can start tracking the system like a pro. That is where the real gains in yield, stability, and labor show up.
1. Consistency of EC, pH, and DO across the loop
In a well-mixed RDWC with good flow design (center drains, open manifolds, or Venturi circulators), you should see very little difference between buckets. Research on DWC and RDWC layouts consistently points to uniform nutrient and oxygen distribution as key drivers of growth efficiency, as summarized in overviews like this hydroponic systems figure.
Practical checks:
- Spot-test EC and pH in the farthest bucket from the pump once in a while.
- If readings differ from the control bucket by more than ~0.1–0.2 pH or ~0.1–0.2 mS/cm, look at flow, not nutrients.
2. Biofilm and light leaks around access points
Even good ports can turn into slime collectors if they are not fully opaque or if caps are left off.
- Use black or colored plastic for side wells and access tubes to block light, just like HydroBucket’s redesigned side lid that “prevents light leaks,” as noted in their product description.
- Inspect around bulkhead gaskets and cable glands at each clean-out. Any visible slime there is a warning that the inside surface looks the same.
3. Sensor drift and cleaning intervals
Inline sensors give you power only if they are trustworthy.
- Calibrate pH probes weekly using fresh pH 4 and 7 buffers.
- Check EC against a standard solution every 2–4 weeks.
- Clean DO membranes per the manufacturer’s schedule; replace membranes and electrolyte when readings get sluggish.
HydraMax’s commercial users rely on this type of disciplined sensor maintenance to keep automated dosing under control across 2-, 3-, and 4-row layouts from 4 to 32 buckets, as laid out on their system catalogue.
4. Ergonomics and labor over a full run
Pay attention to how your body feels running the system.
- If you are bending over or reaching awkwardly every day, raise buckets on stands or move the control reservoir to a more accessible location.
- If it takes more than a couple of minutes to sample and dose, add one more access port or change port positions.
- If full water changes are a dreaded chore, install a low-point drain bulkhead and valve so you can pump or gravity-drain without tipping anything.
Well-designed pro systems lean on raised buckets, under-bucket plumbing, and quick-connects like Qwik-Lok to speed assembly and resets. You can aim for the same ergonomics in a home build even with modest hardware.
5. Infection incidents and how they correlate with access events
Most root problems in DWC/RDWC have a traceable timeline. When slime, Pythium-like symptoms, or odd smells show up, check your notes:
- Did they appear after a big lid-lifting session or a messy water change?
- Were any new tools or fittings introduced without sanitation?
- Did a shared sampler or probe move from an infected system to a clean one?
Use those incidents to tighten your SOP: single-use or system-dedicated sampling tools, quick wipedowns of port lids, and strict “no unwashed probes across systems” rules.
Wrap-Up: Build Access Like The Pros
You do not need a full HydraMax installation or a stack of HydroBuckets to benefit from their design lessons. What those systems show, very clearly, is that how you touch the water matters as much as what you put in it.
- Add side ports or a control bucket so you can sample and dose without lifting lids.
- Use food-safe bulkheads and cable glands to keep everything light-tight and watertight.
- Place inline EC, pH, and DO sensors in real mixing zones, not in dead spots or right at dosing points.
- Follow a simple, repeatable SOP for sterile sampling and gentle dosing.
If you are currently running a bare-bones bucket, start with one port and one small control bucket. Once you feel how much easier it is to manage pH, EC, and DO without touching roots, you will not go back.
As an Amazon Associate, I earn from qualifying purchases.