Diagnosing Hydroponic Lettuce Tip Burn in 2026: Light, EC, Airflow and Variety Fixes from Real Grower Cases
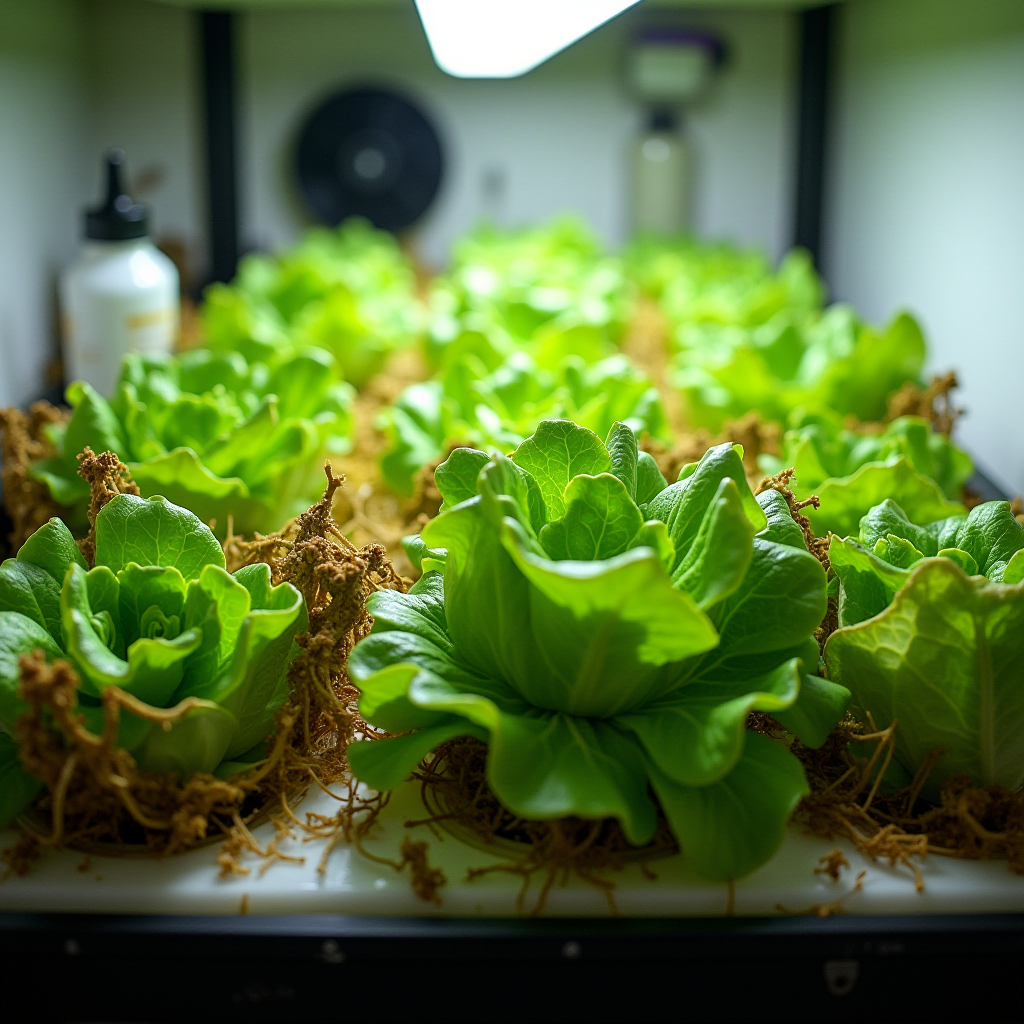
Brown, crispy edges on otherwise fresh hydroponic lettuce are one of the fastest ways to kill your motivation. The plants look nearly ready. Then, in two or three days, the inner leaves start browning, cupping, and collapsing from the tips inwards.
That was exactly the scenario in a recent Facebook grower post: an indoor system full of almost-finished heads, suddenly showing tan, dead edges and blotchy chlorosis on the newer leaves overnight. No obvious pests. No slime in the roots. Nutrients “by the bottle.”
In 2026, this is still the most common failure point for new indoor lettuce growers.
This guide is built for that 2 a.m. search: you already have tip burn, you do not have lab-grade sensors, and you want a clear, symptom-driven path to a fix in Kratky, DWC, NFT, or a small vertical setup.
1. Common Mistakes That Cause Hydroponic Lettuce Tip Burn
Tip burn is usually not a single mistake. It is a stack of small problems: light slightly too strong, EC slightly too high, airflow slightly too weak, variety slightly too sensitive. Once the plants hit rapid head-fill, that stack finally shows up as brown edges, cupping, and sometimes inner leaf collapse.
Let us start with the most common mistakes I see in home and hobby systems.
Mistake 1: Confusing Calcium Deficiency With Light Burn
Most new growers assume “nutrient problem” or “light burn” when they see brown edges. In reality, classic lettuce tip burn is usually a calcium transport issue inside the leaf, not a lack of calcium in your bottle.
Key differences:
- Calcium-related tip burn: starts on the youngest inner leaves, at the very edges; tissue goes translucent, then tan, then crispy. Outer leaves often look fine.
- Light burn: hits the topmost leaves facing the LEDs; you see bleaching (pale/yellow/white) patches that follow the light footprint, often between veins.
Calcium moves in the plant via transpiration. If the airflow, humidity, and root health are off, calcium never reaches the fastest-growing tissue at the leaf tip, even if your nutrient mix is “perfect”. Research on controlled-environment lettuce continues to confirm this localized calcium shortage mechanism, especially under high growth rates and dense canopies, as shown in studies like this recent work on controlled lettuce physiology.
Mistake 2: Running EC Too High “For Stronger Growth”
Lettuce is a low-demand crop. A lot of hobby growers push EC into tomato territory because they want fast growth. The result is the opposite: osmotic stress, slower water uptake, and worse calcium delivery.
Good working bands for indoor lettuce:
- Seedlings: 0.5–0.8 mS/cm
- Early vegetative: 0.8–1.2 mS/cm
- Mid to late (head fill): 1.2–1.6 mS/cm for most non-CO₂-enriched rooms
If you are sitting at 1.8–2.2 mS/cm because a schedule said so, or because “more food = bigger plants,” you are probably slowing water movement through the plant. That is a direct setup for tip burn.
Mistake 3: Blasting Light Without Matching Airflow or Root Health
Another classic beginner move in 2026: buying a powerful LED panel, running it at 100 %, and hanging it too close to lettuce.
Lettuce does not need extreme PPFD. For most indoor hydroponic lettuce:
- Target PPFD: roughly 150–250 µmol/m²/s at canopy
- Photoperiod: 14–16 hours per day
When you run 300–400+ µmol/m²/s at short distance without strong airflow, the leaf surface heats up, transpiration becomes inconsistent, and root systems (especially in warm nutrient solution) cannot keep pace. Calcium delivery to the leaf tips breaks down. Brown edges are the visible symptom.
Mistake 4: Ignoring Airflow In The Plant Heart
In the Facebook case that kicked off this article, the grower had good room fans but very tight spacing and no air really moving through the center of the heads. Outer leaves swayed. Inner leaves were in still, humid pockets.
That is prime tip burn territory.
Dense indoor heads trap humid air in their centers. Relative humidity rises, transpiration drops, calcium flow slows, and the exact tissue growing fastest (inner tips) is the first to fail. This lines up with many grower reports and controlled experiments where high humidity and poor airflow sharply increase tip burn incidence even at ideal nutrient levels, as noted in this controlled environment study.
Mistake 5: Choosing Tip-Burn-Prone Varieties As Your First Hydro Crop
Not all lettuce is equal under LEDs and small reservoirs. Some dense romaines and compact head types are notorious for tip burn indoors, especially if you push them warm and fast.
Starting your hydroponic journey with a dense-heart variety is like learning to drive in an ice storm. Possible, but you are adding difficulty for no reason.
2. Why These Mistakes Happen In Real Home Systems
It is easy to blame “bad nutrients” or “weak genetics” when lettuce tips burn. In most cases, the mistakes come from how home systems are built and how we interpret what we see.
Reason 1: Research Numbers vs. Living Rooms
Controlled-environment trials often publish tight bands for EC, PPFD, VPD, and solution temperature. Many growers copy those numbers into very different environments: small tents, warm apartments, cheap LEDs, and reservoirs sitting on the floor next to radiators.
On paper, the EC and pH look right. But the microclimate at the leaf surface, the actual root-zone oxygen, and the airflow through the canopy are completely different. The physics of calcium transport do not care that you matched a PDF’s EC number if your inner leaves are sitting in still 85 % humidity.
Reason 2: Sensors For The Easy Things, Guesswork For The Hard Stuff
Every new grower buys a pH pen. Fewer buy a simple thermometer/hygrometer. Almost nobody measures nutrient temperature until something goes wrong.
So you get precise readings on solution pH and EC, but you guess on air temperature, humidity, airflow, and root zone heat. Tip burn is strongly driven by those “guessed” variables.
Reason 3: Social Media System Layouts
Instagram and short-form videos reward systems that look crammed with plants. It looks efficient: wall-to-wall lettuce with no gaps. The reality in a tent or on a rack is different. Tight spacing kills interior airflow.
The Facebook case we started with had textbook nutrient numbers but extremely tight spacing under a strong LED and only light air movement across the top. Once the heads closed up, the inner leaves never saw fresh air again. Tip burn followed within days.
Reason 4: Misreading Symptoms Under LEDs
LEDs can hide early stress. Under cool white or purple light, early translucent damage on young leaves can be hard to spot. By the time the brown edges are obvious, the underlying calcium and environmental imbalance has been in place for several days.
This is why symptom pattern matters: whether the damage is on inner vs outer leaves, top vs side leaves, and whether it is uniform or localized helps you avoid the wrong “fix” (like adding more nutrients to an already stressed plant).
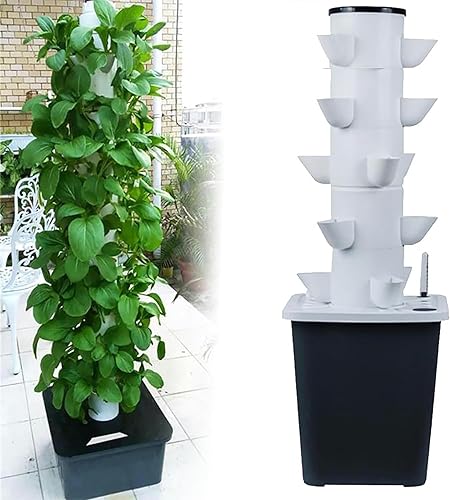
Reason 5: System Type Constraints (Kratky vs DWC vs NFT)
Each common hobby system brings its own trap:
- Kratky: static solution; as water drops, EC rises and root zone warms; no aeration safety net.
- DWC: easy to overheat large volumes and under-aerate; air pumps get undersized.
- NFT / vertical towers: warm return solution and marginal oxygen in warm spaces; small film of nutrient swings fast in EC and temperature.
These system quirks all feed into the same end result: inconsistent water supply or root stress, which directly impacts calcium transport and tip burn risk.

3. How To Fix Hydroponic Lettuce Tip Burn: A Symptom-Driven Plan
Now we get practical. The goal is to read what the plant is telling you and make low-cost adjustments that actually target the cause: calcium transport, not “mystery disease”.
Step 1: Read The Pattern On The Leaves
Stand in front of your system and answer these questions:
- Where did the problem start?
Inner, youngest leaves first → classic calcium-related tip burn.
Top, outer leaves directly under light → likely light burn/heat stress.
Older leaves and many leaves at once → possible high EC “nutrient burn”. - What does the damage look like?
Translucent, then tan, then crispy brown edges → tip burn.
Bleached, pale patches between veins, often irregular shapes → light stress.
Uniform dark, dry margins on many leaves → high EC/salt stress. - Is the tissue around the damage still turgid?
Tip burn often shows as dead edges on otherwise firm leaves.
Wilted leaves plus brown tips suggest more general root or heat stress.
In most indoor cases from 2024–2026 that I have seen, the answer is “inner leaves, edge first, otherwise healthy leaf” which points to calcium transport combined with environment or light, not a raw nutrient shortage.
Step 2: Lock In pH, EC, And Root-Zone Temperature
Before you move lights or fans, get your basic numbers in line. This gives your adjustments a stable base.
- pH: 5.5–6.0 (allow gentle drift, do not chase perfection every hour).
- EC: 1.0–1.4 mS/cm for most mid-stage indoor lettuce; 1.2–1.6 mS/cm max if you know your environment is cool and stable.
- Solution temperature: 18–21 °C (64–70 °F) is ideal in DWC, NFT, and recirculating systems. Kratky reservoirs will follow room temperature more closely, so prioritize insulation and shading from lights.
If you are above those ranges, dilute with plain water first. If you are below EC but plants look hungry, raise EC by small increments and recheck in a day.
Step 3: Fix Light Intensity And Distance
If you suspect light is part of the problem, make manageable changes rather than a total system overhaul.
- Raise your light 15–30 cm (6–12 inches) or dim to 60–80 % power for 3–5 days.
- Aim for an even spread across the canopy; avoid hot spots in the center.
- Keep a consistent photoperiod around 14–16 hours per day; do not compensate lower intensity with 20-hour days.
Watch new growth. If bleaching on the top leaves stops but inner leaf edges still brown, you have removed light as the primary driver and can focus on airflow and calcium transport.
Step 4: Improve Airflow Through The Canopy
You do not need an environmental controller to fix airflow. A couple of clip-on fans and better plant spacing go a long way.
- Use two to four small fans instead of one big one; position them at different heights.
- Aim for gentle flutter on the leaves, not hard wind. If leaves are snapping around, reduce speed or angle.
- Direct at least one fan so air flows into the “heart” area where inner leaves meet; you want to break that humid pocket.
- For tents, add or upgrade an exhaust fan and keep a passive intake flap or duct open to bring in fresh air.
- Increase plant spacing to 15–20 cm (6–8 inches) between heads at finishing size. Crowded systems photograph well but grow poorly.
Combine airflow improvements with a cheap thermometer/hygrometer at canopy level. Try to keep relative humidity in the 50–70 % range. Above ~80 %, tip burn risk climbs rapidly.
Step 5: Confirm Calcium Supply Without Overfeeding
If your nutrient program is generic or built for fruiting crops, check that you are actually supplying enough calcium and not overwhelming it with potassium or magnesium.
- Use a leafy-greens or lettuce-specific nutrient if possible. These usually land in the 120–200 ppm Ca range, which is appropriate.
- If your tap water is very soft and your base nutrient is low in Ca, consider a small calcium nitrate supplement. Add slowly and watch EC.
- Avoid the temptation to push overall EC higher just to “add more calcium.” It is better to maintain moderate EC and a balanced ratio than to overload the solution.
- Foliar calcium sprays can help in stubborn cases but should be treated as a short-term tool. Mist lightly right before lights-off to avoid spotting and burning, and always start with low concentrations.
Step 6: Check Roots By System Type
Healthy roots are non-negotiable for steady calcium transport.
Kratky
- Ensure a clear air gap under the net pots once roots are established. Do not keep the solution touching the pot for the entire grow.
- Use opaque containers or jar covers to block light and reduce root-zone heat and algae.
- If EC rises sharply as water drops, dilute partway through the grow rather than running to harvest on very concentrated solution.
DWC
- Use a properly sized air pump: roughly 0.5–1 L/min per liter of nutrient solution is a reasonable target for hobby systems.
- Spread air stones to cover the entire bucket or bed; avoid dead zones.
- Keep solution temperature under 23–24 °C (73–75 °F). If your buckets feel warm, add insulation, move them off hot floors, or rotate in frozen bottles.
NFT and Vertical Systems
- Make sure the nutrient film actually flows through all channels or tower levels uniformly; dry spots or pooling stress roots.
- Watch return solution temperature; thin films in warm rooms overheat fast.
- Clean channels and manifolds regularly to prevent biofilm that reduces oxygen availability.
Roots should be white to cream and smell earthy, not swampy. Brown, slimy roots plus tip burn is a root-oxygen problem first, not just a calcium or light issue.

4. What To Watch Long-Term: Light, EC, Airflow, And Variety
Once you get tip burn under control, the goal is to keep it from coming back season after season, even as you change varieties or system layouts.
Long-Term Benchmark 1: Stable Parameters
For indoor hobby setups growing lettuce in 2026, these are realistic target bands:
- pH: 5.5–6.2, gentle drift allowed.
- EC: 1.0–1.4 mS/cm for most cycles; up to 1.6 mS/cm when you know your environment is cool and airflow is excellent.
- Air temperature: 18–23 °C (64–73 °F).
- Relative humidity: 50–70 % at canopy.
- Solution temperature: 18–21 °C (64–70 °F).
- Light: roughly 150–250 µmol/m²/s PPFD for 14–16 hours.
You do not need a full sensor stack to monitor all of this. A reliable pH/EC pen, a simple thermometer/hygrometer, and occasional checks on solution temperature with a kitchen thermometer are enough to prevent most tip burn once your system is dialed in.
Long-Term Benchmark 2: Variety Selection And Rotation
Use variety choice as a tool, not an afterthought.
- Start with looseleaf and oakleaf types such as Green Oakleaf, Red Oakleaf, or Black Seeded Simpson. Their open habit allows better airflow and makes them more forgiving in marginal conditions.
- Add hydroponic-bred butterheads labeled as “tip burn tolerant” or “for greenhouse production” once your system is stable.
- Bring in romaine and denser heads last, once you have proven control over airflow, humidity, and nutrient stability.
This approach mirrors how commercial operations phase in more sensitive cultivars only after their climate and fertigation recipes are proven.
Long-Term Benchmark 3: System Design For Air And Access
When you build or upgrade your system, design around airflow and access, not just plant count.
- Leave space between channels, towers, or rafts so fans can reach the plant centers.
- Position intake and exhaust so that fresh air moves across and through the canopy, not just above it.
- Plan for maintenance: you should be able to inspect roots and reservoirs without uprooting half the crop.
- Shroud or insulate reservoirs where necessary to control solution temperature under lights.
The Facebook grower case we started with is typical: the system produced gorgeous young plants, but as heads filled in, lack of airflow and slight overdriving of light and EC pushed the plants over the edge. A few small design changes would have prevented that late-cycle crash.
Long-Term Benchmark 4: “New Growth Tells The Truth”
Tip burn scars will not heal. Treat them as a history lesson, not a verdict on your current settings.
- Each time you adjust lights, fans, EC, or pH, judge success by the next flush of leaves.
- If new inner leaves are coming in clean or with dramatically less burn, you are on the right track, even if old leaves still show damage.
- Keep a simple log: date, pH, EC, air/solution temperatures, and a one-line note on plant appearance. Patterns will jump out faster than you think.
Over a few cycles, you will build your own dataset that reflects your room, not just numbers from papers or internet charts.
Bringing It All Together
Tip burn on indoor hydroponic lettuce is not random. It is the visible end point of how your system handles light, EC, airflow, humidity, root temperature, and variety. The Facebook grower who lost their nearly finished crop to sudden brown edges made the same mistakes almost everyone does at first: chasing nutrient numbers while airflow stagnated and light and root temperature crept a little too high.
You can fix it without expensive gear:
- Keep pH and EC in lettuce-friendly bands and avoid pushing concentration.
- Moderate your light instead of blasting the canopy “just because the panel can.”
- Move air through the plant hearts and keep humidity and solution temperature in check.
- Choose varieties that match your current level of control, not just how they look in seed catalogs.
Do those consistently, and tip-burned edges will shift from a recurring crisis to a rare, easy-to-diagnose exception in your Kratky, DWC, NFT, or vertical setups.

As an Amazon Associate, I earn from qualifying purchases.