Can You Start Seeds Hydroponically and Transplant Them Outside? 2026 Evidence‑Based Guide for Kratky, AeroGarden & DIY Systems
“Hydro seedlings can’t survive in soil.” That line pops up in forums every week. It is also wrong.
You absolutely can start seeds in a hydroponic system, then transplant them outside into beds, raised planters, or containers. If people fail, it is almost always because the seedlings were grown like finished hydro crops, not like transplant stock.
This guide will walk you through exactly how to run Kratky tubs, AeroGarden units, and simple DWC as seedling factories for your outdoor garden — with the right crops, EC, pH, light, and a hardening-off schedule that keeps shock to a minimum.
1. The Big Question: Does Hydro-to-Soil Transplanting Actually Work?
Short answer: yes, and it can work extremely well.
Growers in Facebook hydroponics groups are already using small countertop systems and Kratky tubs to crank out seedlings, then moving them to raised beds and outdoor containers with high success, provided they manage roots and hardening-off properly, as seen in real-world threads like this discussion. Time-lapse clips of fast growth in small Amazon countertop units and DWC totes, such as this YouTube walkthrough and this Reddit timelapse, show just how strong hydro-started seedlings can be.
The key is understanding what makes a good transplant seedling:
- Compact, not stretched
- Stocky stems with strong root branching
- Moderate nutrient levels (not pushed hard)
- Roots that can adapt from constant solution to variable soil moisture
You can get all of that from Kratky, AeroGarden, and DIY DWC with a few adjustments.
1.1 Best Crops To Start Hydroponically Then Move Outside
In practice, these transplant reliably from hydroponics to soil:
- Leafy greens: lettuce, chard, spinach (best as “cut-and-come-again” size starts)
- Brassicas: kale, cabbage, broccoli, cauliflower, kohlrabi
- Solanums: tomatoes, peppers, eggplant
- Herbs: basil, parsley, cilantro, dill, oregano, thyme
- Alliums: bunching onions, leeks (more delicate but doable)
More problematic or lower return on effort:
- Root crops: carrots, beets, radish, parsnip. Direct sowing in their final spot is usually better, because disturbing the taproot can cause forking.
- Vining cucurbits: cucumbers, squash, pumpkins, melons. They can be started hydroponically, but they grow fast and do not like root disturbance. If you start them hydro, transplant young and carefully.
Think of your indoor hydro as a high-speed nursery for everything you would normally start in cell trays.

2. What’s Really Going On: Hydro vs Soil Seedlings
To make hydro-to-soil transplanting boringly reliable, you need to know how hydro seedlings differ from soil ones in three areas: roots, nutrient exposure, and foliage.
2.1 Root Architecture: “Water-Sp oiled” vs Soil-Ready
Hydro roots grow in a world where water and oxygen are (ideally) constant. In Kratky, AeroGarden, and DWC, this means:
- Lots of fine white feeder roots
- Less cuticle development against drying
- Minimal resistance training against fluctuating moisture
Soil seedlings, especially in flats, deal with occasional dryness and higher mechanical resistance. Their roots are often thicker and better at pushing through media.
When you drop a hydro seedling into soil without prep, those fine roots can collapse, rot, or dry out. The fix is to grow seedlings in ways that encourage branching and oxygen exposure (air gaps, good aeration) and then manage moisture and light carefully during the first 7–10 days after transplant.
2.2 Nutrient Levels: Seedling vs Finished Plant
Most new growers run countertop units or DIY DWC at “full veg strength” because the bottle says so. That is great for finishing lettuce hydroponically, but it is too hot for transplant-bound seedlings.
For outdoor-bound seedlings, you are aiming for moderate EC to build robust roots without making plants dependent on high salt levels. A practical target (drawing from common hydroponic guidelines and hobbyist results) is:
- Germination to first true leaf: EC 0.2–0.4 mS/cm (about 100–200 ppm on a 500 scale)
- 1–3 true leaves: EC 0.5–0.8 mS/cm (250–400 ppm)
- Transplant-ready (2–4 true leaves, still compact): EC 0.8–1.0 mS/cm (400–500 ppm)
This is lower than you might run a dedicated hydro grow, which improves post-transplant survival and reduces salt shock when roots meet fertilized soil, consistent with best-practice advice in seedling-focused hydro guides such as those summarized in this DWC seedling video.
2.3 Light: Compact, Not Stretched
Hydro seedlings grow fast. If your light is weak or too far away, you end up with lanky stems that snap in the first windy day outside.
In practice:
- Run 14–16 hours of light daily for most vegetable seedlings
- Aim for moderate intensity: roughly 150–300 µmol/m²/s at the canopy
- Keep fixtures 10–25 cm (4–10 in) above seedlings, adjusting to prevent bleaching
Many countertop kits are designed for full-cycle herbs, so they are bright enough out of the box. Your job is to keep the light close and the plants trimmed to stay compact.

3. Practical Steps: From Kratky/AeroGarden/DWC To Outdoor Soil
Now the nuts and bolts. We will break this down into:
- Running a hydro seedling system (Kratky, AeroGarden, DWC)
- Transplant SOP for each
- A 7-day hardening-off schedule tuned for hydro starts
3.1 How To Run Hydroponic Seedlings For Transplant
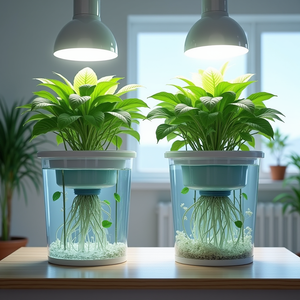
Kratky Seedling Setup
Kratky is perfect for low-maintenance seedling production:
- Use opaque tubs or buckets to prevent algae.
- Fit 2–3 inch net cups in the lid, filled with rockwool, Rapid Rooter, or similar starter plugs.
- Fill nutrient solution so the bottom of each plug just touches the surface.
- Maintain an air gap as water drops, so upper roots get oxygen.
- Target EC and pH as in section 2.2 (light feed, pH 5.8–6.2).
Goal: seedlings with 2–4 true leaves and a dense white root zone hanging below the net cup, not long spaghetti roots trailing half a meter.
AeroGarden / Countertop Systems
Most AeroGarden-style units run a small pump and LED panel over sponge pods. To turn them into transplant factories:
- Use the seed-starting deck if available, or regular grow sponges.
- Run the default light schedule (often 14–16 hours) but keep the light canopy low.
- Mix nutrients at 1/2 the manufacturer’s recommended vegetative dose.
- Top up with plain water to keep EC in the seedling range; do not chase bottle directions blindly.
Real-world growers in the Facebook thread above report strong results when transplanting at 2–3 weeks, before roots fill the entire reservoir.
Simple DWC Seedling Buckets/Totes
If you are using a bubbler bucket or small tote:
- Install a decent air stone with continuous aeration.
- Start with the solution touching the bottom of the starter plug to ensure consistent moisture.
- After roots emerge, lower the solution 1–2 cm so roots experience both air and water.
- Keep EC in the same ranges as above and change or refresh solution every 10–14 days to avoid nutrient drift.
DWC will give the fastest early growth. That is useful, but it also means you need to transplant on time before seedlings get oversized and fragile.
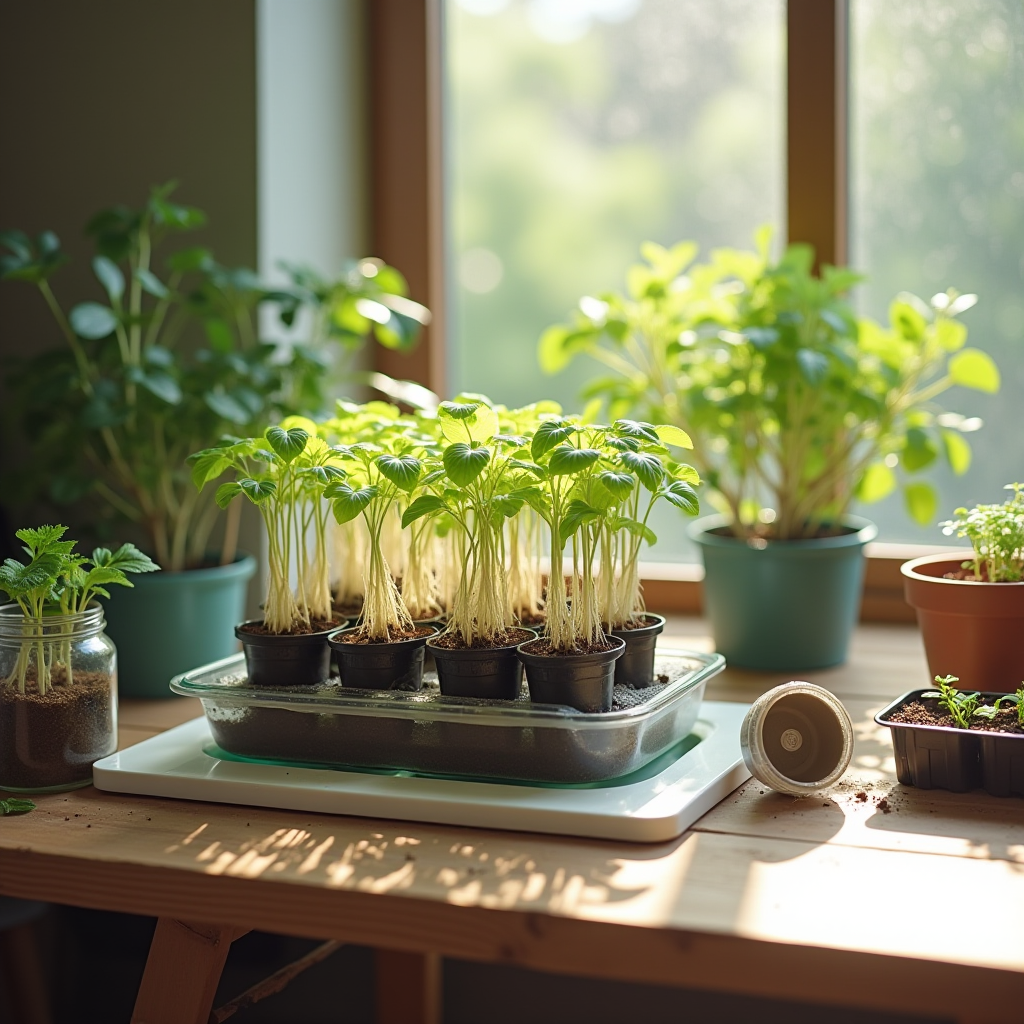
3.2 Transplanting AeroGarden Seedlings To Soil: Step-By-Step
Here is a practical SOP for moving AeroGarden (or similar) seedlings into pots or beds.
- Start tapering nutrients 3–5 days before transplant.
Top up with plain, pH-balanced water so EC falls by 25–50 %. Optionally, finish with 1–2 days at near-zero EC. - Prep your soil or potting mix.
Use a well-draining mix. Pre-wet until evenly moist but not soupy. - Remove the seedling.
Lift the pod and plastic collar gently. Do not yank on the stem. Let long roots dangle. - Optional root trim.
If roots are extremely long and tangled, you can cleanly snip off the bottom 10–20 % with sanitized scissors. This encourages branching and makes planting easier. - Plant the whole pod.
Do not peel off the sponge. Bury it completely so the top of the pod sits just below the soil surface, then firm soil around it. - Water in.
Use plain water or 1/4-strength fertilizer. The goal is to settle soil around the pod and remove air gaps. - Give 1–3 days in gentle conditions.
Bright shade or indirect indoor light is ideal before serious outdoor hardening.
3.3 Transplanting Kratky & DWC Seedlings To Soil
The principles are the same, but you have net cups and media to deal with.
- Taper nutrients and lower water level.
3–5 days before transplant, dilute the reservoir and let the water level drop slightly so roots experience more air exposure. - Choose how you will handle the net cup.
- For small, slotted net cups: plant the entire cup in soil; roots will grow through the slits.
- For bulkier setups: gently remove clay pebbles or loose media while keeping the plug and main root mass intact.
- Avoid aggressive root washing.
A quick rinse to remove dust is fine. Scrubbing roots bare is a good way to stunt the plant. - Plant at the right depth.
Bury the plug completely. Tomatoes can be planted deeper (they root along the buried stem); leafy greens should sit at roughly the same depth they grew at in the hydro system. - Water and shade.
Water in well and give 1–3 days in soft light before full sun.
3.4 Hardening Off Hydro Seedlings: A 7-Day Schedule
Hydro-grown seedlings are sheltered. UV, wind, and big temperature swings are all new to them. Treat hardening-off like a staged training program.
Here is a realistic 7-day schedule that works for most climates; stretch it to 10 days in harsh conditions.
- Day 1–2: 1–2 hours outside in bright shade or very dappled light. No strong wind. Bring them back in afterwards.
- Day 3–4: 3–4 hours outside. Give 1–2 hours of gentle morning sun (east exposure), then shade or filtered light.
- Day 5–6: 4–6 hours outside with longer morning sun and some late-afternoon sun. Avoid the harshest mid-day sun if temperatures are high.
- Day 7: Full day in the actual planting location. If nights are mild, they can often stay out overnight from this point.
Watch leaves closely. Bleaching, crisping, or severe wilting are signals to slow the progression. This staged approach reflects common advice among both hydro and soil growers and is especially important for hydro roots that were used to constant moisture and stable temperatures.

4. Pro Tips, Benchmarks & Troubleshooting
Once you understand the basics, you can start dialing in for higher success and more predictable results.
4.1 Benchmarks: What “Good” Looks Like
When you pull a transplant-ready hydro seedling, you should see:
- Age: typically 2–4 weeks from germination for fast crops (lettuce, brassicas), 3–5 weeks for slower crops (peppers, tomatoes in cool homes).
- Size: 2–4 true leaves, 5–15 cm tall depending on species.
- Roots: mostly white to cream, no rotten smell, dense but not yet a massive tangled mop.
- Stem: holds itself upright with minimal support; not paper-thin.
If a plant fails those tests, either let it grow a bit longer under tuned conditions or start over.
4.2 Common Problems & Fixes
Problem: Lanky, weak seedlings
Symptoms: Tall seedlings, big gaps between leaves, stems that fold over when moved.
Likely causes:
- Light too far away or too weak
- Photoperiod too short
- Excessive nitrogen or overall EC for the light level
Fix:
- Bring light closer or upgrade to a stronger fixture.
- Run 14–16 hours of light for veg seedlings.
- Dial EC back to the lower end of the ranges in section 2.2.
Problem: Root rot in Kratky/DWC
Symptoms: Brown, slimy roots, off smell, sudden wilting despite plenty of solution.
Likely causes:
- Low dissolved oxygen (poor aeration or no air gap)
- Warm nutrient solution (often above 24 °C / 75 °F)
- High organic load (slime, algae, decaying roots)
Fix:
- Add or upgrade air stones in DWC; ensure Kratky systems maintain a clear air gap.
- Keep reservoirs shaded and, if possible, in a cooler area.
- Change solution, trim dead roots, and sanitize equipment between batches of seedlings.
Problem: Transplant shock and wilt
Symptoms: Leaves droop badly after transplant; plants stall or lose lower leaves.
Likely causes:
- Skipping or rushing hardening-off
- Planting into dry or waterlogged soil
- Using full-strength fertilizer on day one in soil
Fix:
- Follow the 7-day hardening schedule.
- Plant into evenly moist, not saturated, media.
- Use plain or 1/4-strength nutrient solution for the first watering; wait 5–7 days before strong feeding unless plants show deficiency.
Problem: Nutrient issues after moving to soil
Symptoms: Yellowing, purpling, or burnt tips in the first 2–3 weeks outdoors.
Likely causes:
- Soil too cold or too wet, limiting nutrient uptake
- Soil pH off (either very acidic or alkaline)
- Over-fertilizing on top of hydro salts that were not flushed
Fix:
- Improve drainage and avoid planting out into cold mud.
- Use a simple soil pH test; amend if needed.
- Next time, taper hydro nutrients earlier and avoid heavy soil feeding in week one.
4.3 pH & EC Management: Quick Field Rules
You do not need lab gear to run a transplant-focused hydro nursery, but basic pH and EC control will push your success rate way up, aligning with common recommendations in practical hydroponics overviews such as those collated in this community thread.
- pH: keep nutrient solution in the 5.8–6.2 zone for mixed crops.
- EC: stay under 1.0 mS/cm for transplant-bound seedlings unless you have very heavy feeders and strong light.
- Top-ups: when EC rises (from evaporation), top up with plain water; when it falls and plants pale, add a small dose of nutrients.
- Solution changes: for small seedling systems, a complete refresh every 1–3 weeks prevents weird imbalances.
Use these numbers as guardrails, not shackles. If plants look good, do not chase numbers for the sake of it.

5. Final Takeaways: Turning Small Hydro Systems Into Serious Seedling Factories
Countertop systems, Kratky tubs, and little DWC totes rarely produce enough full-size crops to feed a family. Where they shine is as controlled environments for raising bulletproof transplants, especially in 2026 when weather swings and soil costs are pushing more of us to start indoors.
If you remember nothing else, keep these points in view:
- Run lower EC than full hydro grows and keep pH in the 5.8–6.2 window.
- Transplant seedlings when they are small but sturdy: 2–4 true leaves, compact growth, white roots.
- Move the entire plug (sponge, rockwool, or net cup) into moist soil; do not shred the root mass trying to get it “perfectly bare.”
- Harden off over 7–10 days so foliage and roots can adjust to sun, wind, and changing moisture.
Handle those four levers properly, and your question stops being “Can I start seeds hydroponically then transplant outside?” and becomes “How many trays can I fit under these lights this month?”
As an Amazon Associate, I earn from qualifying purchases.